


Table of Contents
- What You'll Need for Your Moka Pot Latte
- Gear
- Ingredients
- Understanding the Moka Pot Latte Difference
- Key Differences: Moka Pot vs. Espresso Machine for Lattes
- Step-by-Step Guide to Brewing Moka Pot Coffee for Lattes
- The Brewing Process
- How to Froth Milk Without an Espresso Machine
- Method 1: Handheld Electric Frother
- Method 2: French Press Frothing
- Method 3: Mason Jar Shake
- Assembling Your Café-Style Moka Pot Latte
- Taste Profile
- Common Mistakes and How to Fix Them
- Problem: Coffee Tastes Burnt or Bitter
- Problem: Weak, Watery Coffee
- Problem: Milk Won't Froth Properly
- Problem: Latte Tastes Unbalanced
- Frequently Asked Questions
- Can I make latte art with a Moka pot latte?
- What's the best milk alternative for Moka pot lattes?
- How many shots of Moka pot coffee should I use for a latte?
- Can I make iced lattes with Moka pot coffee?
- Why does my Moka pot coffee taste metallic?
- Final Thoughts and Your Next Steps
Ever wonder why your homemade lattes never quite taste like the ones from your favorite café? You’re not alone. The good news is that you don’t need a $500 espresso machine to craft a creamy, satisfying latte at home. Your humble Moka pot can produce a rich, concentrated coffee that’s perfect for milk-based drinks. In my experience, once you nail the technique, you’ll be making café-style lattes that rival anything you’d pay $6 for at a coffee shop.
In this guide, I’ll walk you through everything you need to know about making a latte at home with a Moka pot. You’ll learn how to brew the perfect strong coffee base, froth milk without an espresso machine’s steam wand, and combine them into a drink that looks and tastes professional. Life is too short for bad coffee, so let’s get this right.
What You’ll Need for Your Moka Pot Latte
Gear
- Moka pot (3-cup or 6-cup size works best for lattes)
- Milk frother (handheld electric frother, French press, or manual pump frother)
- Small saucepan (if heating milk on the stove)
- Thermometer (optional but helpful for milk temperature)
- Latte glass or large mug (around 240-350ml capacity)
- Kitchen towel (for handling hot equipment)
Ingredients
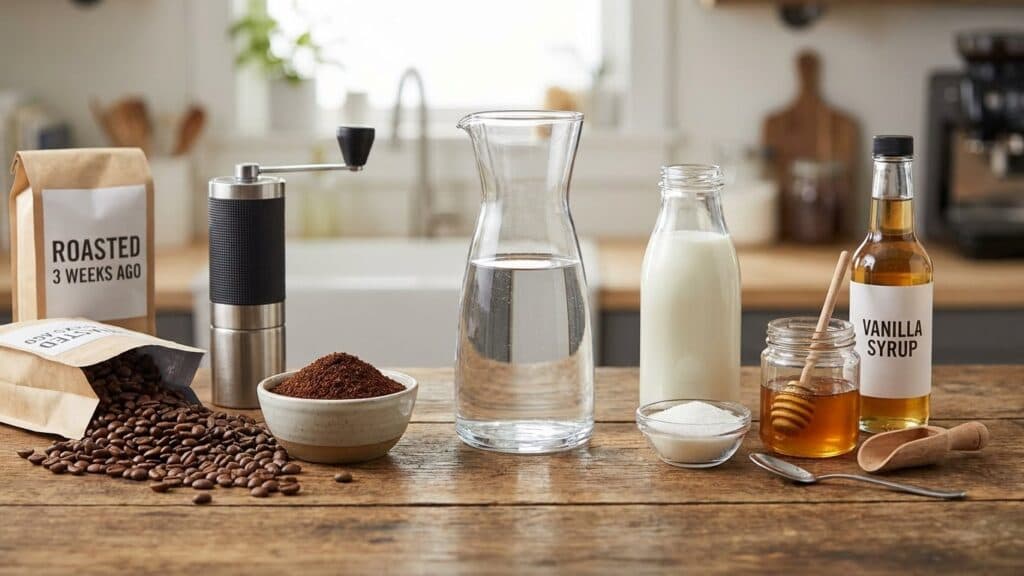
- Fresh coffee beans (medium to dark roast, finely ground)
- Filtered water (makes a noticeable difference in taste)
- Whole milk (or your preferred milk alternative)
- Sweetener (optional – sugar, honey, or flavored syrup)
Barista Tip: For the best results, use coffee that was roasted within the past 2-4 weeks. Pre-ground supermarket coffee works in a pinch, but freshly ground beans will give you that aromatic, café-quality experience.
Understanding the Moka Pot Latte Difference
Let’s address the elephant in the room. A Moka pot doesn’t produce true espresso. Espresso machines extract coffee at around 9 bars of pressure, while a Moka pot generates only 1-2 bars. This means your Moka pot coffee is stronger than drip coffee but not quite as concentrated as espresso.
Does this matter for your latte? Not as much as you might think. The Moka pot produces what I like to call “stovetop espresso” – a bold, intense coffee with a slightly different flavor profile than machine espresso. It’s often a bit more bitter and less creamy, but when combined with properly steamed milk, it creates a delicious latte that most people can’t distinguish from the café version.
Key Differences: Moka Pot vs. Espresso Machine for Lattes
| Factor | Moka Pot | Espresso Machine |
|---|---|---|
| Pressure | 1-2 bars | 9 bars |
| Crema | Minimal to none | Rich golden layer |
| Cost | $25-50 | $150-2000+ |
| Coffee Strength | Very strong | Concentrated |
| Learning Curve | Moderate | Steep |
Did You Know? The Moka pot was invented in Italy in 1933 by Alfonso Bialetti. For decades, it was the primary way Italians made strong coffee at home before affordable espresso machines became available.
Step-by-Step Guide to Brewing Moka Pot Coffee for Lattes
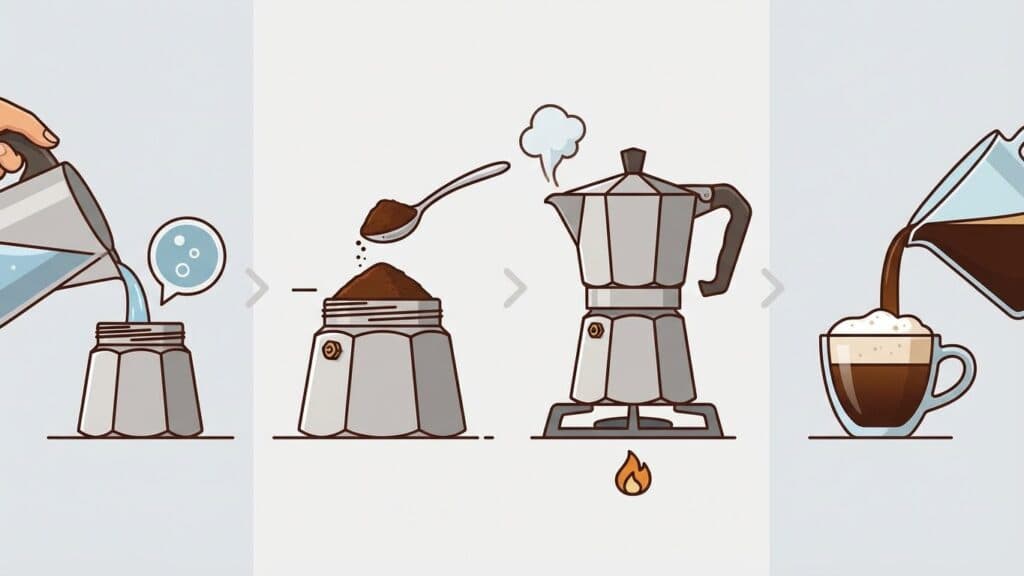
Getting the coffee base right is crucial. A watery or burnt Moka pot brew will ruin your latte before you even get to the milk. Here’s how to brew it properly.
The Brewing Process
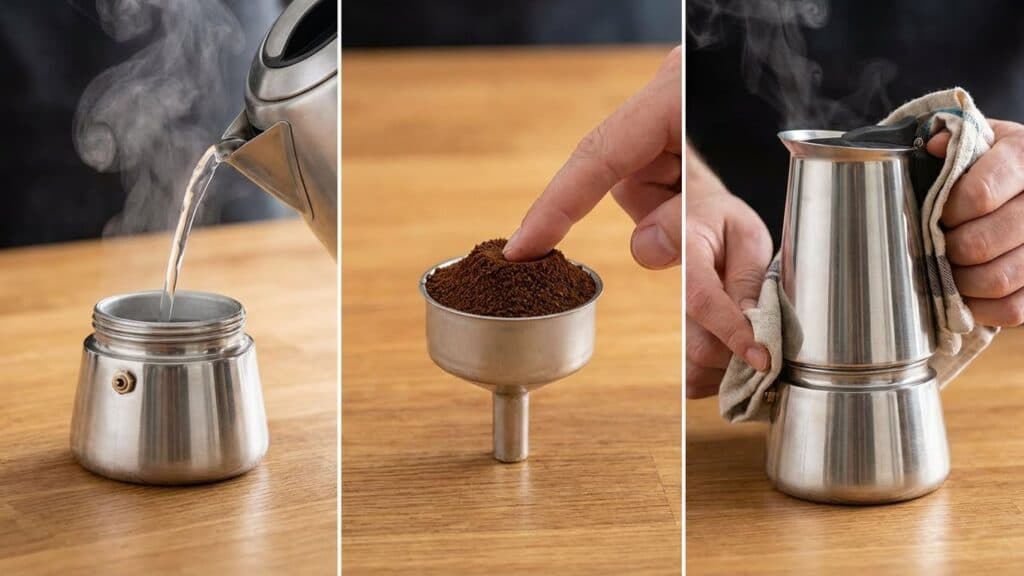
- Fill the bottom chamber with hot water up to just below the safety valve. Using pre-heated water is essential – it reduces the time the coffee spends on heat, preventing bitter over-extraction.
- Add finely ground coffee to the filter basket. Fill it completely and level it off with your finger. Don’t tamp or compress the grounds like you would for espresso.
- Assemble the Moka pot by screwing the top chamber onto the bottom. Use a kitchen towel to hold the bottom chamber since it contains hot water.
- Place on medium-low heat. This is where many people go wrong. High heat causes the coffee to extract too quickly and taste burnt. Patience pays off here.
- Listen for the gurgling sound. When coffee starts flowing into the upper chamber, you’ll hear a bubbling noise. Once the flow becomes steady, reduce the heat slightly.
- Remove from heat early. Take the Moka pot off the burner when the upper chamber is about 80% full. The residual heat will complete the extraction without burning the coffee.
- Cool the bottom chamber immediately by running it under cold water or wrapping it in a cold, wet towel. This stops extraction and prevents a bitter, metallic taste.
Barista Tip: If your Moka pot coffee consistently tastes bitter or burnt, you’re likely using heat that’s too high. Try reducing it to medium-low and extending your brew time by a minute or two.
For a single latte, a 3-cup Moka pot provides the perfect amount of coffee. A 6-cup Moka pot gives you enough for two lattes or one extra-strong drink.
How to Froth Milk Without an Espresso Machine
Here’s where the magic happens. Properly frothed milk transforms your strong Moka pot coffee into a genuine café-style latte. You have several options depending on what equipment you own.
Method 1: Handheld Electric Frother
This is the most popular and affordable option. These small battery-powered or rechargeable frothers cost between $10-30 and work surprisingly well.
- Heat your milk to around 60-65°C (140-150°F). You can do this in a microwave or small saucepan.
- Submerge the frother at an angle just below the milk’s surface.
- Froth for 20-30 seconds, moving the frother up and down slightly to incorporate air.
- Tap the container on the counter to pop large bubbles, then swirl gently.
Method 2: French Press Frothing
If you already own a French press, this method produces the silkiest foam in my experience.
- Heat milk to 60-65°C and pour it into your French press (fill no more than one-third to allow room for expansion).
- Pump the plunger up and down vigorously for 30-60 seconds.
- The milk will double in volume and develop a creamy microfoam perfect for lattes.
Method 3: Mason Jar Shake
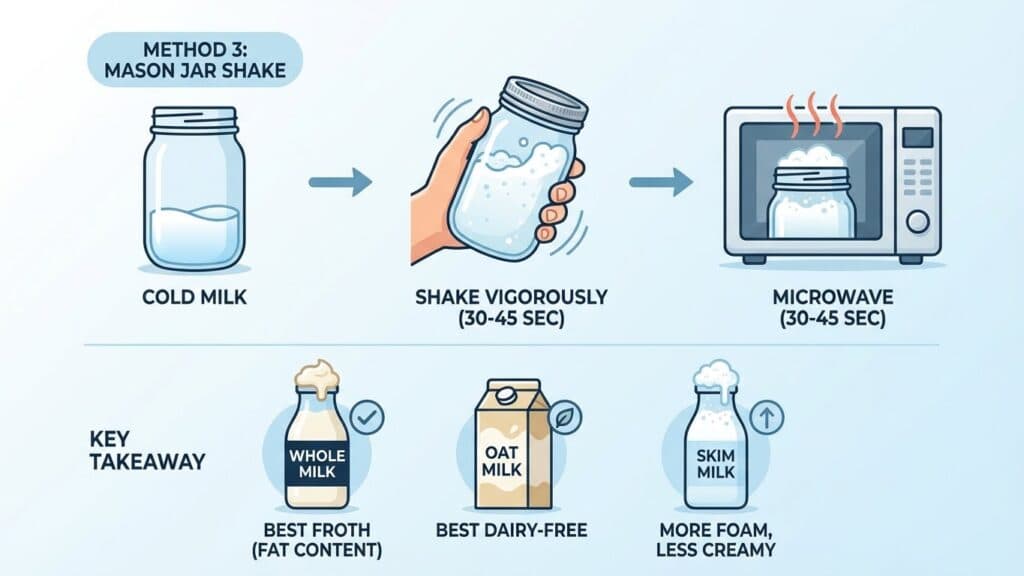
No special equipment? No problem. This method works in a pinch.
- Pour cold milk into a mason jar (fill about one-third).
- Secure the lid tightly and shake vigorously for 30-45 seconds until the milk doubles in volume.
- Remove the lid and microwave for 30-45 seconds. The heat stabilizes the foam.
Key Takeaway: Whole milk froths best because of its fat content, but oat milk is the best dairy-free alternative for latte foam. Skim milk creates more foam but with less creamy texture.
Assembling Your Café-Style Moka Pot Latte
Now comes the satisfying part – bringing everything together. The order and technique matter more than you might expect.
- Preheat your glass or mug by rinsing it with hot water. This keeps your latte warm longer.
- Pour the Moka pot coffee into the bottom of your glass. For a standard latte, use about 60ml of Moka pot coffee.
- Add sweetener now if you’re using any. Stirring it into the hot coffee ensures it dissolves completely.
- Gently pour the steamed milk from a height of about 5cm, holding back the foam with a spoon.
- Spoon the foam on top to create that classic latte look. For latte art, pour the milk closer to the coffee surface and wiggle the pitcher gently.
A traditional latte has a coffee-to-milk ratio of about 1:3. For a stronger drink with more coffee flavor, try a 1:2 ratio. I’ve found that most home baristas prefer their lattes slightly stronger than café versions since you can taste the coffee more distinctly.
Taste Profile
When made correctly, your Moka pot latte should taste bold and slightly bitter from the coffee, balanced by the natural sweetness of the milk. Expect notes of chocolate, nuts, or caramel depending on your beans. The texture should be creamy and smooth, with a thin layer of microfoam on top.
Common Mistakes and How to Fix Them
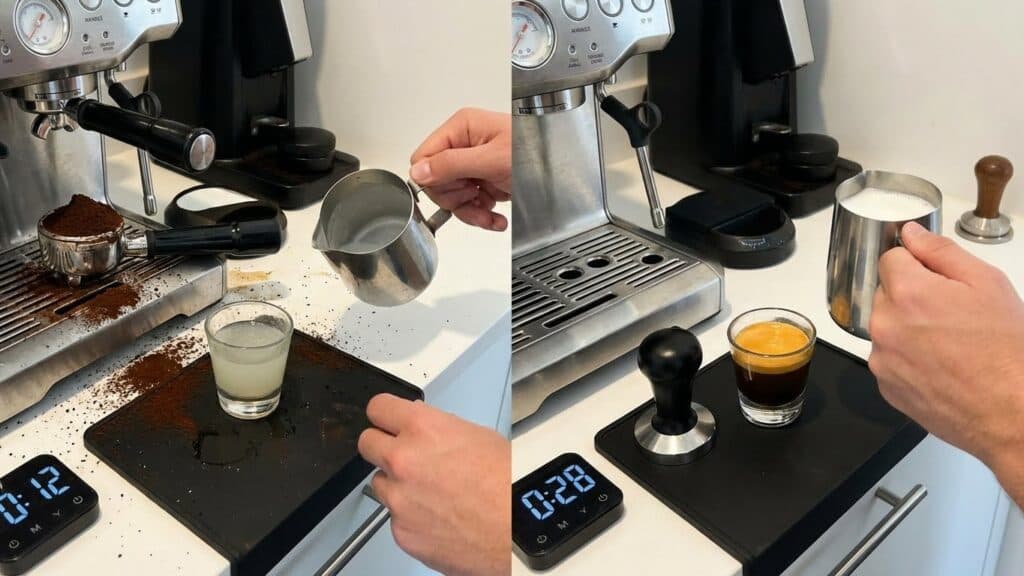
Even experienced home baristas run into problems. Here are the issues I see most often and how to troubleshoot them.
Problem: Coffee Tastes Burnt or Bitter
This happens when the Moka pot gets too hot during brewing. The solution is simple: use lower heat and pre-heated water. Also, remove the pot from heat before it finishes sputtering and gurgling. Those final drops are often over-extracted and bitter.
Problem: Weak, Watery Coffee
You’re likely using a grind that’s too coarse, or you’re not filling the filter basket completely. Moka pots need a fine grind – not quite espresso fine, but close. Think slightly coarser than table salt.
Problem: Milk Won’t Froth Properly
Temperature is usually the culprit. Milk that’s too cold won’t foam well, and milk that’s too hot will scald and taste flat. Aim for that 60-65°C sweet spot. Also, check your milk’s freshness – older milk doesn’t froth as well.
Problem: Latte Tastes Unbalanced
If your latte tastes too milky, use more Moka pot coffee or less milk. If it’s too strong, increase your milk ratio. Don’t be afraid to experiment – everyone’s preferences differ.
Frequently Asked Questions
Can I make latte art with a Moka pot latte?
Yes, but it’s challenging. Latte art requires microfoam with tiny, uniform bubbles. French press frothing produces the closest texture to steamed milk from an espresso machine. Start with simple hearts or rosettas before attempting complex designs.
What’s the best milk alternative for Moka pot lattes?
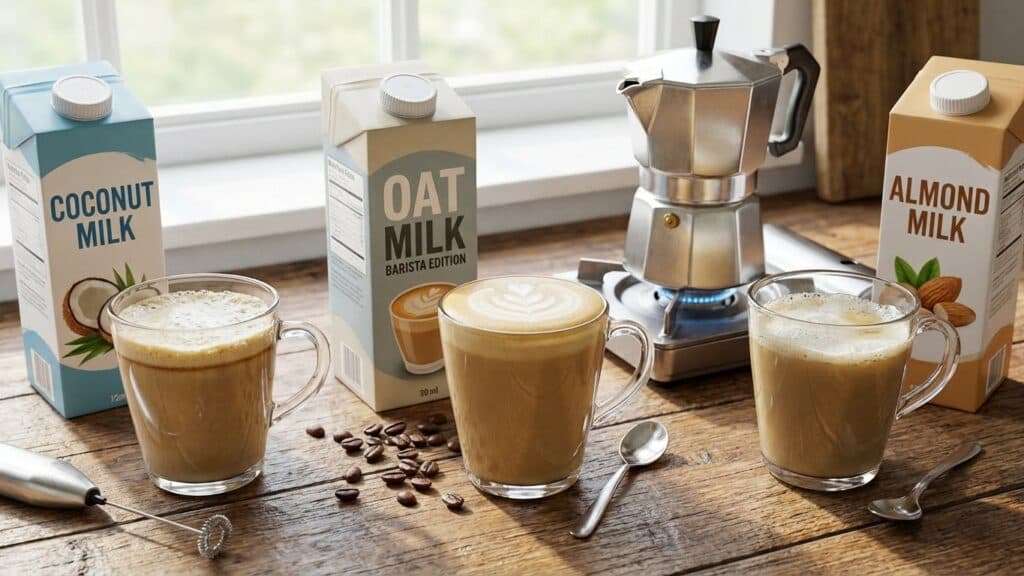
Oat milk is the gold standard for dairy-free lattes because it froths well and has a creamy, neutral taste. Barista-edition oat milks contain added oils that make them even better. Coconut and almond milk can work but produce thinner foam and may separate.
How many shots of Moka pot coffee should I use for a latte?
A 3-cup Moka pot produces roughly the equivalent of 1.5-2 espresso shots, which is perfect for a standard latte. For a larger latte or stronger taste, use a 6-cup Moka pot or brew two batches with a smaller pot.
Can I make iced lattes with Moka pot coffee?
Absolutely. Brew your Moka pot coffee and let it cool slightly, or pour it directly over ice for a flash-chill effect. Add cold milk and ice, then stir or shake. For a creamier iced latte, blend everything with ice briefly.
Why does my Moka pot coffee taste metallic?
This usually indicates over-extraction or a pot that needs cleaning. After each use, rinse all parts with warm water but avoid soap, which can strip the oils that season the pot. If the metallic taste persists, try using filtered water.
Final Thoughts and Your Next Steps
Making a café-style latte at home with a Moka pot is absolutely achievable with a bit of practice. The key takeaways are simple: use fresh coffee and pre-heated water, keep the heat moderate, and invest time in learning to froth your milk properly. These three factors make the biggest difference in your final drink.
I recommend starting with your morning latte tomorrow. Use the techniques outlined here, and don’t get discouraged if your first attempt isn’t perfect. By your third or fourth try, you’ll have developed a feel for the timing and ratios that work best for your taste. Before long, you’ll be saving money, impressing friends, and enjoying genuinely delicious lattes without leaving your kitchen.



Comments