


Table of Contents
- What You'll Need
- Equipment
- Ingredients
- Why the V60 Is Perfect for Beginners
- What Makes the V60 Different
- Step-by-Step V60 Brewing Guide
- Preparation
- The Bloom Phase
- The Main Pour
- Expected Taste Profile
- Common V60 Mistakes and How to Fix Them
- Coffee Tastes Sour or Weak
- Coffee Tastes Bitter or Harsh
- Uneven Extraction
- Brew Takes Too Long
- V60 Brewing Variables at a Glance
- Taking Your V60 Skills Further
- Frequently Asked Questions
- Do I really need a gooseneck kettle for V60?
- Why does my V60 coffee taste different every time?
- How do I know if my grind size is correct?
- Can I use pre-ground coffee in a V60?
- What's the best water to use for V60 brewing?
- Conclusion and Your Next Steps
What You’ll Need
Before you start brewing, let’s gather everything you need. Having your gear ready makes the whole process smoother and more enjoyable. Trust me, there’s nothing worse than realizing mid-pour that you forgot to boil water.
Equipment
- Hario V60 dripper (size 01 for single cups, size 02 for larger batches)
- V60 paper filters (bleached or unbleached, your preference)
- Gooseneck kettle (electric or stovetop – the thin spout is essential for pour control)
- Coffee grinder (burr grinder strongly recommended for consistent results)
- Digital scale with timer function
- Your favorite mug or carafe
Ingredients
- Fresh coffee beans – 15-18 grams for a single cup
- Filtered water – about 250-300ml, heated to 90-96°C (195-205°F)
Barista Tip: Use coffee roasted within the last 2-4 weeks. Freshness matters more than you might think, and it’s the easiest way to level up your brew.
Why the V60 Is Perfect for Beginners
You might wonder why the V60 is recommended so often for people just getting into pour-over coffee. The answer comes down to simplicity and feedback. The V60 teaches you the fundamentals of manual brewing while being incredibly forgiving once you understand the basics.
The cone shape and large single hole at the bottom give you complete control over extraction. Pour faster, and the water rushes through. Pour slower, and you extend the brew time. This direct relationship between your technique and the final cup helps you learn quickly what works and what doesn’t.
In my experience, beginners who start with the V60 develop better pouring habits than those who begin with more automated methods. The learning curve is real, but it’s not steep. After just a few brews, you’ll notice improvements in consistency.
What Makes the V60 Different
The spiral ribs inside the V60 aren’t just decorative. They create air channels between the filter and the dripper walls, allowing coffee to extract more evenly. Combined with the 60-degree angle (that’s where the name comes from), this design promotes a balanced flow rate.
Unlike flat-bottom brewers that can pool water at the base, the V60’s cone funnels everything toward a single exit point. This means your pouring technique directly influences the result. Some people find this intimidating, but I see it as an opportunity. You’re the barista here.
Step-by-Step V60 Brewing Guide
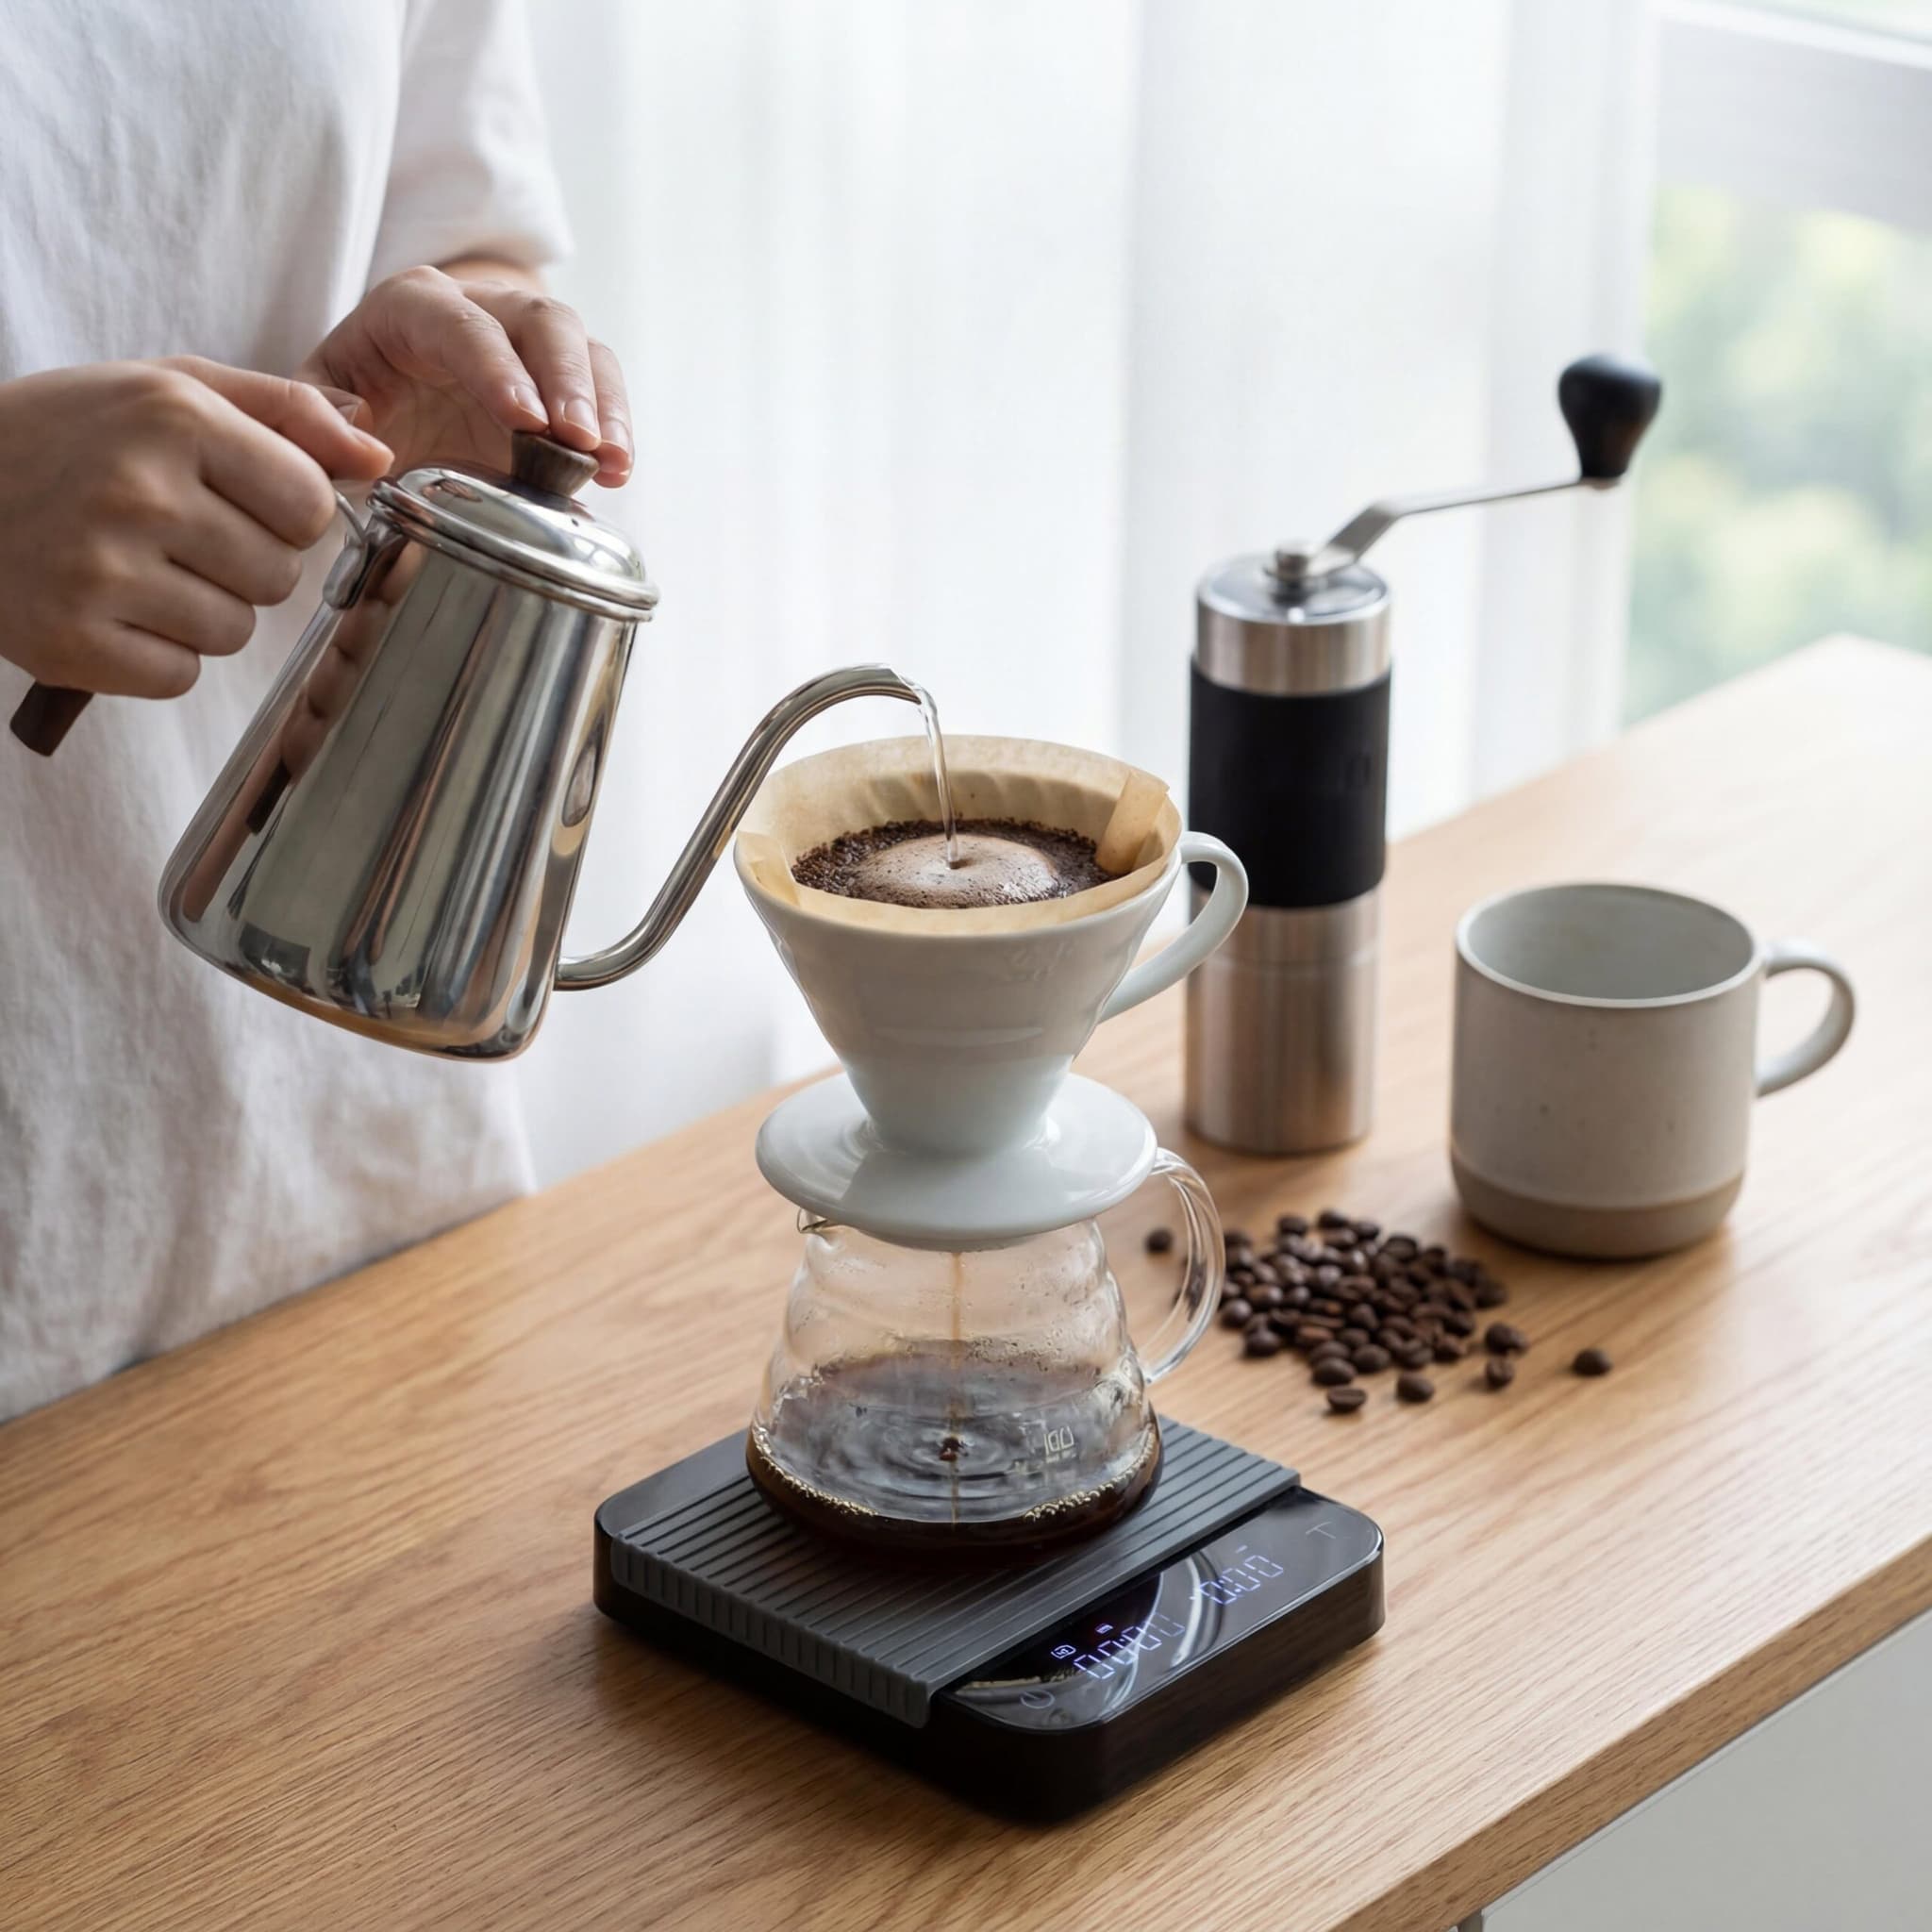
Now let’s get into the actual brewing process. Follow these steps, and you’ll have a delicious cup in about 3-4 minutes. I recommend starting with a 1:15 coffee-to-water ratio. That means 15 grams of coffee to 225 grams of water.
Preparation
- Heat your water to 93°C (200°F). If you don’t have a temperature-controlled kettle, bring water to a boil and let it rest for 30-45 seconds.
- Grind your coffee to a medium-fine consistency. Think table salt or slightly coarser. You’ll adjust this later based on taste.
- Fold the paper filter along the seam and place it in the V60. Set the dripper on your mug or carafe.
- Rinse the filter thoroughly with hot water. This removes paper taste and preheats everything. Discard the rinse water.
- Add your ground coffee to the filter and gently shake to level the bed. Place everything on your scale and tare to zero.
The Bloom Phase
- Start your timer and pour about 30-45 grams of water over the grounds in a circular motion.
- Make sure all grounds are wet. You’ll see the coffee bed swell and bubble – this is carbon dioxide escaping, which is a good sign of freshness.
- Wait 30-45 seconds. This bloom phase allows gases to release so water can extract flavors more evenly during the main pour.
Barista Tip: If your coffee doesn’t bloom much, it might be stale. Fresh coffee should puff up noticeably, almost like a muffin rising.
The Main Pour
- Begin pouring slowly in concentric circles, starting from the center and moving outward. Avoid pouring directly on the filter walls.
- Keep the water level about halfway up the slurry. Don’t flood it, but don’t let it drain completely between pours either.
- Pour in pulses if you prefer – add 50-60 grams at a time, letting it drain slightly before the next pour. Alternatively, use one continuous slow pour.
- Stop pouring when you reach your target weight (225 grams for our recipe).
- Let it drain completely. Total brew time should be around 2:30-3:30 for most recipes.
When the stream turns to drips and stops, remove the dripper. Give your coffee a quick swirl to mix everything, and you’re ready to taste your work.
Expected Taste Profile
A well-brewed V60 should taste clean, bright, and nuanced. You’ll notice more clarity than French press or immersion methods. Floral and fruity notes come through beautifully, especially with lighter roasts. Expect a medium body with a tea-like quality that’s refreshing rather than heavy.
Common V60 Mistakes and How to Fix Them
Even with a straightforward technique, things can go wrong. Here are the issues I see most often with beginners – and I’ve made every single one of these mistakes myself.
Coffee Tastes Sour or Weak
This usually means under-extraction. The water passed through too quickly without pulling enough flavor from the grounds. Try grinding finer, using hotter water, or slowing down your pour. You can also extend your bloom time slightly.
A common scenario: you’re pouring too aggressively, creating channels where water rushes through without properly saturating all the grounds. Focus on a gentle, controlled stream.
Coffee Tastes Bitter or Harsh
Over-extraction is the culprit here. You’ve pulled too much from the coffee, including unpleasant compounds that taste bitter and dry. Grind coarser, use slightly cooler water, or speed up your pour. If your total brew time exceeds 4 minutes, that’s a red flag.
Uneven Extraction
If your coffee bed looks like a mountain range after brewing – high spots and low spots everywhere – your pouring technique needs work. Practice making even circles. The goal is a flat, uniform bed when the brew finishes. This indicates even water distribution throughout the process.
Key Takeaway: The V60 is responsive to changes. Adjust one variable at a time and taste the difference. Grind size is usually the most impactful adjustment.
Brew Takes Too Long
If your drawdown stretches beyond 4 minutes, your grind is probably too fine or you’ve used too much coffee. The filter can also clog if fines migrate to the bottom. Some people gently swirl the slurry during brewing to prevent this, but start with grind adjustment first.
V60 Brewing Variables at a Glance
| Variable | Recommended Starting Point | Adjust If… |
|---|---|---|
| Coffee Dose | 15-18g | Taste too strong or weak |
| Water Temperature | 93°C (200°F) | Sour (go hotter) or bitter (go cooler) |
| Grind Size | Medium-fine (table salt) | Fast brew = grind finer; Slow brew = grind coarser |
| Ratio | 1:15 (coffee:water) | Prefer stronger or lighter coffee |
| Total Brew Time | 2:30-3:30 | Outside this range, check grind and technique |
Taking Your V60 Skills Further
Once you’re comfortable with the basics, experimentation becomes the fun part. Different coffees reveal different characteristics, and small tweaks to your method can highlight specific flavors.
Try single-origin beans from various regions. Ethiopian coffees often showcase floral and berry notes that the V60 handles beautifully. Colombian beans tend toward caramel and nut flavors. The clean extraction of pour-over lets you taste these differences clearly.
You can also experiment with different pouring techniques. The Tetsu Kasuya 4:6 method, for example, divides your pour into specific phases for controlling sweetness and strength independently. James Hoffmann’s technique emphasizes a gentle swirl after blooming. Each approach offers something unique.
Barista Tip: Keep a simple log of your brews – dose, grind setting, water temp, brew time, and tasting notes. After a few weeks, you’ll spot patterns that help you dial in any new coffee faster.
Frequently Asked Questions
Do I really need a gooseneck kettle for V60?
Technically, no – but practically, yes. The thin spout gives you precise control over water placement and flow rate. Standard kettles pour too fast and erratically, making it nearly impossible to achieve even extraction. A gooseneck kettle is one of the best investments for any pour-over method.
Why does my V60 coffee taste different every time?
Consistency comes from controlling variables. Small changes in grind size, water temperature, pour speed, and dose add up. Using a scale and timer eliminates most inconsistency. If you’re eyeballing things, that’s likely your issue.
How do I know if my grind size is correct?
Brew time is your best indicator. For a 15g dose with 250g water, aim for 2:30-3:30 total time. If it finishes much faster, grind finer. If it drags past 4 minutes, grind coarser. Taste tells the full story – sour usually means too coarse, bitter means too fine.
Can I use pre-ground coffee in a V60?
You can, but results will suffer. Pre-ground coffee loses freshness quickly and isn’t calibrated for your specific dripper. If you must use pre-ground, buy small quantities labeled for pour-over or drip and use them within a week of opening.
What’s the best water to use for V60 brewing?
Filtered water works well for most people. You want some mineral content for proper extraction – completely distilled or reverse-osmosis water tastes flat. Avoid heavily chlorinated tap water, which can introduce off-flavors. If your coffee tastes dull despite good beans and technique, water quality might be the missing piece.
Conclusion and Your Next Steps
Brewing V60 coffee isn’t complicated once you understand the fundamentals. Start with good beans, proper equipment, and a consistent technique. Pay attention to grind size, water temperature, and brew time. Taste your results and adjust accordingly. That’s really all there is to it.
The V60 rewards practice. Your first few cups might not be perfect, and that’s completely normal. Each brew teaches you something. Within a week of daily practice, you’ll notice significant improvement in both consistency and flavor.
Life is too short for bad coffee. Now that you have the knowledge, grab some fresh beans and start brewing. Your morning routine is about to get a lot more delicious.

Comments