


Table of Contents
- What You'll Need to Make a Starbucks Mocha at Home
- Ingredients
- Gear
- Step-by-Step: How to Make a Starbucks Mocha
- The Basic Method
- The Secret to Making It Better Than Starbucks
- Use Quality Chocolate
- Fresh Espresso Makes All the Difference
- Control Your Sweetness
- Better Milk, Better Foam
- Variations to Try Once You've Mastered the Basics
- White Chocolate Mocha
- Peppermint Mocha
- Salted Caramel Mocha
- Iced Mocha
- Common Mistakes (And How to Avoid Them)
- Frequently Asked Questions
- Can I make a mocha without an espresso machine?
- What's the difference between a mocha and a latte?
- How do I make my mocha less sweet?
- Can I make a mocha ahead of time?
- What milk alternative works best for mochas?
- Conclusion: Your Coffee Shop Is Now Your Kitchen
Ever stood in a Starbucks line, wallet in hand, wondering if you really need to spend $6 on a mocha you could probably make at home? You’re not alone. The good news is that making a Starbucks-style mocha in your own kitchen isn’t just possible—it’s surprisingly easy, and with a few tweaks, you can actually make it better than what you’d get at the shop. In my experience, homemade mochas taste fresher, cost a fraction of the price, and let you control exactly how sweet and chocolatey you want your drink.
In this guide, I’ll walk you through everything you need to create a rich, velvety mocha that rivals (and beats) the coffee giant. Whether you have an espresso machine or just a simple stovetop setup, you’ll be sipping coffeehouse-quality drinks in no time.
What You’ll Need to Make a Starbucks Mocha at Home
Before we dive into the steps, let’s gather your ingredients and gear. The beauty of a mocha is its simplicity—you don’t need fancy equipment to pull this off.
Ingredients
- Espresso: 2 shots (about 60ml) or 1/2 cup strong brewed coffee
- Chocolate sauce or cocoa powder: 1-2 tablespoons (adjust to taste)
- Milk: 1 cup (whole milk works best, but oat milk is a great alternative)
- Sugar: Optional, 1-2 teaspoons if your chocolate isn’t sweet enough
- Whipped cream: For topping (optional but highly recommended)
- Chocolate shavings or cocoa powder: For garnish
Gear
- Espresso machine, Moka pot, AeroPress, or French press
- Milk frother, steam wand, or a small saucepan with a whisk
- Your favorite mug (12-16 oz works perfectly)
- Measuring spoons
Barista Tip: If you don’t have an espresso machine, a Moka pot produces a concentrated coffee that’s close enough to espresso for mocha purposes. I’ve found that AeroPress also works wonderfully when you use a fine grind and a shorter brew time.
Step-by-Step: How to Make a Starbucks Mocha
Now for the fun part. Follow these steps, and you’ll have a café-worthy mocha in about five minutes.
The Basic Method
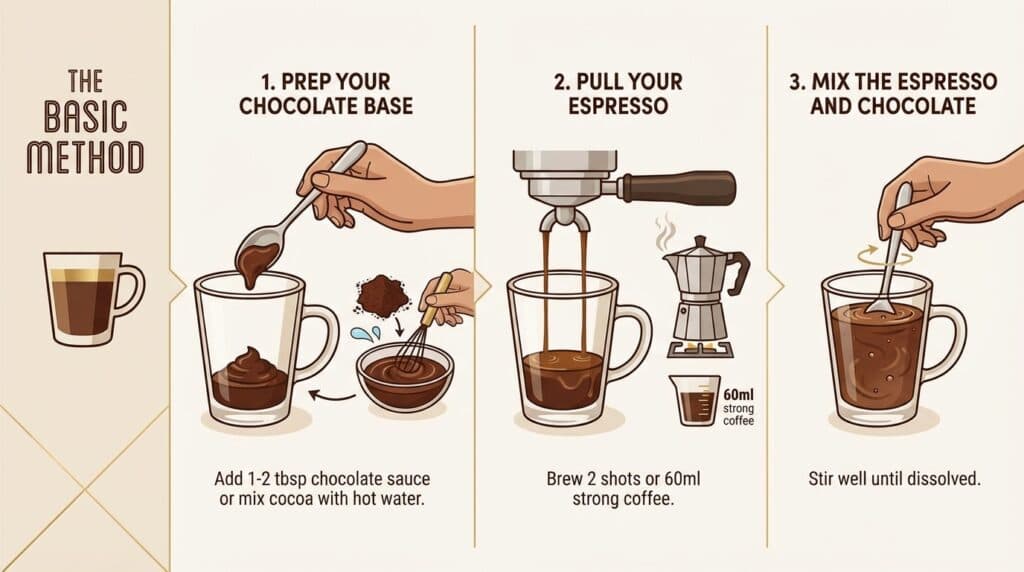
- Prep your chocolate base. Add 1-2 tablespoons of chocolate sauce to the bottom of your mug. If you’re using cocoa powder instead, mix it with a splash of hot water first to create a smooth paste—this prevents clumps.
- Pull your espresso. Brew 2 shots of espresso directly into the mug over the chocolate. If you’re using a Moka pot or other method, aim for about 60ml of strong, concentrated coffee.
- Mix the espresso and chocolate. Give it a good stir until the chocolate is completely dissolved. This is your mocha base, and it should smell incredible at this point.
- Steam or froth your milk. Heat your milk to around 150-160°F (65-70°C). If you have a steam wand, create microfoam by keeping the tip just below the surface. No steamer? Heat milk in a saucepan and use a handheld frother or whisk vigorously.
- Pour the milk. Add the steamed milk to your mug, holding back the foam with a spoon. Then spoon the foam on top.
- Top it off. Add a generous swirl of whipped cream and dust with cocoa powder or chocolate shavings.
Taste Profile: When done right, your homemade mocha should be rich and chocolatey with a balanced coffee flavor cutting through the sweetness. The texture should be smooth and velvety, not watery or overly thick.
The Secret to Making It Better Than Starbucks
Here’s where we separate a good mocha from a great one. Starbucks mochas are consistent, but they’re also made for mass production. At home, you have advantages they don’t.
Use Quality Chocolate
Starbucks uses a standard chocolate sauce that’s designed for speed and consistency. At home, you can upgrade significantly. I’ve found that using real chocolate—melted dark chocolate or high-quality cocoa powder—creates a depth of flavor that syrup simply can’t match.
Try this: melt a square of dark chocolate (70% cacao) with a tablespoon of milk before adding your espresso. The result is richer and more complex than any pump of syrup.
Fresh Espresso Makes All the Difference
Coffee shops pull hundreds of shots daily, and sometimes that espresso sits for a moment too long. Your home espresso is fresh the second it hits the cup. Use freshly ground beans (ideally roasted within the past 2-4 weeks), and you’ll taste the difference immediately.
Barista Tip: For mochas, I recommend a medium-dark roast with chocolate or nutty notes. These flavors complement the chocolate rather than competing with it.
Control Your Sweetness
A grande Starbucks mocha contains around 35 grams of sugar. That’s a lot. At home, you decide exactly how sweet your drink should be. Start with less chocolate sauce than you think you need—you can always add more, but you can’t take it away.
Better Milk, Better Foam
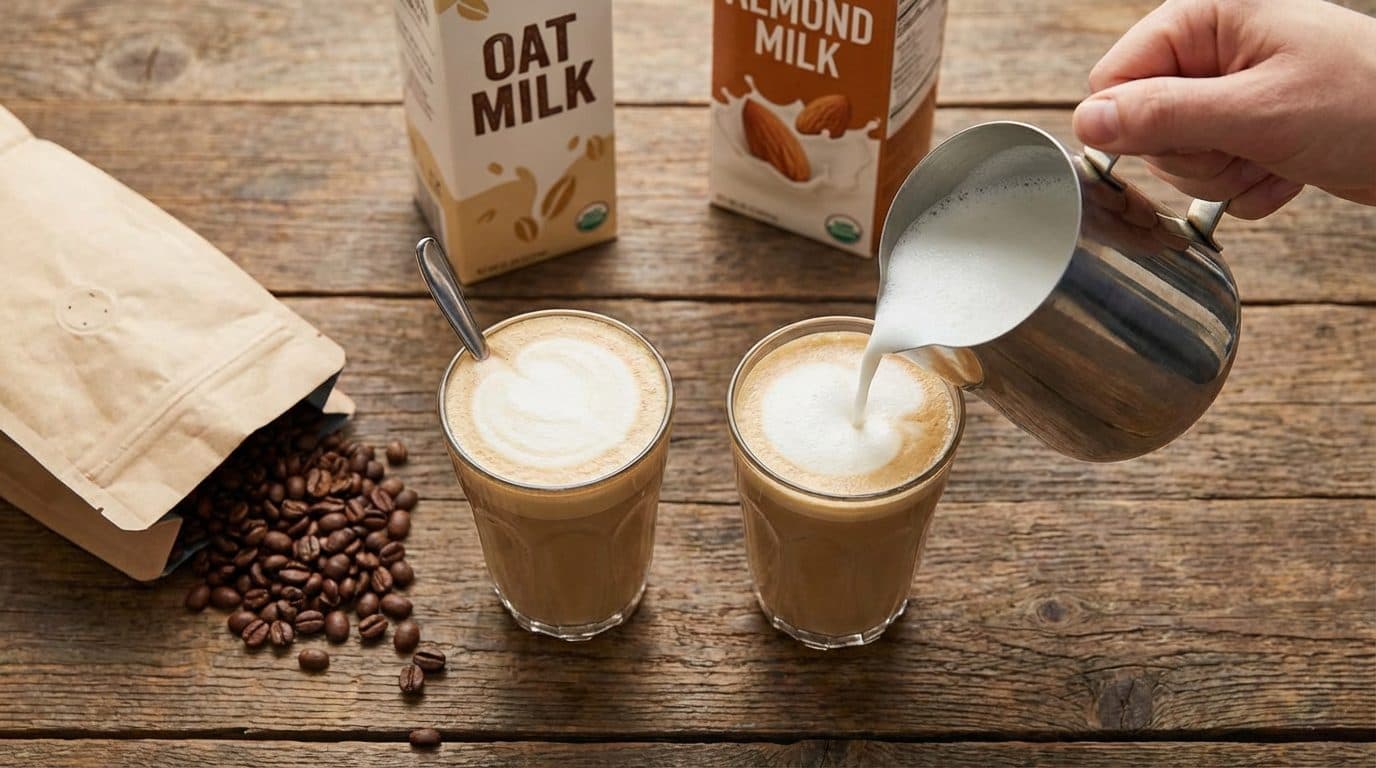
Whole milk creates the creamiest, most stable foam. If you’re dairy-free, oat milk froths beautifully and adds a subtle sweetness. Avoid skim milk if possible—it froths well but lacks the richness that makes a mocha feel indulgent.
Variations to Try Once You’ve Mastered the Basics
Once you nail the classic mocha, the world is your oyster. Here are some variations I love making at home.
White Chocolate Mocha
Swap the dark chocolate for white chocolate sauce or melted white chocolate chips. It’s sweeter and creamier, perfect for those who find regular mochas too intense.
Peppermint Mocha
Add 1/4 teaspoon of peppermint extract to your chocolate base. Top with whipped cream and crushed candy cane pieces. This is essentially the holiday drink Starbucks charges extra for.
Salted Caramel Mocha
Drizzle caramel sauce into your mug along with the chocolate. Add a tiny pinch of sea salt to the whipped cream topping. The salt enhances both the chocolate and caramel flavors.
Iced Mocha
Make your espresso-chocolate base as usual, but let it cool slightly. Pour over a glass filled with ice, then add cold milk. Skip the foam and go straight to whipped cream.
| Variation | Key Addition | Best For |
|---|---|---|
| White Chocolate Mocha | White chocolate sauce | Sweet tooth lovers |
| Peppermint Mocha | Peppermint extract | Holiday vibes |
| Salted Caramel Mocha | Caramel + sea salt | Complex flavor seekers |
| Iced Mocha | Ice + cold milk | Warm weather refreshment |
Common Mistakes (And How to Avoid Them)
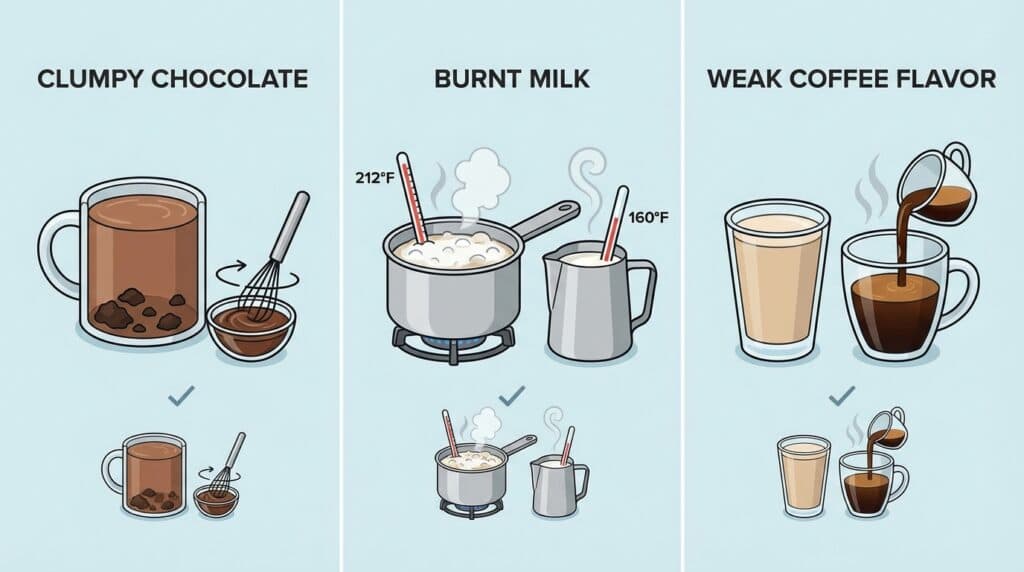
Even simple drinks can go wrong. Here are the pitfalls I see most often with homemade mochas.
- Clumpy chocolate: Always dissolve cocoa powder in a small amount of hot liquid first. With chocolate sauce, stir it into the hot espresso immediately.
- Burnt milk: Never let your milk boil. Once it starts steaming and reaches 160°F, it’s ready. Overheated milk tastes scorched and loses its sweetness.
- Weak coffee flavor: If your mocha tastes like hot chocolate with a hint of coffee, you need stronger espresso or less milk. The coffee should be a co-star, not a background extra.
- Too sweet: Start with one tablespoon of chocolate and taste before adding more. You can always increase sweetness, but you can’t undo it.
Key Takeaway: The best mocha balances three elements—strong espresso, rich chocolate, and creamy milk. If one overpowers the others, adjust your ratios until you find your perfect blend.
Frequently Asked Questions
Can I make a mocha without an espresso machine?
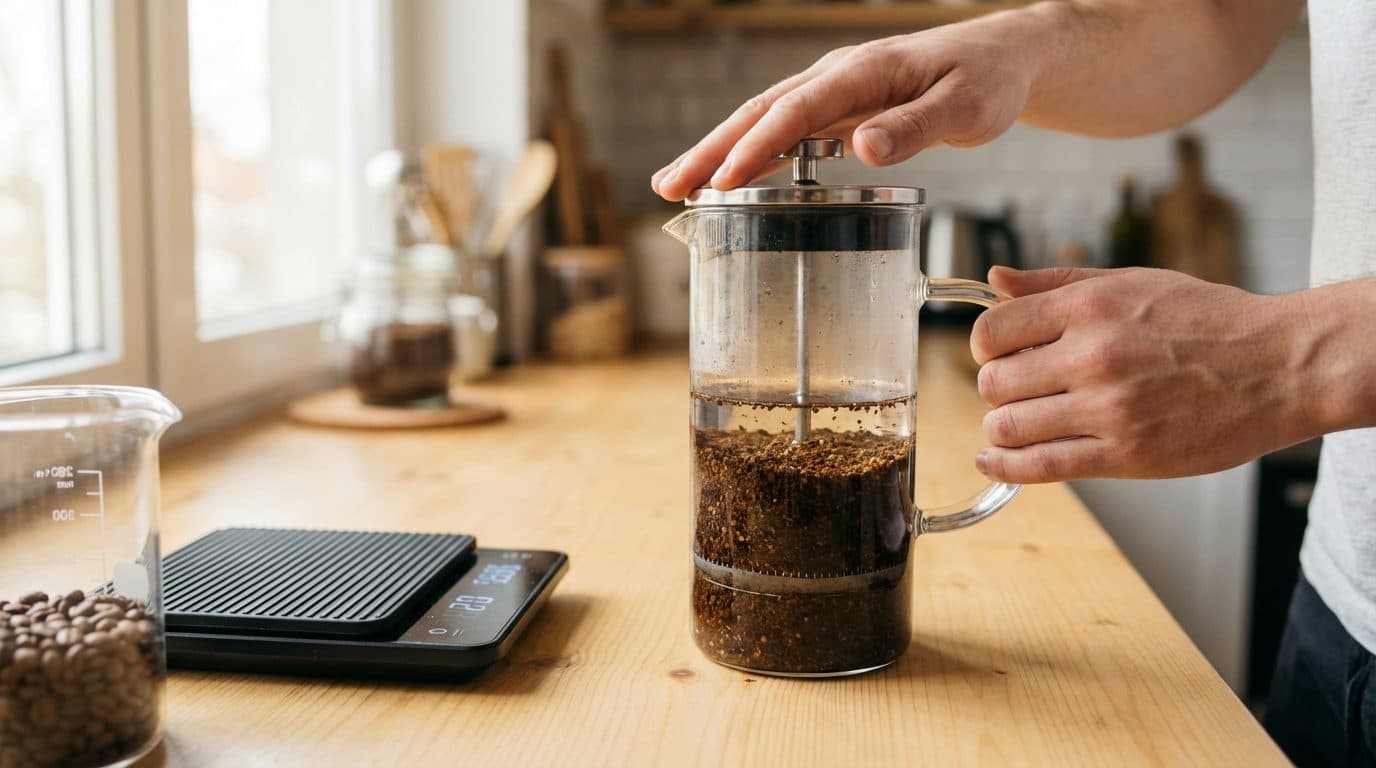
You can make an excellent mocha without any fancy equipment. A Moka pot, AeroPress, or even strong French press coffee will work. The key is using concentrated coffee—regular drip coffee is too weak and will result in a watery drink. If using a French press, double your coffee grounds and halve your water.
What’s the difference between a mocha and a latte?
Both drinks contain espresso and steamed milk, but a mocha adds chocolate to the mix. Think of a mocha as a latte’s sweeter, more indulgent cousin. Lattes highlight the espresso flavor, while mochas create a harmony between coffee and chocolate.
How do I make my mocha less sweet?
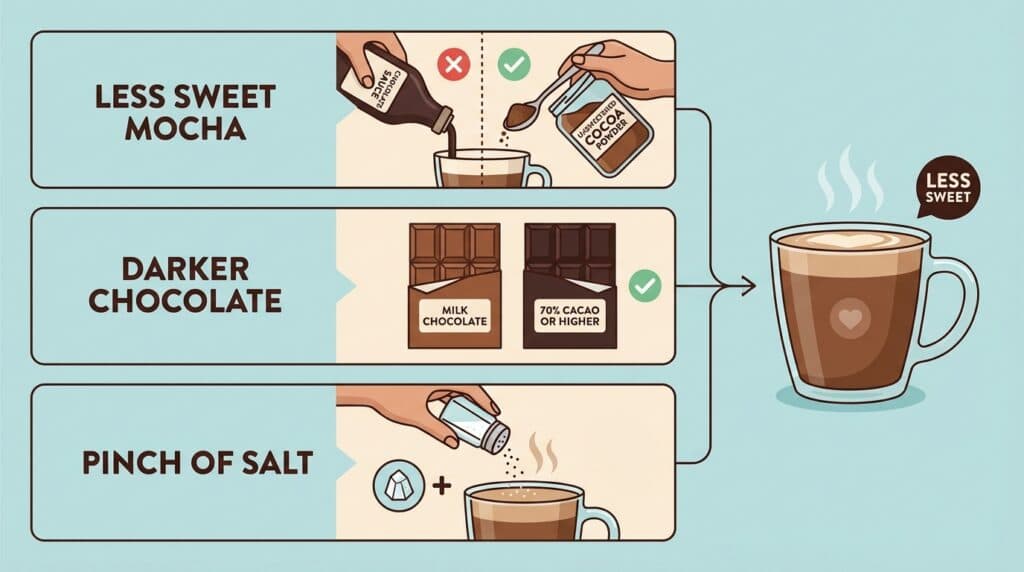
Use unsweetened cocoa powder instead of chocolate sauce, or reduce the amount of sauce you use. You can also choose darker chocolate (70% cacao or higher), which has less sugar and a more intense flavor. Another trick is to add a pinch of salt—it reduces the perception of sweetness while enhancing other flavors.
Can I make a mocha ahead of time?
Mochas are best enjoyed fresh, but you can prep the chocolate-espresso base and refrigerate it for up to 24 hours. When ready to drink, reheat the base gently and add freshly steamed milk. Pre-made mochas lose their foam and can taste flat, so I don’t recommend making the complete drink in advance.
What milk alternative works best for mochas?
Oat milk is my top recommendation for dairy-free mochas. It froths well, has a naturally sweet flavor, and doesn’t overpower the chocolate. Coconut milk adds a tropical twist but doesn’t foam as nicely. Almond milk works but can taste slightly bitter when heated.
Conclusion: Your Coffee Shop Is Now Your Kitchen
Making a Starbucks-style mocha at home isn’t just about saving money (though you’ll save plenty). It’s about crafting a drink exactly the way you like it—with better ingredients, fresher espresso, and the perfect level of sweetness for your taste.
Life is too short for bad coffee, and it’s also too short to wait in line for something you can make better yourself. Start with the basic recipe, experiment with the variations, and before long, you’ll wonder why you ever paid coffee shop prices for a mocha.
Grab your favorite mug, pull that espresso, and treat yourself to a homemade mocha today. Your taste buds (and your wallet) will thank you.

Comments