


Table of Contents
- Why Does Coffee Get Gritty or Chalky in the First Place?
- The Main Culprits Behind Texture Problems
- How to Fix Gritty Coffee: Step-by-Step Solutions
- Upgrade Your Grinder (or Adjust Your Current One)
- Match Your Grind Size to Your Brewing Method
- Check and Replace Your Filters
- Fixing Chalky or Over-Extracted Coffee
- Reduce Brewing Time or Temperature
- Evaluate Your Coffee Beans
- French Press Specific Fixes for Sediment
- The Double-Filter Technique
- Perfect Your Plunge Technique
- Pour Over and Drip Coffee Troubleshooting
- Ensure Proper Filter Placement
- Clean Your Equipment Regularly
- Frequently Asked Questions
- Can I fix gritty coffee after it's already brewed?
- Why is my espresso chalky when my other coffee is fine?
- Does water quality affect coffee texture?
- Should I buy a more expensive grinder to fix grittiness?
- How do I know if my beans are too old?
- Conclusion and Next Steps
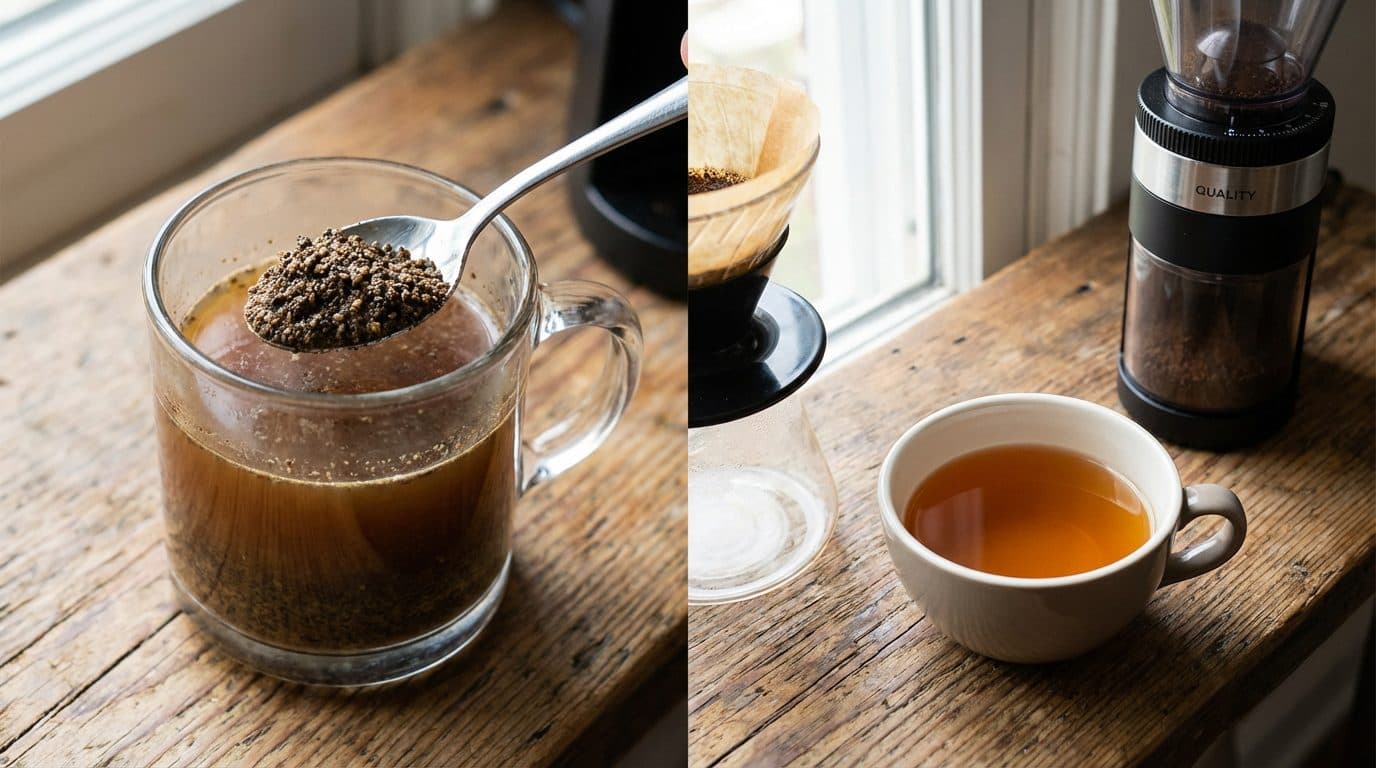
Ever taken a sip of your morning coffee only to feel like you’re chewing on sand? That gritty, chalky texture can ruin an otherwise perfect cup and leave you wondering what went wrong. If you’re dealing with gritty coffee at home, you’re not alone—it’s one of the most common complaints I hear from home baristas. The good news? This problem is almost always fixable, and once you understand the root causes, you’ll never have to suffer through a mouthful of coffee sediment again.
In this guide, I’ll walk you through exactly why your coffee has that unpleasant texture and, more importantly, how to fix gritty or chalky coffee for good. We’ll cover everything from grind size issues to brewing technique mistakes, plus some troubleshooting tips that have saved countless cups in my own kitchen. Life is too short for bad coffee, so let’s get yours silky smooth.
Why Does Coffee Get Gritty or Chalky in the First Place?
Before we fix the problem, we need to understand what’s causing it. That gritty texture in your cup comes from fine coffee particles—sometimes called “fines”—that escape your brewing process and end up in your drink. Chalky mouthfeel, on the other hand, often results from over-extraction or using coffee that’s been ground too fine for your brewing method.
In short: gritty coffee usually means particles are sneaking through, while chalky coffee often points to extraction issues or stale beans. Sometimes you’re dealing with both at once.
The Main Culprits Behind Texture Problems
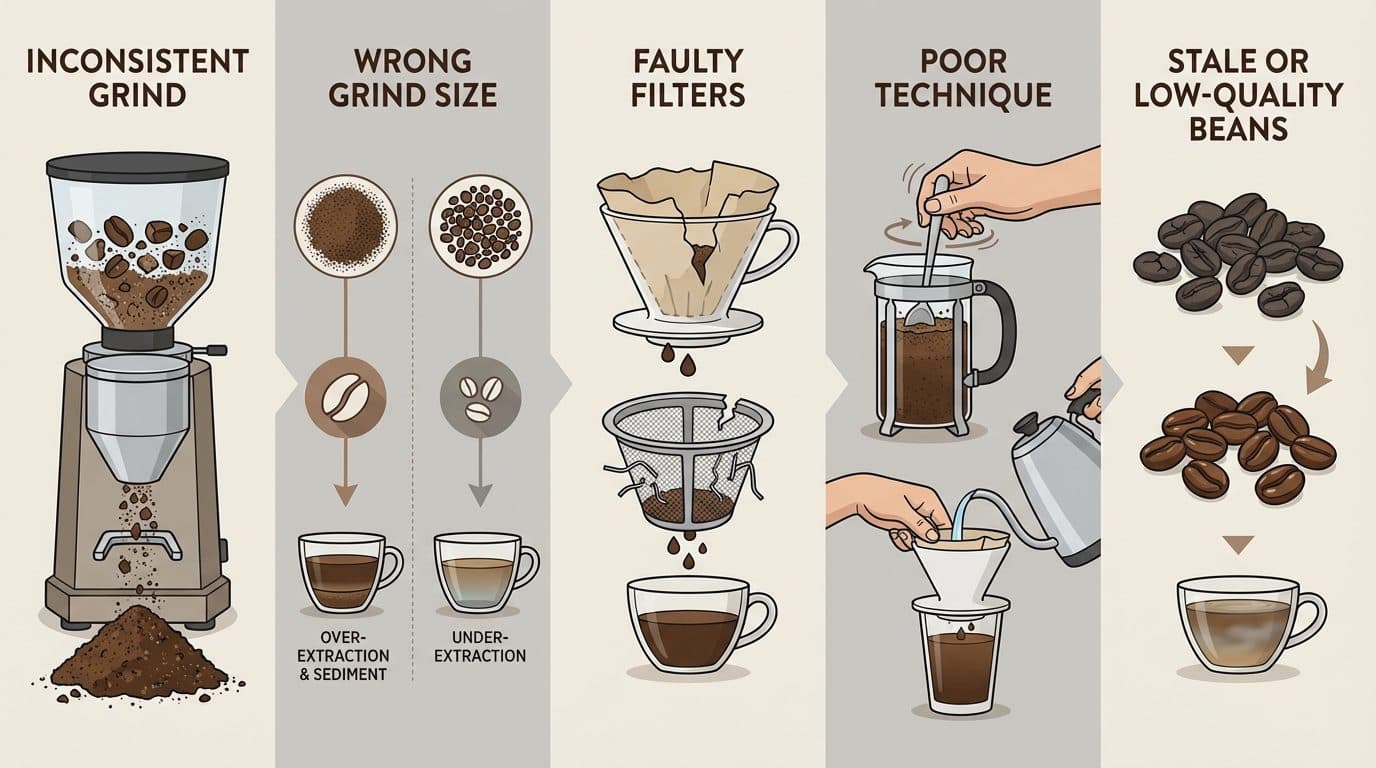
- Inconsistent grind size: Cheap grinders produce a mix of large chunks and powdery fines
- Wrong grind size for your brewing method: Too fine = over-extraction and sediment
- Faulty or worn filters: Paper filters with tears or metal filters with damaged mesh
- Poor brewing technique: Agitating grounds too aggressively or not filtering properly
- Stale or low-quality beans: Old beans break down unevenly and extract poorly
I’ve found that most texture problems come down to one or two of these issues. Once you identify yours, the solution is usually straightforward.
How to Fix Gritty Coffee: Step-by-Step Solutions
Let’s tackle the most common causes of gritty coffee and how to eliminate each one. Work through these solutions in order—often the first or second fix solves the problem entirely.
Upgrade Your Grinder (or Adjust Your Current One)
If there’s one piece of equipment that makes the biggest difference in coffee texture, it’s your grinder. Blade grinders are notorious for producing inconsistent particle sizes. They chop beans randomly, creating a mix of boulders and dust that leads directly to gritty cups.
Burr grinders, on the other hand, crush beans between two surfaces for a much more uniform grind. You don’t need to spend a fortune—even an entry-level burr grinder around $50-80 will dramatically improve consistency. In my experience, switching from a blade to a burr grinder eliminates about 70% of texture complaints immediately.
Barista Tip: If you’re stuck with a blade grinder for now, try pulsing in short bursts and shaking the grinder between pulses. This helps redistribute the grounds and reduces the extreme variation in particle size.
Match Your Grind Size to Your Brewing Method
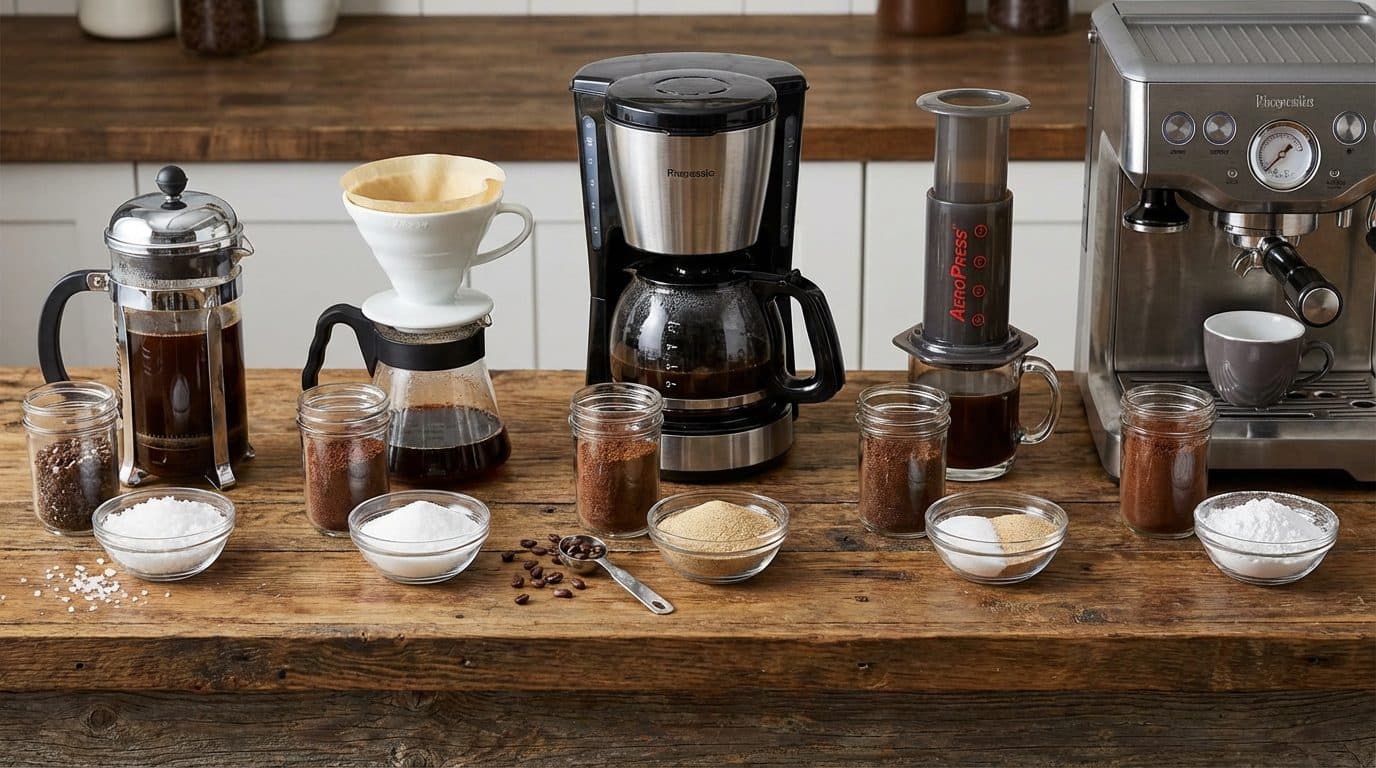
Using the wrong grind size for your brewer is one of the most common mistakes I see. Here’s a quick reference:
| Brewing Method | Ideal Grind Size | Texture Reference |
|---|---|---|
| French Press | Coarse | Sea salt |
| Pour Over (V60, Chemex) | Medium-Fine | Table salt |
| Drip Coffee Maker | Medium | Sand |
| AeroPress | Medium to Fine | Table salt to fine sand |
| Espresso | Very Fine | Powdered sugar |
If you’re using a French press with a fine grind, those tiny particles will slip right through the metal mesh filter and into your cup. Coarsen up your grind, and that gritty problem often disappears.
Check and Replace Your Filters
Filters might seem like an afterthought, but they’re your primary defense against sediment. Paper filters should be stored flat and dry—wrinkled or damp filters can develop tiny tears that let fines through. Always check your filter before brewing.
For metal mesh filters (like those in French presses or some pour-overs), inspect the mesh regularly. Over time, these can develop small holes or stretched areas. If your French press filter looks warped or damaged, it’s time for a replacement. Most are inexpensive and easy to find online.
Did You Know? Rinsing paper filters with hot water before brewing doesn’t just remove papery taste—it also helps the filter seal better against the brewer, reducing the chance of grounds sneaking around the edges.
Fixing Chalky or Over-Extracted Coffee
Chalkiness is a bit different from grittiness. While gritty coffee has actual particles you can feel, chalky coffee has a dry, astringent mouthfeel that coats your tongue unpleasantly. This usually points to extraction problems rather than filtration issues.
Reduce Brewing Time or Temperature
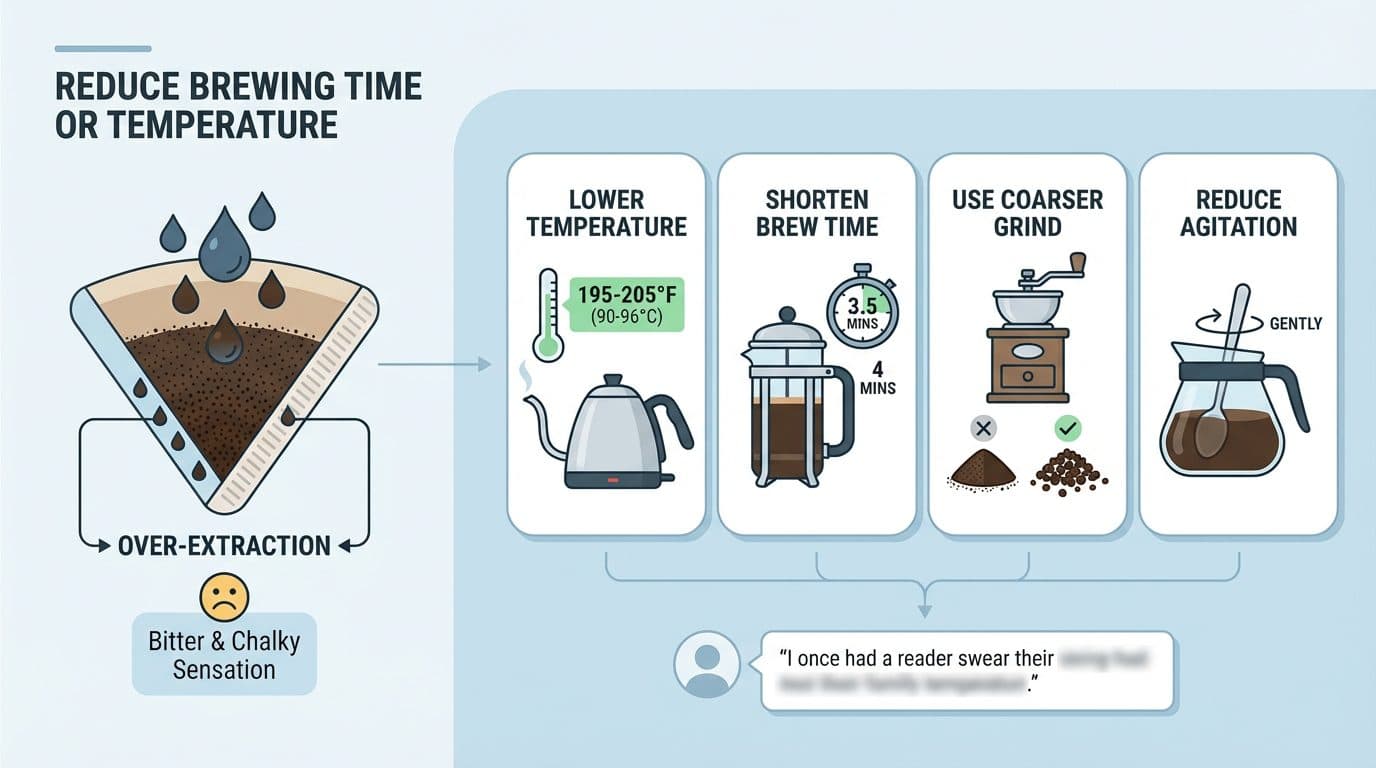
Over-extraction happens when water pulls too much from the coffee grounds, including bitter compounds that create that chalky sensation. If your coffee tastes both bitter and chalky, try these adjustments:
- Lower your water temperature: Aim for 195-205°F (90-96°C) rather than boiling
- Shorten brew time: For French press, try 3.5 minutes instead of 4
- Use a coarser grind: Larger particles extract more slowly
- Reduce agitation: Stir less or more gently during brewing
I once had a reader swear their coffee was always chalky no matter what they tried. Turned out they were using water straight off the boil and letting their French press steep for 6 minutes. A few simple timing adjustments transformed their morning cup completely.
Evaluate Your Coffee Beans
Stale coffee often produces a flat, chalky cup. Coffee beans start losing freshness about 2-3 weeks after roasting, and pre-ground coffee goes stale even faster. If your beans have been sitting in the pantry for months, they might be the problem.
Look for beans with a roast date on the bag rather than just a “best by” date. Buy in smaller quantities that you’ll use within 2-4 weeks, and store beans in an airtight container away from light and heat.
Key Takeaway: Fresh beans ground right before brewing make an enormous difference in both flavor and texture. If you’ve been using pre-ground coffee, switching to whole beans is one of the best upgrades you can make.
French Press Specific Fixes for Sediment
French press coffee is notorious for sediment issues because of its metal mesh filter. If your French press coffee feels like a mouthful of sand, here are some targeted solutions.
The Double-Filter Technique
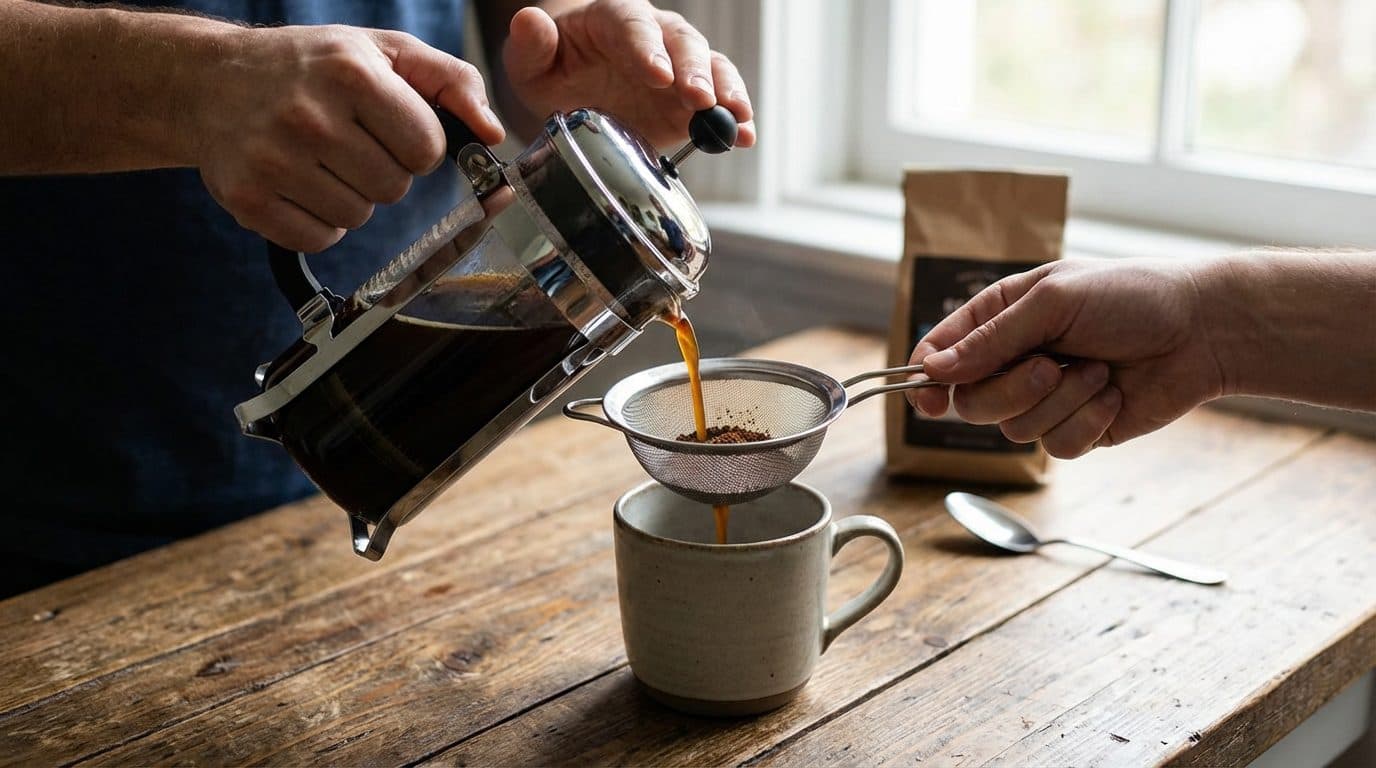
One trick I swear by is using a secondary filter when pouring. You can hold a fine-mesh sieve or even a paper filter over your cup as you pour from the French press. This catches the fine particles that escaped the plunger filter without changing the body and oils that make French press coffee special.
Perfect Your Plunge Technique
How you plunge matters more than you might think. Pressing down too quickly stirs up the sediment and forces fines through the mesh. Instead:
- Wait 30 seconds after brewing before plunging
- Press slowly and steadily—take about 20-30 seconds
- Stop pressing just before you hit the bed of grounds
- Pour immediately after plunging to prevent over-extraction
Also, don’t drink the last sip. The bottom of a French press cup will always contain more sediment, no matter how careful you are. Consider that last quarter-inch a sacrifice to the coffee gods.
Pour Over and Drip Coffee Troubleshooting
Even filtered brewing methods can produce gritty coffee if something’s off. Here’s what to check.
Ensure Proper Filter Placement
For cone-shaped filters (like V60 or Chemex), make sure the filter is properly seated with no gaps around the edges. Fold along the seam before placing it in the dripper, and rinse thoroughly so it clings to the walls.
In drip coffee makers, check that the filter basket is correctly aligned. Some models have baskets that can sit slightly crooked, creating gaps where grounds escape into your carafe.
Clean Your Equipment Regularly
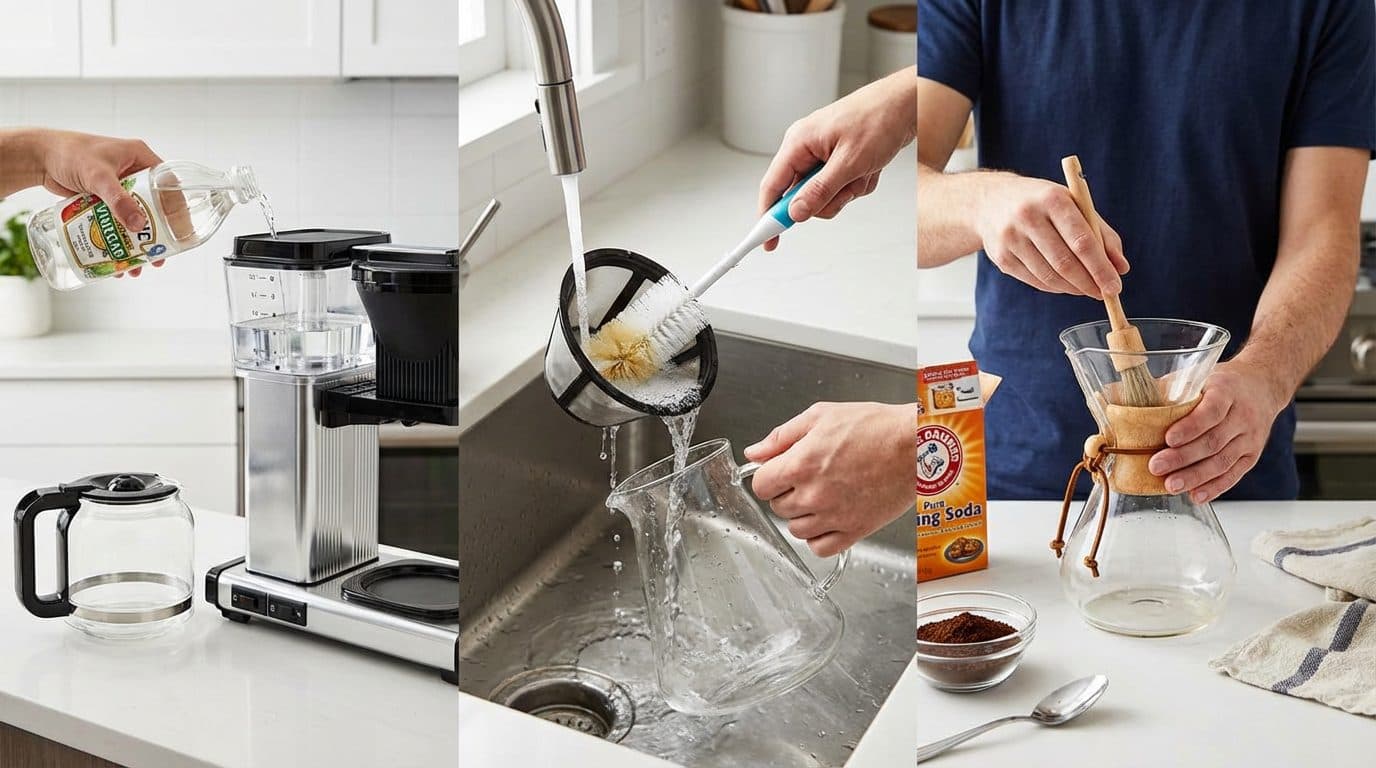
Old coffee oils and residue can build up in your brewer and affect both taste and texture. Descale your drip machine monthly with a vinegar solution, and wash all removable parts after every use. For pour-over gear, a simple rinse isn’t always enough—use a brush to scrub away oily buildup.
I neglected to clean my Chemex properly for a few months once, and the coffee slowly developed an off, almost gritty quality. A thorough cleaning with baking soda brought it right back to normal.
Frequently Asked Questions
Can I fix gritty coffee after it’s already brewed?
Yes, you can salvage a gritty cup by pouring it through a paper filter or fine-mesh sieve. This won’t fix over-extraction issues, but it will remove the physical particles making your coffee unpleasant. Let the coffee sit for a minute before pouring so the heaviest particles settle to the bottom.
Why is my espresso chalky when my other coffee is fine?
Espresso requires a much finer grind than other methods, which makes it prone to channeling (water finding shortcuts through the puck) and over-extraction. If your espresso tastes chalky, try a slightly coarser grind, lower dose, or shorter extraction time. Distribution and tamping technique also play a big role—uneven pucks extract unevenly.
Does water quality affect coffee texture?
Absolutely. Hard water with high mineral content can create a chalky mouthfeel and leave deposits in your equipment. Very soft water, on the other hand, can under-extract coffee. Filtered water or bottled spring water usually works best for home brewing.
Should I buy a more expensive grinder to fix grittiness?
In my experience, upgrading from a blade grinder to even a basic burr grinder makes a significant difference. However, you don’t need to spend hundreds of dollars. Entry-level burr grinders handle most home brewing needs just fine. Save the high-end grinders for when you get serious about espresso.
How do I know if my beans are too old?
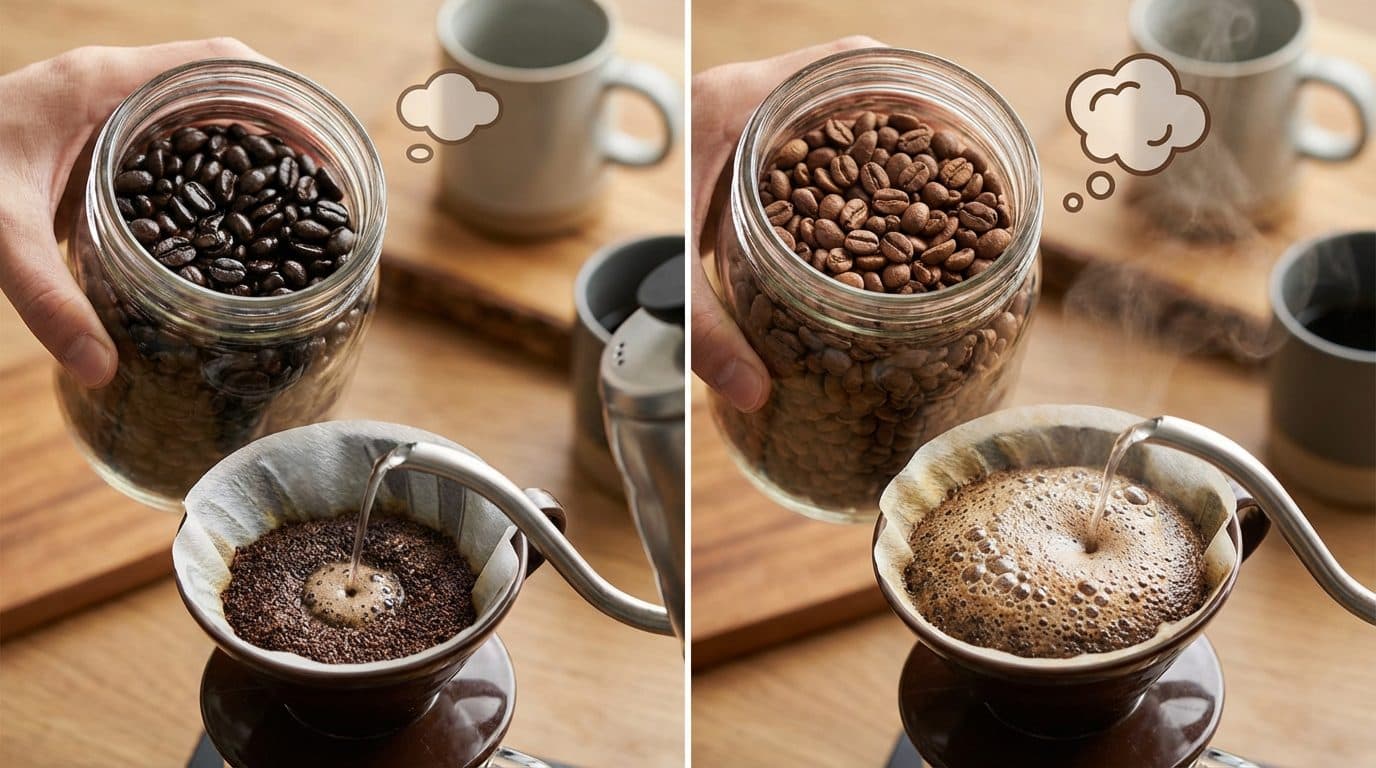
Old beans often look dull and oily (the oils migrate to the surface as beans age), and they may smell flat or stale. When ground, fresh beans produce more visible CO2 off-gassing (that bloom you see during pour-over). If your grounds barely bubble when hot water hits them, the beans are probably past their prime.
Conclusion and Next Steps
Fixing gritty or chalky coffee at home usually comes down to a few key adjustments: using a consistent grind size that matches your brewing method, ensuring your filters are intact and properly placed, and dialing in your extraction time and temperature. Most texture problems trace back to one or two of these factors.
Start by evaluating your grinder—if you’re still using a blade grinder, that’s likely your main culprit. Then work through the other potential causes systematically. Take notes on what you change and how it affects your cup. Within a few days of experimenting, you’ll have smooth, sediment-free coffee that’s a genuine pleasure to drink.
Remember, troubleshooting is part of the home barista journey. Every gritty cup teaches you something new about your equipment and technique. By following these steps, you’re already on your way to consistently better coffee—no more unpleasant surprises at the bottom of your mug.



Comments