


Table of Contents
- Why Create a Dedicated Latte Station at Home
- Essential Gear for Your Home Latte Station
- The Espresso Source
- Milk Frothing Tools
- Supporting Accessories
- Choosing Syrups and Flavor Add-Ons
- Classic Syrup Flavors to Start With
- Syrup Brands Worth Considering
- Beyond Syrups: Other Add-Ons
- Setting Up Your Latte Station Step by Step
- Step 1: Choose Your Location
- Step 2: Arrange Your Equipment
- Step 3: Organize Your Syrups and Add-Ons
- Step 4: Set Up Your Mug and Accessories Zone
- Tips for Keeping Your Station Organized
- Frequently Asked Questions
- How much does it cost to set up a basic latte station?
- Can I make lattes without an espresso machine?
- What's the best milk for frothing at home?
- How do I store syrups properly?
- Do I need special skills to make latte art?
- Wrapping Up Your Home Latte Station
Imagine waking up and walking a few steps to make yourself a perfectly crafted latte—no lines, no waiting, and exactly the way you like it. Building a simple latte station at home isn’t just about convenience; it’s about creating a small ritual that makes your mornings (or afternoons) feel a little more special. Whether you’re tired of spending money at coffee shops or you simply want to experiment with new flavors, setting up your own latte station is easier than you might think.
In this guide, you’ll learn what gear you actually need, how to pick the right syrups, and how to organize everything into a functional setup. By the end, you’ll have a clear roadmap to create a latte station that fits your space, budget, and taste preferences.
Why Create a Dedicated Latte Station at Home

Having a dedicated spot for making lattes changes the game. Instead of digging through cabinets for your milk frother or searching for that vanilla syrup you bought months ago, everything sits in one place, ready to go. This small change can turn a rushed morning coffee into something you actually look forward to.
For a cost comparison, use current local café prices and include beans or capsules, milk, syrups, filters, cleaning supplies, equipment, and maintenance. A home setup can lower cost per drink at sufficient volume, but the break-even point differs for every workflow.
Estimate savings before buying equipment: multiply expected weekly drinks by the café-versus-home cost difference, then subtract equipment and maintenance. This prevents an unverified anecdote from becoming the budget case.
Essential Gear for Your Home Latte Station
You don’t need professional barista equipment to make great lattes at home. Here’s a breakdown of the essentials, from must-haves to nice-to-haves.
The Espresso Source
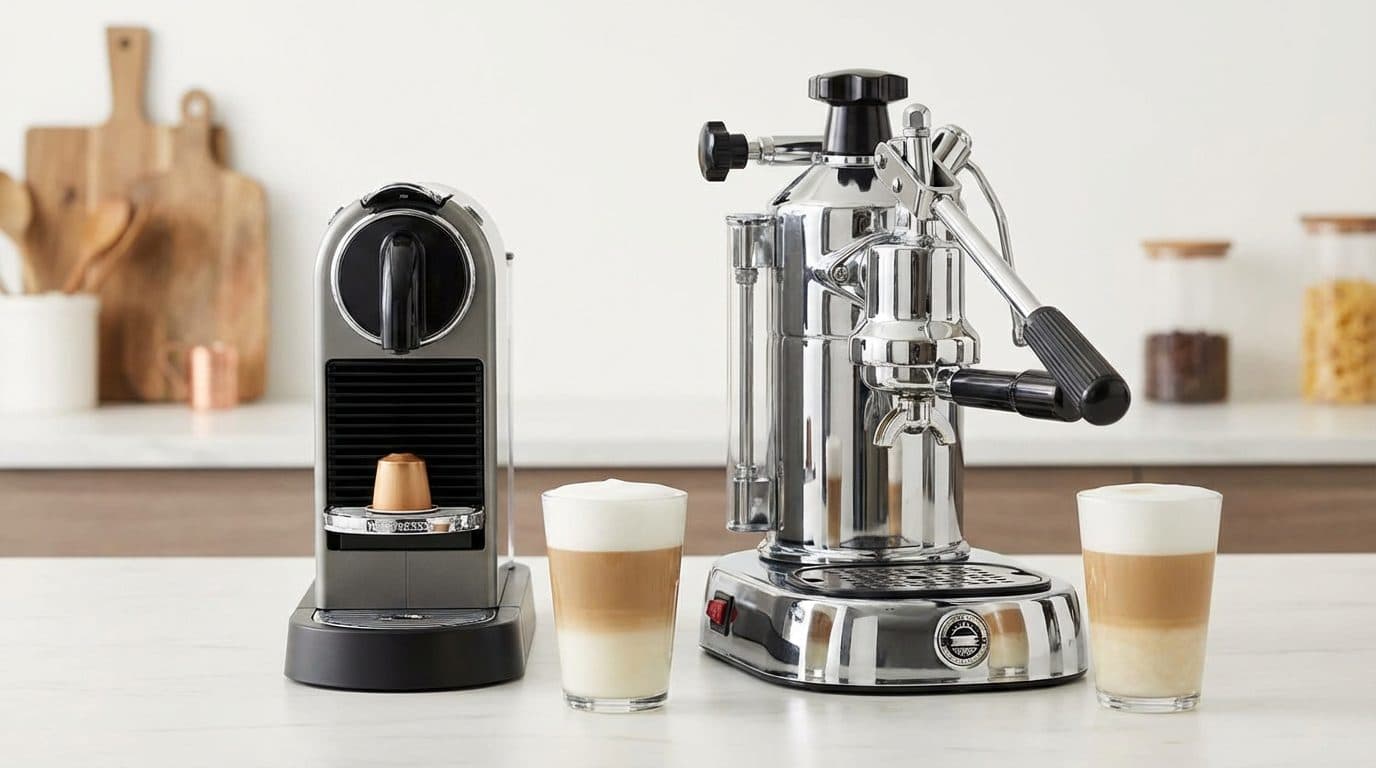
At the heart of any latte is espresso (or a strong coffee concentrate). You have several options depending on your budget:
- Espresso machine: Entry-level machines like the Breville Bambino or De’Longhi Dedica work well for beginners. They pull decent shots without requiring barista-level skills.
- Moka pot: A budget-friendly alternative that produces strong, espresso-like coffee. It won’t have crema, but the flavor is rich enough for milk drinks.
- AeroPress: With the right technique, you can brew a concentrated coffee that mimics espresso. Great for small spaces.
- Capsule machines: A short, repeatable workflow with model-specific warm-up, beverage size, capsule, cleaning, and milk steps.
If you’re just starting out, a Moka pot or Nespresso machine keeps things simple. You can always upgrade later once you know you’ll stick with the hobby.
Milk Frothing Tools

Steamed, frothy milk is what separates a latte from regular coffee with milk. Here are your options:
- Steam wand (on espresso machines): Gives you the most control and produces microfoam for latte art.
- Electric milk frother: Devices like the Breville Milk Café or Nespresso Aeroccino heat and froth milk automatically. Very beginner-friendly.
- Handheld frother: The cheapest option (usually under $15). It froths cold or pre-heated milk but doesn’t heat it.
- French press: Heat your milk separately, pour it into a French press, and pump the plunger rapidly. Surprisingly effective.
An electric frother can prioritize a low-attention workflow, but texture depends on the exact model, milk, fill level, settings, and cleaning. Compare the manufacturer instructions and the finished foam instead of expecting a perfect result.
Supporting Accessories
Beyond the main equipment, a few extras make the process smoother:
- A small scale for measuring coffee (especially if you grind your own beans)
- A knock box or small container for used coffee grounds
- A frothing pitcher if you’re using a steam wand
- Mugs or glasses you actually enjoy drinking from
- A small tray or mat to contain spills and keep things tidy
Choosing Syrups and Flavor Add-Ons
Syrups are where you can get creative and customize your lattes to match café drinks—or invent your own combinations. The syrup selection can make or break your home latte experience.
Classic Syrup Flavors to Start With
If you’re building your collection from scratch, these flavors cover most bases:
- Vanilla: The most versatile option. Works in almost any latte.
- Caramel: Adds sweetness with a buttery depth.
- Hazelnut: Nutty and slightly sweet, pairs well with chocolate.
- Mocha or chocolate: Essential for mochas and any chocolate-coffee combination.
Start with two or three flavors you know you’ll use. There’s no point in buying ten syrups that sit untouched for months.
Syrup Brands Worth Considering

Not all syrups taste the same. Here are some popular options:
- Torani: Widely available, affordable, and comes in dozens of flavors including sugar-free versions.
- Monin: Slightly more premium, with natural flavor options and a smoother taste profile.
- Jordan’s Skinny Syrups: If considering this brand, verify the exact product label, serving size, ingredients, and current local availability; “zero-calorie” and “sugar-free” apply only where the label states them.
- Homemade syrups: Simple syrup (equal parts sugar and water) infused with vanilla beans, lavender, or cinnamon is easy to make and tastes fresh.
Calculate syrup yield from the bottle volume and the measured amount used per drink. Start below the product label’s suggested serving, taste, and record the amount rather than assuming a universal 15 ml dose or drink count.
Beyond Syrups: Other Add-Ons
Syrups aren’t your only option for flavor. Consider keeping these on hand:
- Cocoa powder or chocolate shavings for dusting
- Cinnamon or nutmeg for a warm, spiced touch
- Whipped cream for indulgent drinks
- Alternative milks (oat, almond, coconut) for different textures and flavors
Setting Up Your Latte Station Step by Step
Now that you know what gear and ingredients you need, let’s talk about the actual setup. The goal is to create a workflow that feels natural and keeps everything within arm’s reach.
Step 1: Choose Your Location
Pick a spot with access to an electrical outlet (for your espresso machine or frother) and ideally near your sink for easy cleanup. A section of kitchen counter works best, but a bar cart or small table can also work if counter space is limited.
Step 2: Arrange Your Equipment
Place your espresso machine or coffee maker as the centerpiece. Position your milk frother nearby. Keep your knock box or grounds container close to where you’ll be working with coffee. The idea is to minimize movement—you shouldn’t have to walk across the kitchen mid-process.
Step 3: Organize Your Syrups and Add-Ons

Group your syrups together on a small tray or in a caddy. This keeps bottles from cluttering the counter and makes it easy to grab what you need. Store extra bottles or seasonal flavors in a cabinet nearby.
Step 4: Set Up Your Mug and Accessories Zone
Keep your favorite mugs stacked or hanging near the station. Add a small container for spoons, a napkin holder, and any toppings you use regularly. Everything should be visible and accessible.
Here’s a real-world example: a simple latte station might include a Nespresso machine, an electric frother, three syrup bottles on a wooden tray, two mugs, and a small dish for used pods. Total footprint: about two feet of counter space.
Tips for Keeping Your Station Organized
A latte station only works if you maintain it. Here are some practical tips to keep things running smoothly:
- Clean as you go: Wipe down the steam wand or frother after each use. Milk residue builds up fast and gets harder to clean over time.
- Rotate your syrups: Follow the exact product label for storage and use after opening; ingredients, preparation, and packaging change shelf life.
- Restock before you run out: Keep backup coffee pods, beans, or milk so you’re never caught without essentials.
- Declutter regularly: If you haven’t used a syrup or accessory in three months, move it out of the station.
A quick five-minute tidy-up once a week keeps your station looking inviting rather than chaotic.
Frequently Asked Questions
How much does it cost to set up a basic latte station?

Setup cost depends on the brewer, grinder, frother, region, retailer, and whether you already own suitable gear. Price the minimum workflow first and add equipment only when it solves a measured problem.
Can I make lattes without an espresso machine?
Yes. A Moka pot, AeroPress, or even strong French press coffee can serve as your espresso base. The key is using a concentrated coffee-to-water ratio. The result won’t be identical to true espresso, but it works well in milk-based drinks where the coffee flavor blends with other ingredients.
What’s the best milk for frothing at home?
Whole milk froths the easiest and produces creamy, stable foam. For non-dairy options, barista-edition oat milk (like Oatly Barista) is specifically formulated to froth well. Almond and soy milk can work but may produce thinner foam.
How do I store syrups properly?
Follow the commercial product label for storage after opening. For homemade syrup, use a tested recipe, clean containers, refrigeration when required, and that recipe’s storage limit; ingredients and preparation change shelf life.
Do I need special skills to make latte art?
Basic latte art requires practice, but it’s not essential for enjoying great lattes. Focus first on getting your milk texture right—smooth, velvety microfoam without large bubbles. Once you’re comfortable with that, you can start experimenting with simple patterns like hearts.
Wrapping Up Your Home Latte Station
Start with a brewer, a suitable milk tool, ingredients you use, and a clear cleaning zone. Organize the workflow in one place, then add equipment only when it solves a measured limitation.
The best part is that your station can grow with you. As you get more comfortable, you might upgrade your espresso machine, experiment with new flavors, or even try your hand at latte art. For now, pick your starting gear, clear a bit of counter space, and make your first homemade latte. You might be surprised how quickly it becomes your favorite part of the day.



Comments