


Table of Contents
- What Makes Nel Drip Coffee Special?
- Key Differences From Other Brewing Methods
- What You'll Need to Brew Coffee With a Cloth Filter
- Essential Gear
- Coffee and Water
- Step-by-Step Nel Drip Brewing Guide
- Preparing Your Cloth Filter
- The Brewing Process
- Taste Profile You Can Expect
- Cloth Filter Care and Maintenance
- After Every Brew
- Weekly Maintenance
- Common Maintenance Mistakes
- Troubleshooting Your Nel Drip Brew
- Problem: Coffee Tastes Sour or Underdeveloped
- Problem: Coffee Tastes Bitter or Harsh
- Problem: Brew Takes Forever to Drain
- Frequently Asked Questions
- Can I use any cloth as a coffee filter?
- How often should I replace my cloth filter?
- Can I freeze my cloth filter for storage?
- Is nel drip better than paper pour-over?
- What roast level works best for nel drip brewing?
- Conclusion: Your Next Steps With Cloth Filter Brewing
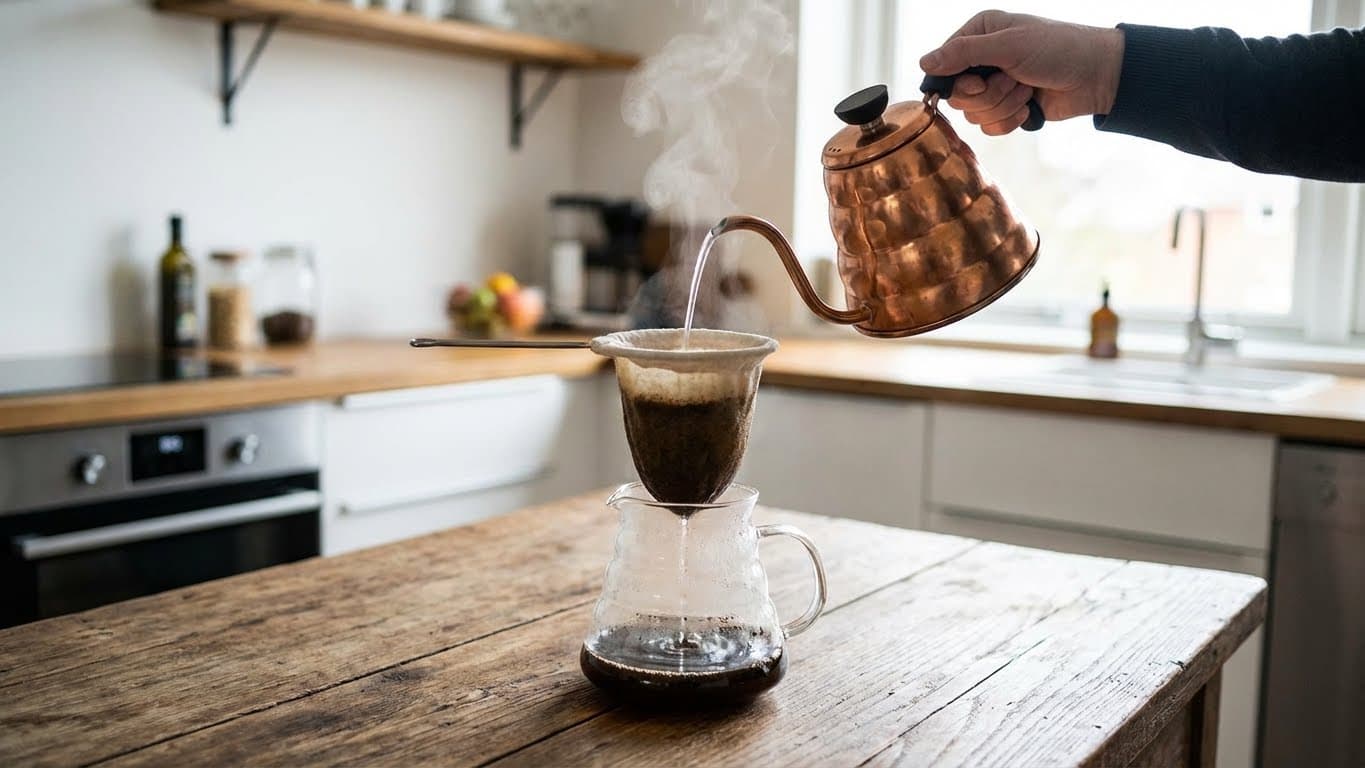
Have you ever wondered why coffee enthusiasts in Japan have been using cloth filters for over a century? The answer lies in the cup: a remarkably smooth, full-bodied brew with a sweetness that paper filters simply cannot replicate. Nel drip coffee, named after the flannel cloth used in the process, represents one of the most elegant and rewarding ways to brew coffee at home. If you’re ready to brew coffee with a cloth filter and experience what many consider the pinnacle of manual brewing, you’re in the right place.
In this guide, I’ll walk you through everything you need to know about nel drip brewing. You’ll learn why cloth filters produce such exceptional coffee, what equipment you need, and the exact step-by-step process to master this technique. I’ve spent years experimenting with various cloth filter methods, and I’m excited to share the insights that will help you nail this brewing style from your very first attempt.
What Makes Nel Drip Coffee Special?
Nel drip sits in a beautiful middle ground between paper pour-over and French press. The cloth filter allows more coffee oils to pass through than paper, giving you that rich, velvety mouthfeel. At the same time, it catches fine sediment that would slip through a metal mesh. The result? A clean cup with remarkable body and complexity.
In my experience, nel drip produces coffee with a natural sweetness that surprised me the first time I tried it. The cloth filter seems to soften any harsh or bitter notes while amplifying the coffee’s inherent flavors. Many specialty coffee shops in Tokyo still use this method for their signature brews, and once you taste it, you’ll understand why.
Key Differences From Other Brewing Methods
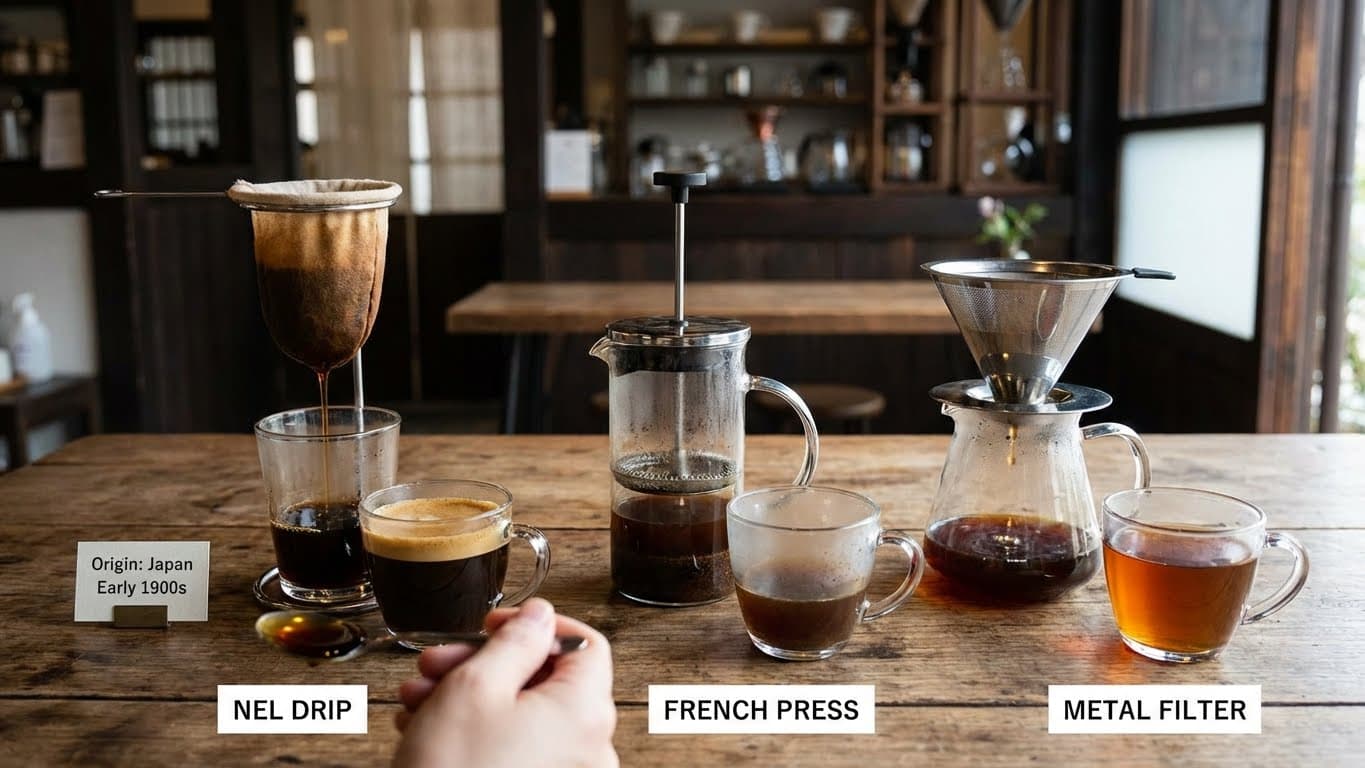
- Compared to paper filters: More oils pass through, creating fuller body and enhanced sweetness
- Compared to French press: Much cleaner cup without the muddy sediment at the bottom
- Compared to metal filters: Slightly less body but noticeably more clarity in the cup
Did You Know? Nel drip originated in Japan during the early 1900s and became the preferred brewing method in kissaten (traditional Japanese coffee houses). Some of these establishments have been using the same nel drip technique for over 70 years.
What You’ll Need to Brew Coffee With a Cloth Filter
Before we dive into the brewing process, let’s gather your equipment. The good news is that nel drip doesn’t require a huge investment, though you will need a few specific items.
Essential Gear
- Cloth filter (nel): Look for 100% cotton flannel filters designed for coffee brewing
- Filter holder/handle: A wire or wooden frame that holds the cloth filter open
- Gooseneck kettle: Essential for controlled, precise pouring
- Coffee grinder: Burr grinder preferred for consistent particle size
- Scale: Accuracy matters in nel drip brewing
- Timer: Your phone works perfectly fine
- Server or carafe: To catch your brewed coffee
Coffee and Water
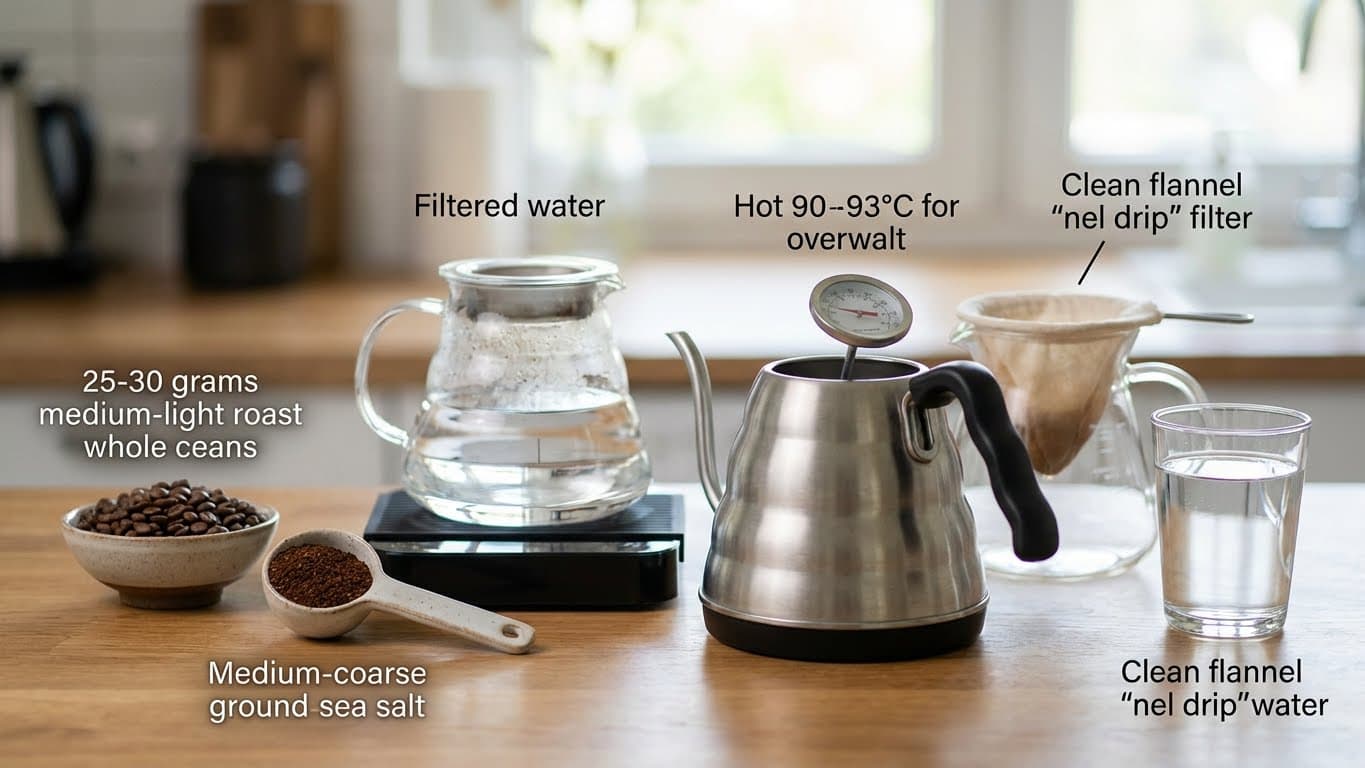
- Coffee beans: 25-30 grams of freshly roasted coffee (medium to medium-light roast works beautifully)
- Water: 350-400ml of filtered water heated to 90-93°C (194-199°F)
- Grind size: Medium to medium-coarse, similar to sea salt
Barista Tip: Use filtered water for a cleaner taste. Hard water with lots of minerals can mask the delicate sweetness that makes nel drip special. If your tap water tastes off, your coffee will too.
Step-by-Step Nel Drip Brewing Guide
Now for the fun part. Nel drip requires a bit more attention than your average pour-over, but the technique isn’t complicated once you understand the rhythm. Think of it as a meditative process rather than a rushed morning routine.
Preparing Your Cloth Filter
If you’re using a brand new cloth filter, you’ll need to prepare it properly. This step is crucial and often overlooked by beginners.
- Boil your new cloth filter in water for 10-15 minutes to remove any manufacturing residue or sizing
- After boiling, rinse thoroughly under cold water
- For best results, brew a “sacrificial” batch of inexpensive coffee through the filter and discard it
- Store the filter in a container of clean water in your refrigerator until ready to use
In short: never use a dry cloth filter. The fabric should always be damp before brewing. A dry filter will produce uneven extraction and off-flavors.
The Brewing Process
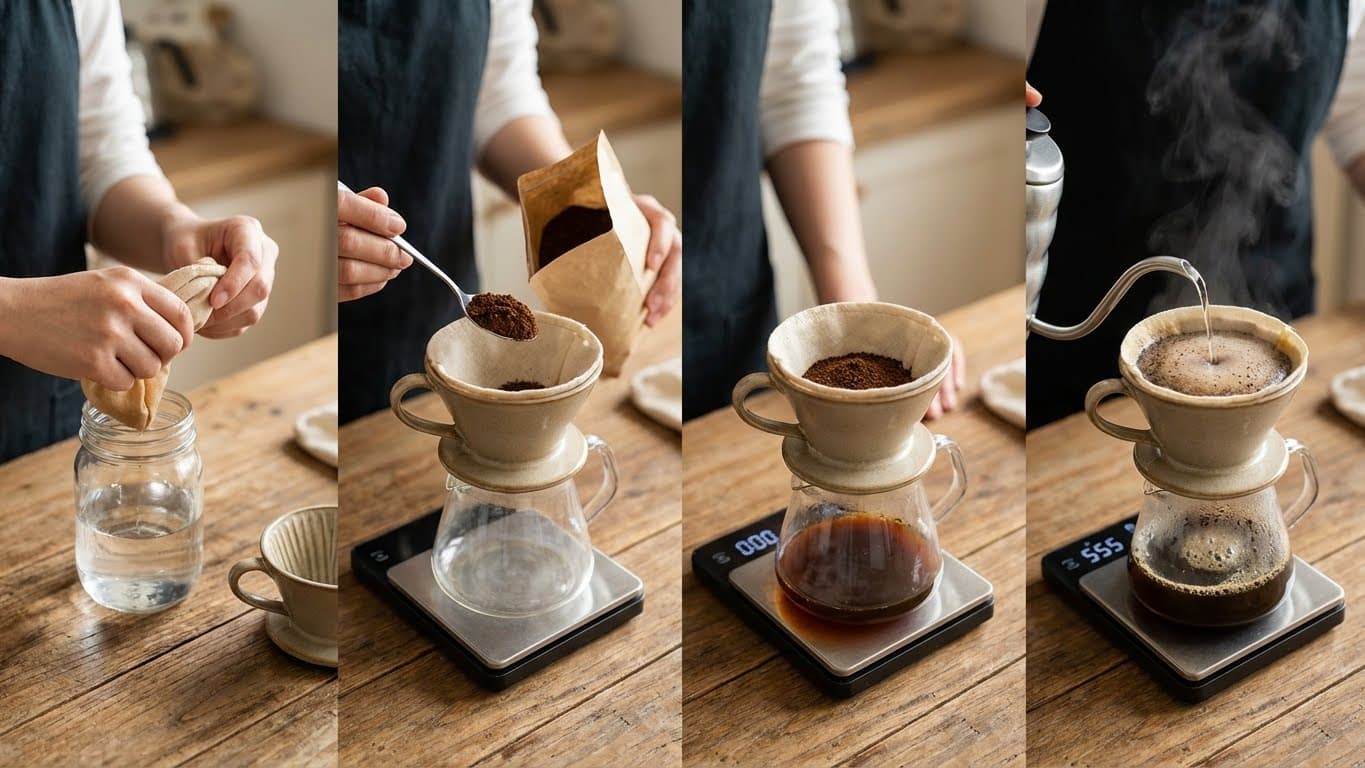
- Prepare your filter: Remove the cloth filter from its water storage, wring it out gently but thoroughly, and attach it to your holder
- Add coffee grounds: Place 25-30 grams of medium-ground coffee into the filter and give it a gentle shake to level the bed
- Position over server: Set up your filter holder over your serving vessel with the scale underneath
- Bloom phase: Start your timer and slowly pour 50-60ml of water in a circular motion to saturate all the grounds. Wait 30-45 seconds as the coffee degasses
- Main pour: Begin pouring in slow, steady spirals from the center outward, then back to the center. Maintain a thin, consistent stream
- Pacing: Pour in intervals, adding water every 30 seconds or so. Let the water level drop slightly before adding more
- Finish: Stop pouring once you’ve added 350-400ml total. Your target brew time is 3-4 minutes
- Remove and serve: Once dripping slows significantly, remove the filter and enjoy your coffee
Barista Tip: The key to nel drip is patience. Pour slower than you think you should. The cloth filter drains more slowly than paper, so if you pour too aggressively, you’ll overflow the filter and create a mess. Trust me, I learned this the hard way.
Taste Profile You Can Expect
When brewed correctly, nel drip coffee delivers a remarkably smooth cup with pronounced sweetness and a syrupy body. You’ll notice more chocolate and caramel notes compared to paper filter brewing, with a rounded, less acidic finish. The mouthfeel is silky rather than thin, almost like the coffee has been polished.
Cloth Filter Care and Maintenance
Here’s where nel drip gets a bit demanding. Your cloth filter requires proper care between uses, or it will develop off-flavors and eventually ruin your coffee. This is the trade-off for such exceptional brewing quality.
After Every Brew
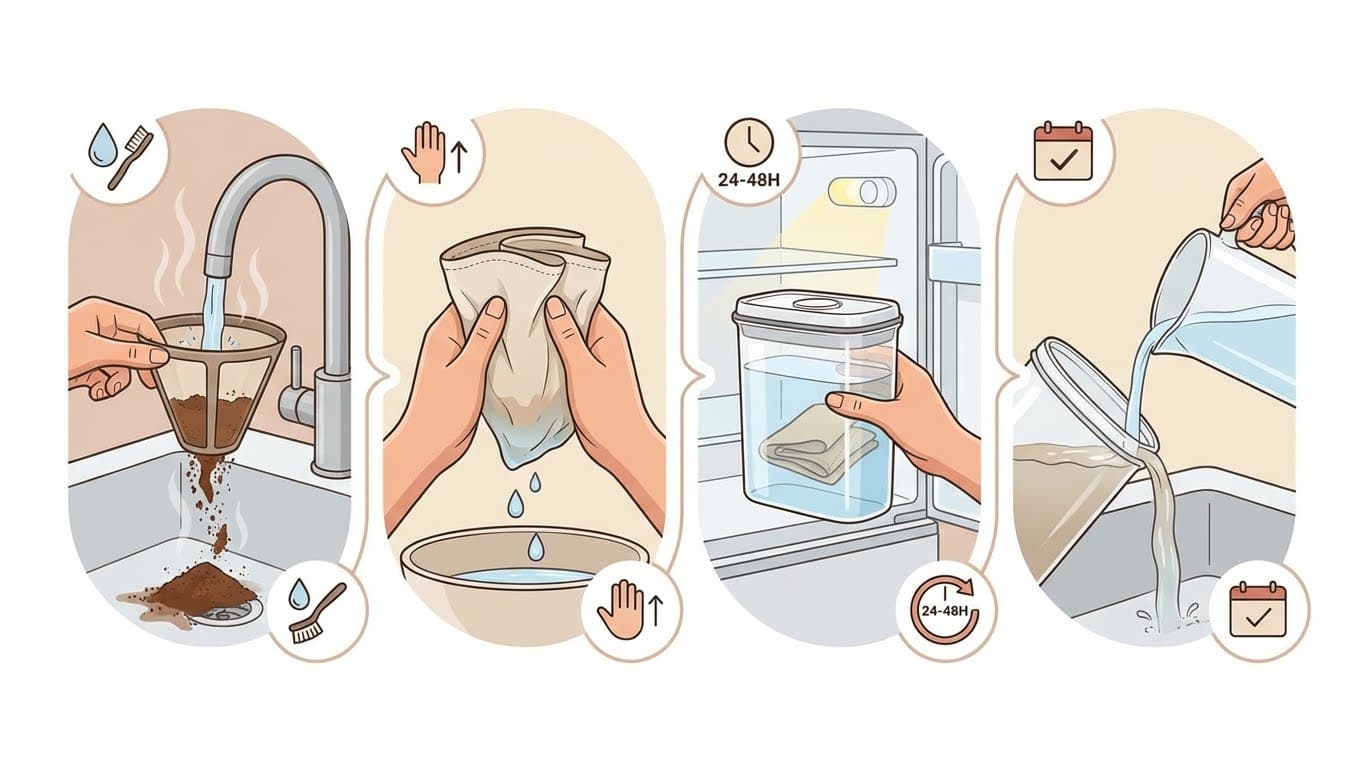
- Immediately rinse the filter under hot running water to remove all coffee grounds
- Gently squeeze out excess water (don’t wring too aggressively)
- Store the damp filter in a container of clean water in your refrigerator
- Change the storage water every 24-48 hours to prevent bacterial growth
Weekly Maintenance
- Boil your filter for 10-15 minutes once a week to remove built-up oils
- Never use soap or detergent on your cloth filter
- If you notice any off smells, boil immediately and consider replacing the filter
A well-maintained cloth filter can last 2-3 months with daily use. You’ll know it’s time for a replacement when the filter starts clogging more quickly, drains unevenly, or develops a persistent odor even after boiling.
Common Maintenance Mistakes
I’ve seen many home baristas give up on nel drip because they let their filter dry out or didn’t rinse it properly. The biggest mistake is leaving the filter in the open air. Once the cloth dries with coffee oils still present, those oils go rancid and create a stale, unpleasant flavor in your next brew. Always keep that filter wet and cold.
Troubleshooting Your Nel Drip Brew
Even experienced brewers run into issues sometimes. Here’s how to diagnose and fix the most common problems with cloth filter brewing.
Problem: Coffee Tastes Sour or Underdeveloped
- Your water temperature might be too low. Aim for 90-93°C
- Grind finer to increase extraction
- Pour more slowly to extend contact time
- Check that you’re using enough coffee (1:13-1:15 coffee-to-water ratio)
Problem: Coffee Tastes Bitter or Harsh
- Water temperature too high—let it cool after boiling
- Grind coarser to reduce extraction
- Brew time too long? Increase your pour rate slightly
- Check your filter for built-up oils that need cleaning
Problem: Brew Takes Forever to Drain
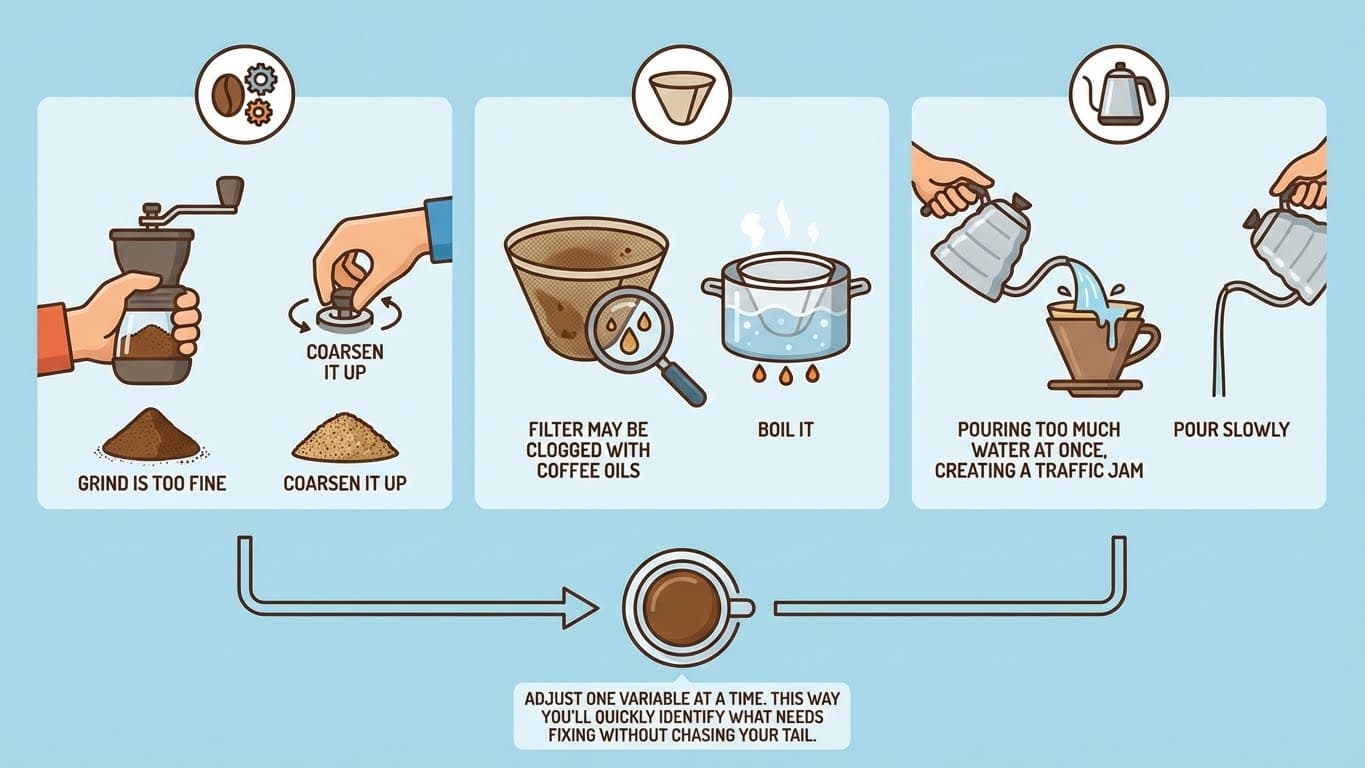
- Grind is too fine—coarsen it up
- Filter may be clogged with coffee oils (boil it)
- You’re pouring too much water at once, creating a traffic jam
To sum up: when something tastes off, adjust one variable at a time. This way you’ll quickly identify what needs fixing without chasing your tail.
Frequently Asked Questions
Can I use any cloth as a coffee filter?
Technically, any unbleached cotton fabric will work, but I recommend purchasing filters specifically made for coffee brewing. They’re woven at the right density and pre-cleaned for food contact. Using random fabric from around your house introduces unknown chemicals and inconsistent results.
How often should I replace my cloth filter?
With proper daily care, expect 2-3 months of use from a single filter. If you brew less frequently, it might last longer. Replace it immediately if you notice persistent off-flavors, slow drainage, or any visible deterioration in the fabric.
Can I freeze my cloth filter for storage?
Yes, this is actually a great option if you don’t brew daily. Rinse the filter thoroughly, squeeze out excess water, seal it in a zip-lock bag, and freeze. When ready to use, thaw under warm running water. This prevents bacterial growth during extended storage.
Is nel drip better than paper pour-over?
Neither is objectively “better”—they produce different results. Nel drip gives more body and sweetness, while paper pour-over offers more clarity and brightness. Many coffee lovers appreciate both methods for different beans and moods. I tend to reach for nel drip when I want comfort in my cup.
What roast level works best for nel drip brewing?
Medium and medium-light roasts shine particularly well with this method. The cloth filter’s ability to enhance sweetness and body complements these roast profiles beautifully. Darker roasts work too but can sometimes taste overly intense with the added oil content.
Conclusion: Your Next Steps With Cloth Filter Brewing
Learning to brew coffee with a cloth filter opens up a whole new dimension of flavor that many home baristas never experience. Yes, nel drip requires more attention and care than dropping a paper filter into your Chemex, but the reward is genuinely special. That first sip of properly brewed nel drip coffee—smooth, sweet, and impossibly clean—makes the extra effort worthwhile.
Start by getting yourself a quality cloth filter and the basic equipment. Commit to proper filter care from day one, and you’ll avoid the common pitfalls that discourage beginners. Practice the slow, patient pour technique, and don’t get frustrated if your first few attempts aren’t perfect. Like any craft, nel drip brewing rewards consistency and attention.
Life is too short for bad coffee, and once you’ve tasted what a cloth filter can do, you’ll understand why this century-old Japanese tradition continues to captivate coffee lovers around the world. Grab that gooseneck kettle and start brewing—your best cup might be just a few pours away.

Comments