


Table of Contents
- The Science Behind Milk Foam Stability
- Why Bubbles Pop
- Common Culprits Behind Disappearing Foam
- 1. You're Using the Wrong Milk
- 2. Your Milk Temperature Is Off
- 3. Your Steaming Technique Needs Work
- 4. Your Equipment Is Contaminated
- 5. Your Milk Isn't Fresh
- How to Create Long-Lasting Foam
- Step 1: Start With Cold, Fresh Milk
- Step 2: Purge Your Steam Wand
- Step 3: Position the Wand Correctly
- Step 4: Add Air Early, Then Submerge
- Step 5: Stop at the Right Temperature
- Step 6: Polish and Pour
- Troubleshooting Specific Foam Problems
- Foam Looks Great But Disappears Within a Minute
- Foam Is Thick and Stiff But Separates From the Milk
- Foam Has Large Visible Bubbles
- Using a Handheld Frother and Foam Won't Last
- Frequently Asked Questions
- Does the type of cup affect foam stability?
- Why does coffee shop foam last longer than mine?
- Can I re-steam milk to improve the foam?
- Does altitude affect foam stability?
- Why does my foam taste burnt even though it looks fine?
- Conclusion and Your Next Steps
You’ve just steamed your milk to velvety perfection, poured a beautiful latte, and within seconds, that gorgeous foam has vanished into thin air. Frustrating, right? If you’ve ever wondered why your foam disappears so fast, you’re not alone. This is one of the most common complaints I hear from home baristas, and the good news is that it’s almost always fixable.
In this guide, we’ll dig into the science behind foam stability, explore the most common culprits behind disappearing foam, and give you practical solutions to create foam that lasts from the first sip to the last. Life is too short for flat lattes, so let’s get your foam game sorted.
The Science Behind Milk Foam Stability
Before we troubleshoot, it helps to understand what’s actually happening in your milk pitcher. Milk foam is essentially a network of tiny air bubbles surrounded by proteins and fats. When you steam milk, you’re doing two things: incorporating air and heating the proteins so they unfold and stabilize those bubbles.
The key players here are whey proteins and casein proteins. When heated to the right temperature (typically between 55-65°C or 130-150°F), these proteins create a protective layer around each air bubble. Think of it like a microscopic bubble wrap that keeps everything intact.
Why Bubbles Pop
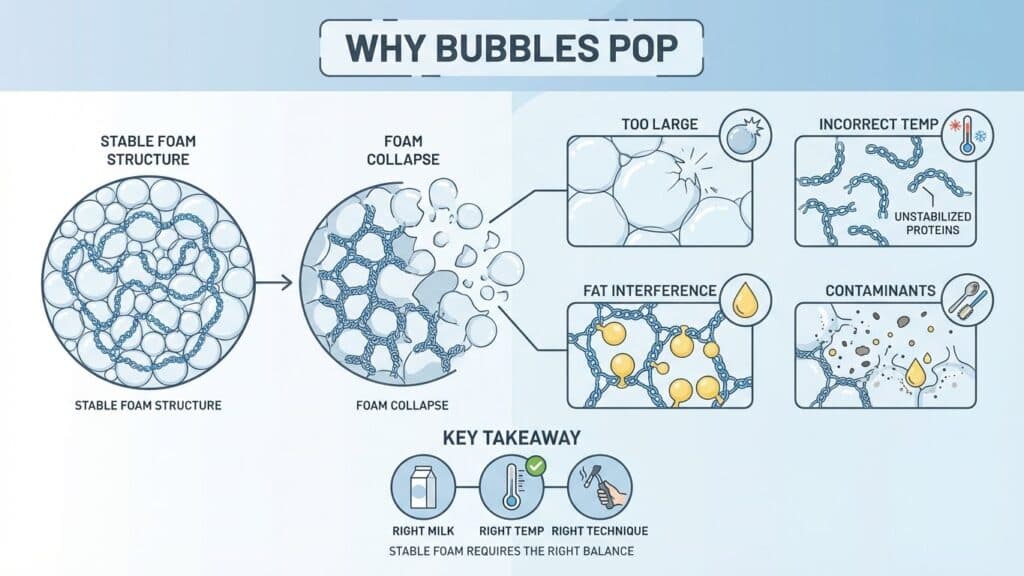
Foam collapses when this protein structure fails. This can happen for several reasons:
- The bubbles are too large – bigger bubbles have thinner walls and pop more easily
- The proteins haven’t properly stabilized – usually from incorrect temperature
- Fat content interferes – too much or poorly emulsified fat destabilizes the structure
- Contaminants break down the foam – residual soap, oils, or old milk residue
Key Takeaway: Stable foam requires the right milk, the right temperature, the right technique, and clean equipment. Miss any one of these, and your foam will suffer.
Common Culprits Behind Disappearing Foam
In my experience, foam problems usually come down to one of these five issues. Let’s break them down so you can identify what’s going wrong in your setup.
1. You’re Using the Wrong Milk
Not all milk foams equally. The protein and fat content dramatically affects foam stability. Whole milk, for example, creates rich and creamy foam but can collapse faster if overheated. Skim milk produces more voluminous foam with better stability, but the texture can feel thin and airy.
Here’s what I’ve found works best:
| Milk Type | Foam Volume | Foam Stability | Best For |
|---|---|---|---|
| Whole Milk | Medium | Medium | Lattes, creamy drinks |
| 2% Milk | Medium-High | Good | All-around use |
| Skim Milk | High | Excellent | Cappuccinos, dry foam |
| Oat Milk (Barista) | Medium | Good | Dairy-free lattes |
| Almond Milk | Low | Poor | Not recommended for foam |
If you’re using plant-based milk, always choose a “barista edition” version. These are specifically formulated with added oils and stabilizers to foam properly. Regular oat or almond milk from the carton often lacks the protein structure needed for lasting foam.
2. Your Milk Temperature Is Off
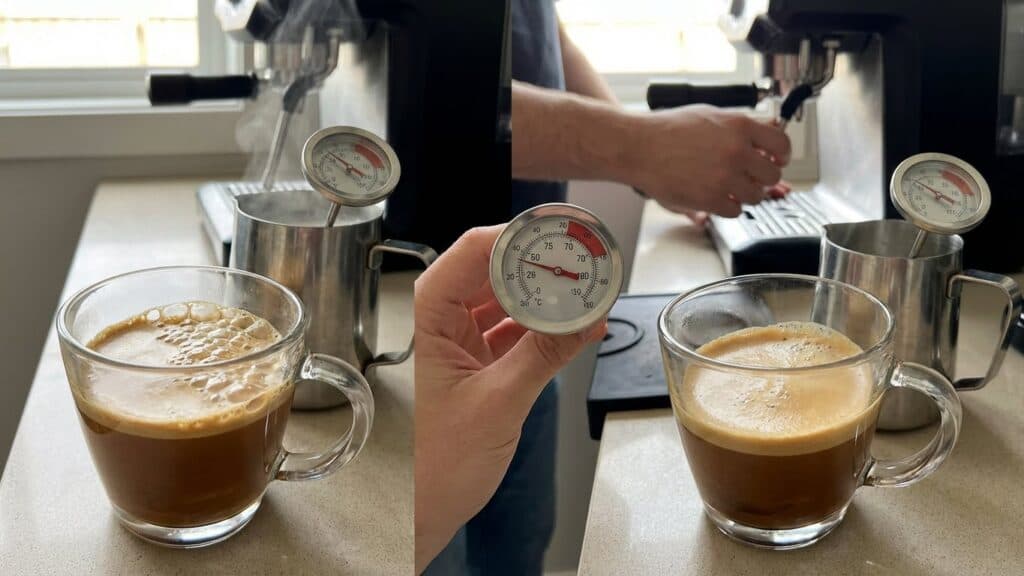
Temperature is crucial. Overheated milk is the number one foam killer I see with home baristas. When milk exceeds 70°C (158°F), the proteins start to break down and lose their ability to hold air bubbles. The result? Foam that looks great for about ten seconds, then deflates into a sad, thin layer.
On the flip side, underheated milk won’t foam properly either. The proteins need enough heat to unfold and create that protective network around the bubbles.
Barista Tip: Invest in a milk thermometer or use the touch test. When the pitcher becomes too hot to hold comfortably against your palm, stop steaming. This usually indicates you’re in the 60-65°C sweet spot.
3. Your Steaming Technique Needs Work
Technique matters more than equipment in most cases. The goal is to create microfoam—tiny, uniform bubbles that you can barely see. Large, visible bubbles drain quickly and pop easily.
Common technique mistakes include:
- Introducing air too late – you should add air early while the milk is still cold
- Keeping the wand too deep – this heats without aerating
- Keeping the wand too shallow – this creates large, unstable bubbles
- Not creating a vortex – the spinning motion integrates air evenly
Here’s a quick scenario: imagine you’re steaming milk but only hearing occasional gurgling sounds. That’s air being introduced in big bursts, creating large bubbles. Instead, you want a consistent “tearing paper” sound, which indicates tiny air bubbles being incorporated smoothly.
4. Your Equipment Is Contaminated
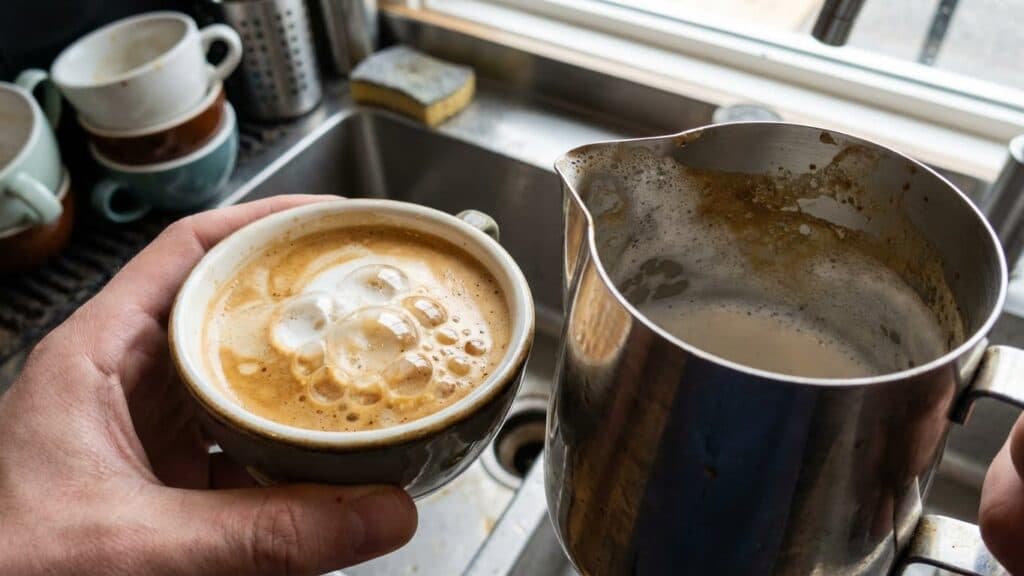
This one catches a lot of people off guard. Even trace amounts of dish soap, coffee oils, or old milk residue can destroy foam stability. These contaminants interfere with the protein structure and cause bubbles to collapse rapidly.
I’ve seen beautiful foam disappear in seconds simply because the pitcher wasn’t rinsed thoroughly after washing. The same goes for cups—if there’s any residue from previous drinks, your foam won’t last.
5. Your Milk Isn’t Fresh
Older milk foams poorly. As milk ages, the proteins begin to break down, reducing their ability to stabilize air bubbles. If your milk is approaching its expiration date or has been open for more than a week, you might notice your foam quality declining.
Always use fresh, cold milk straight from the refrigerator. Milk that’s been sitting out at room temperature, even for thirty minutes, won’t foam as well as properly chilled milk.
How to Create Long-Lasting Foam
Now that we’ve identified the problems, let’s focus on solutions. Follow these steps for foam that holds its shape throughout your entire drink.
Step 1: Start With Cold, Fresh Milk
Always pour your milk straight from the fridge. Cold milk gives you more time to work with during steaming, allowing you to properly incorporate air before the milk heats up. Fill your pitcher no more than one-third full to leave room for expansion.
Step 2: Purge Your Steam Wand
Before steaming, blast your steam wand for a second or two. This clears any condensed water from the wand, which would otherwise add unwanted liquid to your milk and dilute the foam.
Step 3: Position the Wand Correctly
Place the steam wand tip just below the milk surface, slightly off-center. This position allows you to create a spinning vortex while introducing air. You should hear that “tearing paper” sound, which indicates proper aeration.
Step 4: Add Air Early, Then Submerge
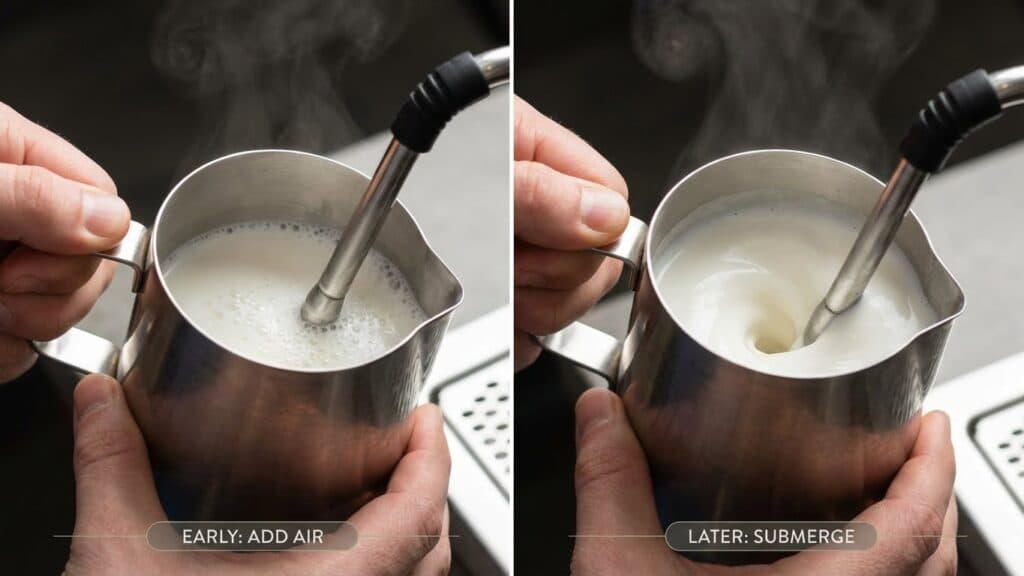
During the first few seconds while the milk is still cold, keep the wand near the surface to incorporate air. Once you’ve added enough volume (the milk should increase by about 25-50%), lower the wand deeper to heat the milk without adding more air. This phase is about spinning and integrating the foam evenly.
Step 5: Stop at the Right Temperature
As mentioned earlier, aim for 60-65°C (140-150°F). When the pitcher becomes uncomfortably hot to touch, stop immediately. Overheating is the fastest way to ruin otherwise perfect foam.
Step 6: Polish and Pour
After steaming, tap the pitcher gently on the counter to pop any large surface bubbles. Then swirl the milk vigorously to integrate the foam with the liquid milk. This creates a unified, glossy texture that pours smoothly and holds its shape.
Barista Tip: If you see visible bubbles on the surface after swirling, tap and swirl again. You want the foam to look like wet paint—smooth and reflective, with no visible bubbles.
Troubleshooting Specific Foam Problems
Let’s address some specific scenarios you might encounter.
Foam Looks Great But Disappears Within a Minute
This usually indicates overheated milk. Even if your technique is perfect, exceeding that 65°C threshold causes rapid foam breakdown. Try stopping 5-10 degrees earlier than you normally would.
Foam Is Thick and Stiff But Separates From the Milk
You’ve created too much foam without properly integrating it. This happens when you keep the wand near the surface for too long. Spend more time in the “spinning” phase with the wand submerged to create a more homogeneous texture.
Foam Has Large Visible Bubbles
Your wand position is too high, or you’re introducing air too aggressively. Lower the wand slightly and listen for that consistent tearing sound rather than loud gurgling.
Using a Handheld Frother and Foam Won’t Last
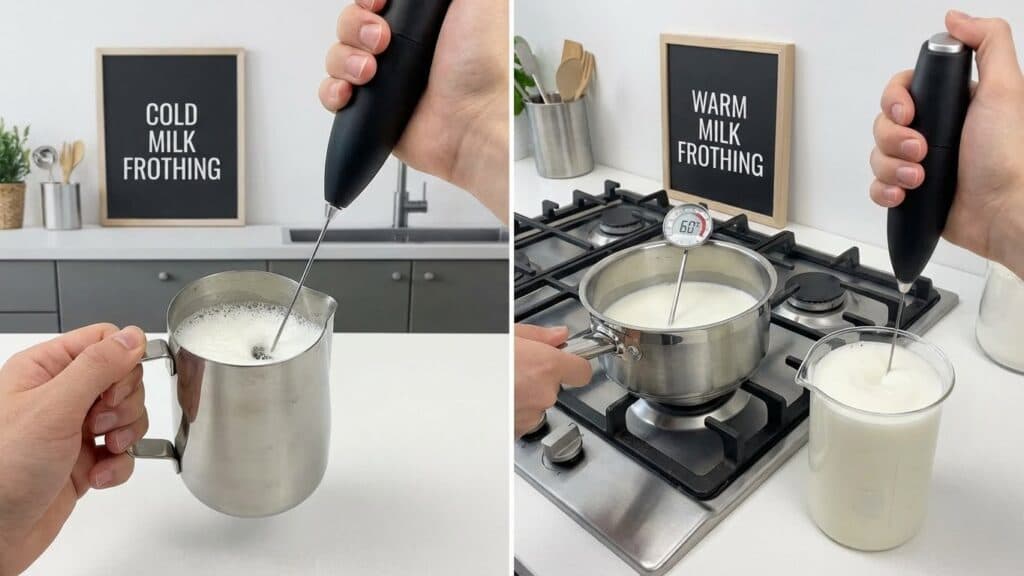
Handheld frothers have limitations. They create foam through mechanical whipping rather than steam injection, which typically produces less stable bubbles. To improve results, heat your milk separately to around 60°C first, then froth. The warmer milk will hold foam better than cold milk frothed by a handheld device.
Frequently Asked Questions
Does the type of cup affect foam stability?
Yes, it can. Wider cups expose more foam surface area to air, which can accelerate collapse. Taller, narrower cups help foam last longer. Additionally, preheating your cup keeps the foam warmer, which maintains its structure better than pouring into a cold cup.
Why does coffee shop foam last longer than mine?
Professional machines typically have more powerful steam wands that create finer microfoam. The higher pressure produces smaller, more uniform bubbles that are inherently more stable. However, with practice, you can achieve similar results at home by focusing on technique.
Can I re-steam milk to improve the foam?
I wouldn’t recommend it. Re-steaming milk that’s already been heated damages the proteins further, making foam even less stable. Always start with fresh, cold milk for each drink.
Does altitude affect foam stability?
Interestingly, yes. At higher altitudes, lower air pressure means bubbles expand more easily and can be less stable. If you live at elevation, you might need to stop steaming at a slightly lower temperature to compensate.
Why does my foam taste burnt even though it looks fine?
This indicates overheating. Burnt taste appears before you see visible foam breakdown, so it’s an early warning sign. Reduce your steaming temperature and see if both taste and longevity improve.
Conclusion and Your Next Steps
Disappearing foam is frustrating, but it’s rarely mysterious once you understand the underlying causes. In most cases, the culprit is overheated milk, improper technique, or contaminated equipment. By using fresh, cold milk, maintaining proper temperature control, and refining your steaming technique, you’ll create foam that lasts from the first sip to the last.
Start by focusing on one variable at a time. If you suspect temperature is the issue, use a thermometer for your next few drinks. If technique seems like the problem, pay close attention to the sounds your steam wand makes. Methodical troubleshooting beats random adjustments every time.
With a bit of practice, you’ll be pouring lattes with foam that holds its shape, tastes silky smooth, and makes every morning feel like a coffee shop experience. Now go steam some milk and show those bubbles who’s boss.


Comments