


Table of Contents
- What You'll Need
- Gear
- Ingredients
- Understanding Your Moka Pot and Basic Safety
- Know the Three Chambers
- Essential Safety Rules
- Step-by-Step Moka Pot Brewing Guide
- 1. Pre-Heat Your Water
- 2. Add Coffee to the Filter Basket
- 3. Assemble Carefully
- 4. Apply Gentle Heat
- 5. Watch and Listen
- 6. Stop the Extraction
- Taste Profile
- Common Moka Pot Mistakes and How to Avoid Them
- Using High Heat
- Tamping the Grounds
- Using Water Above the Safety Valve
- Leaving It on Heat Too Long
- Neglecting Cleaning and Maintenance
- Quick Reference: Moka Pot Variables
- Frequently Asked Questions
- Can I use a Moka pot on an induction stovetop?
- Why does my Moka pot coffee taste bitter or burnt?
- Is it safe to leave a Moka pot brewing while I do other things?
- How often should I replace the rubber gasket?
- Can I make less coffee than my Moka pot's full capacity?
- Conclusion and Your Next Brew
What You’ll Need
Before you start brewing, gather everything you need for a smooth, safe Moka pot experience. Having your gear ready prevents rushing and reduces the risk of accidents with hot surfaces and steam.
Gear
- Moka pot (any size from 1-cup to 12-cup)
- Stovetop or heat source (gas, electric, or induction-compatible base if needed)
- Kettle for pre-heating water
- Kitchen towel or oven mitt
- Timer (optional but helpful)
Ingredients
- Fresh, medium-fine ground coffee (slightly coarser than espresso)
- Filtered water (enough to fill the bottom chamber to just below the safety valve)
Barista Tip: I always grind my beans fresh right before brewing. Pre-ground coffee works fine, but freshly ground beans give you noticeably more aroma and flavor. Aim for a consistency similar to table salt—not as fine as espresso, not as coarse as drip coffee.
Understanding Your Moka Pot and Basic Safety
The Moka pot, invented in Italy in 1933, uses steam pressure to push hot water through coffee grounds. It’s beautifully simple, but that simplicity means you need to understand how it works to use it safely. In my experience, most Moka pot mishaps happen because people skip basic precautions or rush the process.
Know the Three Chambers
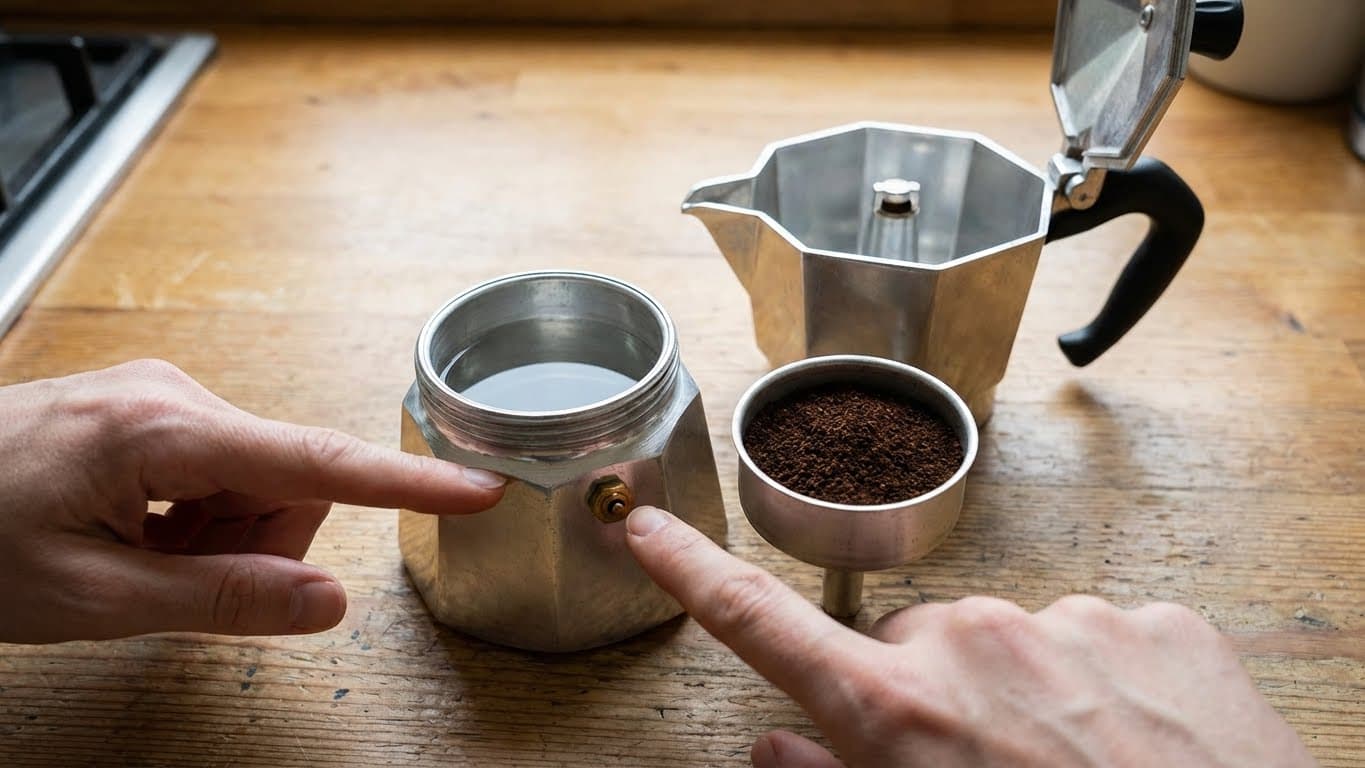
Your Moka pot has three main parts: the bottom chamber holds water, the filter basket holds coffee grounds, and the top chamber collects your brewed coffee. Water in the bottom chamber heats up, creates steam pressure, and forces water up through the grounds and into the top.
The key safety component is the pressure release valve on the side of the bottom chamber. This small valve prevents dangerous pressure buildup. Never fill water above this valve—doing so blocks the safety mechanism and creates a genuine hazard.
Essential Safety Rules
- Never overfill the water chamber past the safety valve
- Don’t tamp the coffee grounds—just level them off gently
- Always use medium-low heat, never high
- Never leave your Moka pot unattended while brewing
- Keep the lid closed during brewing to prevent hot coffee splattering
- Use a towel or mitt when handling the pot—the entire thing gets hot
In short: respect the pressure, keep the heat moderate, and stay present during the brew. Follow these rules and your Moka pot will serve you safely for decades.
Step-by-Step Moka Pot Brewing Guide
Now let’s walk through the complete process. I’ve refined this method over years of daily Moka pot use, and it consistently produces rich, strong coffee without any bitter or burnt flavors.
1. Pre-Heat Your Water
Here’s a tip that transformed my Moka pot coffee: start with hot water from a kettle, not cold tap water. Using pre-heated water means the coffee grounds spend less time sitting on a hot stove before brewing actually begins. This prevents the grounds from “cooking” and developing bitter, metallic flavors.
Boil your kettle, then let it sit for 30 seconds before pouring into the bottom chamber. Fill to just below the safety valve—you’ll see a small metal nub on the inside of the chamber.
2. Add Coffee to the Filter Basket
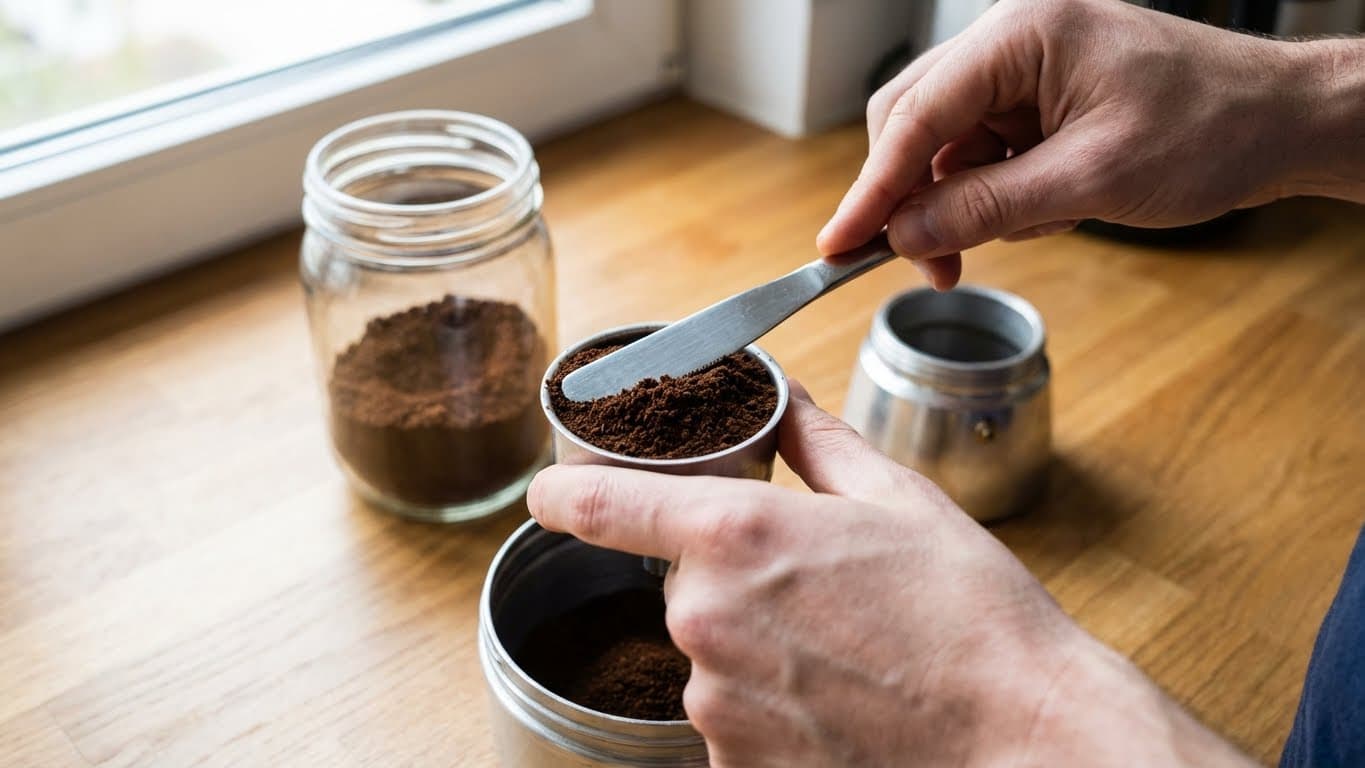
Fill the filter basket completely with ground coffee. Use a knife or your finger to level off the top, brushing away any excess. Here’s the important part: do not press down or tamp the grounds. Tamping creates too much resistance, builds excessive pressure, and can cause dangerous situations.
The grounds should sit loosely and evenly in the basket. Think of it like filling a measuring cup with flour—level, not packed.
3. Assemble Carefully
Place the filter basket into the bottom chamber. Now, using your kitchen towel (remember, that bottom chamber is full of hot water), screw the top chamber on firmly. Make sure it’s tight enough to seal properly but don’t over-tighten.
Check that the rubber gasket inside the top chamber is clean and properly seated. A worn or dirty gasket can cause leaks and weak seals.
4. Apply Gentle Heat
Place your assembled Moka pot on the burner and set the heat to medium-low. This is where many people go wrong. High heat might seem faster, but it causes the water to push through too aggressively, extracting bitter compounds and potentially causing sputtering.
If you’re using a gas stove, the flame should not extend beyond the base of the pot. For electric stoves, medium-low is usually around setting 3-4 out of 10.
5. Watch and Listen
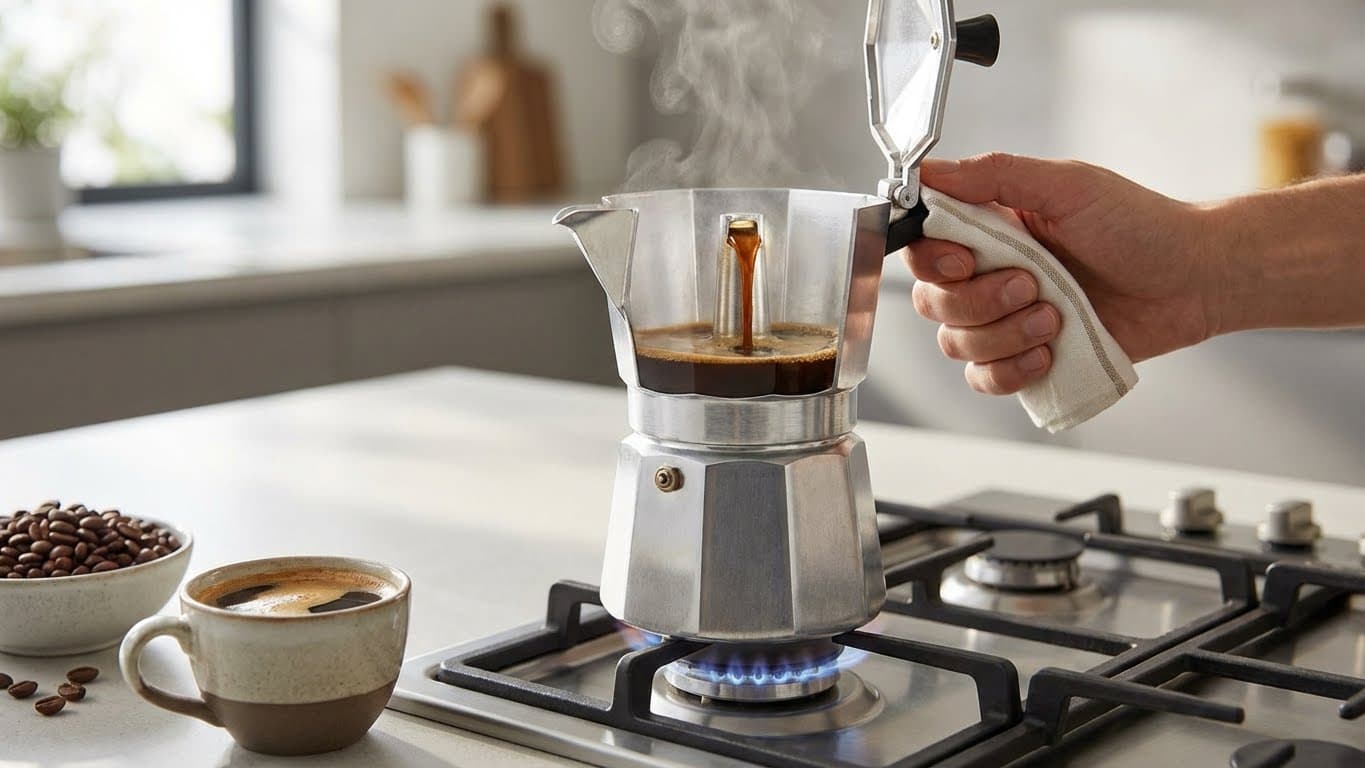
Stay nearby. After 3-5 minutes, you’ll hear a gurgling, bubbling sound. Lift the lid briefly to check—you’ll see coffee flowing up into the top chamber. It should flow steadily like warm honey, not spurt violently.
When the flow turns pale and you hear a hissing, sputtering sound, your brew is nearly done. Remove the pot from heat immediately—don’t wait until it stops completely.
6. Stop the Extraction
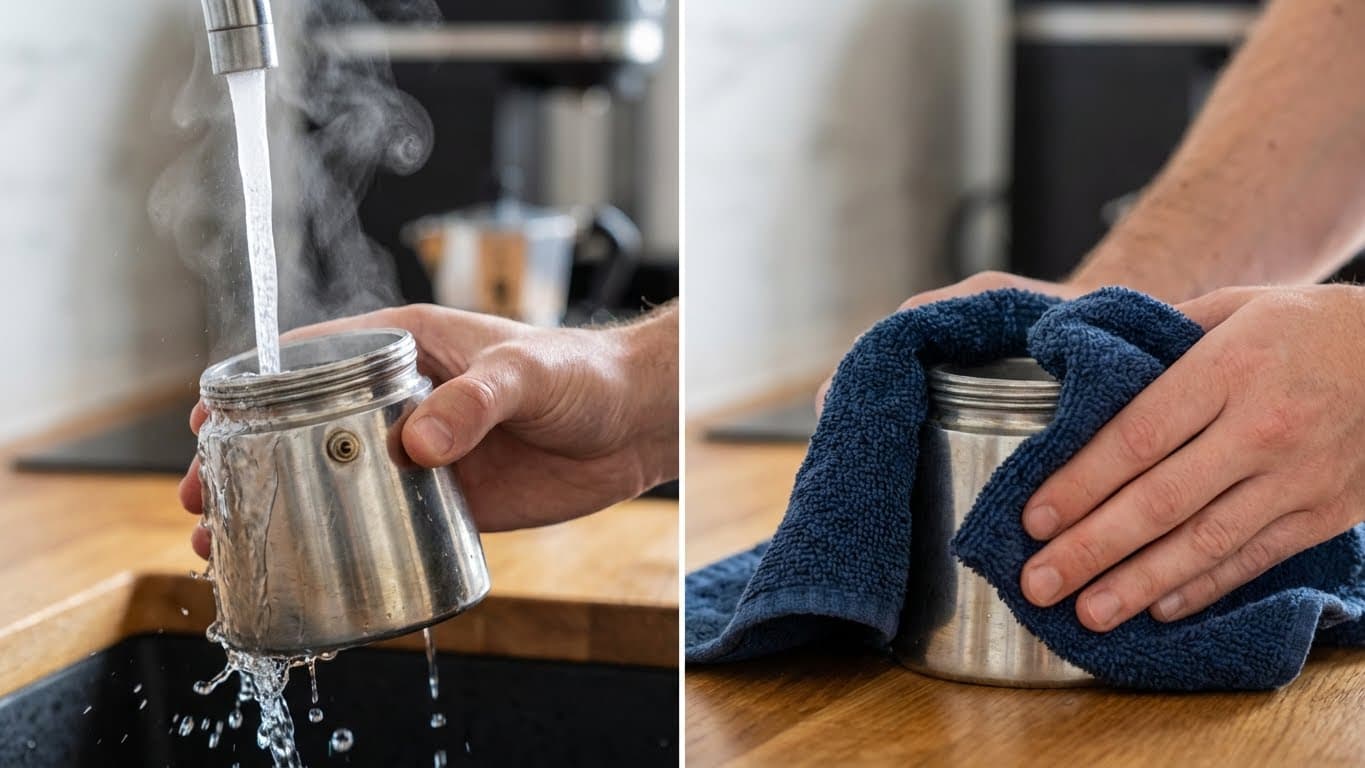
Here’s another trick I’ve learned: run the bottom of the Moka pot under cold water or wrap it in a cold, damp towel. This stops the extraction instantly, preventing any burnt or over-extracted flavors from entering your coffee.
Pour immediately into your cup or a small carafe. The coffee will be concentrated and intense—you can drink it straight like a short espresso or dilute with hot water for an Americano-style drink.
Taste Profile
When brewed correctly, Moka pot coffee delivers a bold, full-bodied cup with chocolatey undertones and moderate bitterness. It won’t have the crema of true espresso, but the intensity and richness come remarkably close. Expect lower acidity than pour-over methods and a satisfying, lingering finish.
Common Moka Pot Mistakes and How to Avoid Them
Even experienced coffee lovers make these errors. Let me walk you through the most common problems I’ve encountered—and helped others fix.
Using High Heat
This is the number one mistake. High heat causes rapid, aggressive extraction that pulls out harsh, bitter compounds. Your coffee ends up tasting burnt and metallic. The fix is simple: patience. Medium-low heat adds maybe two minutes to your brew time but dramatically improves flavor and safety.
Tamping the Grounds
If you’re coming from espresso, you might instinctively want to press down the grounds. Don’t. Moka pots generate far less pressure than espresso machines, and tamped grounds create too much resistance. This can cause pressure buildup, weak extraction, or even damage to your pot.
Using Water Above the Safety Valve
I’ve seen people do this thinking more water equals more coffee. Actually, more water equals blocked safety mechanism and potential danger. The valve exists for a reason—respect it.
Leaving It on Heat Too Long
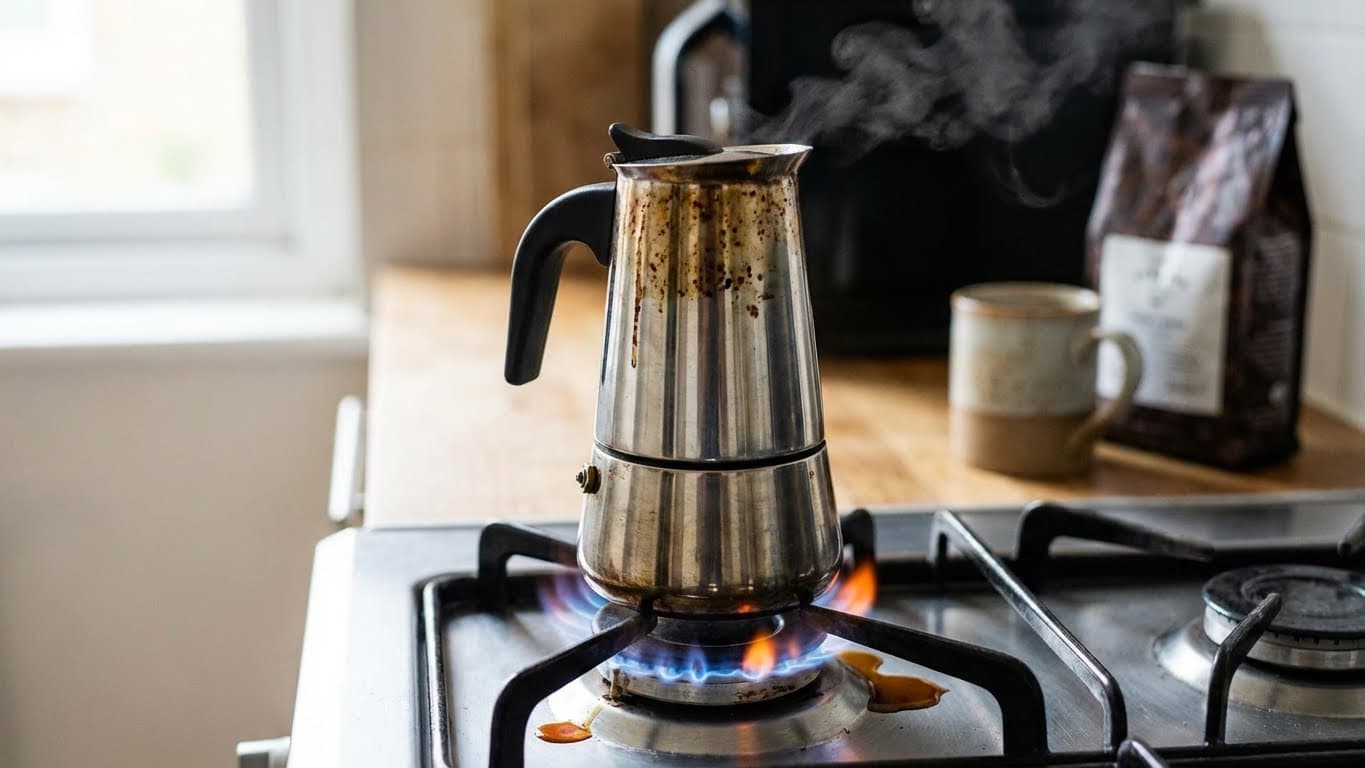
Once that hissing sound starts, your brew is done. Leaving the pot on heat “just to get every last drop” actually extracts bitter, ashy flavors from the already-spent grounds. Remove from heat when you hear the hiss, not after.
Neglecting Cleaning and Maintenance
After each use, disassemble your Moka pot completely and rinse all parts with warm water. Check the rubber gasket and filter plate regularly—these wear out over time and should be replaced annually or when you notice deterioration. A worn gasket causes poor seals and inconsistent brews.
Did You Know? You should never use soap on the interior of a traditional aluminum Moka pot. The slight residue of coffee oils that builds up actually seasons the pot and improves flavor over time, similar to how cast iron develops seasoning.
Quick Reference: Moka Pot Variables
| Variable | Recommendation | Effect on Coffee |
|---|---|---|
| Grind Size | Medium-fine (like table salt) | Too fine = bitter, too coarse = weak |
| Water Temperature | Start with hot, not cold | Prevents cooking grounds on stove |
| Heat Level | Medium-low | Gentle extraction, better flavor |
| Brew Time | 4-6 minutes total | Longer = more bitter, shorter = weak |
| Coffee Amount | Fill basket completely, level off | Consistent strength and extraction |
Frequently Asked Questions
Can I use a Moka pot on an induction stovetop?
Traditional aluminum Moka pots won’t work on induction cooktops because aluminum isn’t magnetic. However, you can buy stainless steel Moka pots designed for induction, or use an induction adapter plate under your aluminum pot. I’ve found the adapter plate works well, though it adds a minute or two to brew time.
Why does my Moka pot coffee taste bitter or burnt?
The most common cause is heat that’s too high. Try reducing to medium-low and using pre-heated water. Also check that you’re removing the pot from heat as soon as you hear the hissing sound—don’t let it continue heating. Finally, make sure your grind isn’t too fine, as this can cause over-extraction.
Is it safe to leave a Moka pot brewing while I do other things?
I don’t recommend it. Moka pots rely on pressure, and while modern pots have safety valves, things can still go wrong if the valve is blocked or the pot malfunctions. Stay in the kitchen and keep an eye (and ear) on your brew. It only takes 5-6 minutes—life is too short for bad coffee, but it’s also too short for kitchen accidents.
How often should I replace the rubber gasket?
Most gaskets last about 1-2 years with regular use. Replace yours when you notice it becoming stiff, cracked, or discolored, or when your pot starts having trouble creating a good seal. Gaskets are inexpensive and make a huge difference in performance.
Can I make less coffee than my Moka pot’s full capacity?
Moka pots work best at full capacity. The ratio of water to coffee grounds is calibrated for a full basket and full water chamber. If you consistently want smaller amounts, consider buying a smaller pot. I keep a 3-cup and a 6-cup for different occasions.
Conclusion and Your Next Brew
Using a Moka pot safely comes down to understanding pressure, respecting heat, and staying present during the brew. Start with hot water, keep your heat medium-low, never tamp your grounds, and remove from heat at the first sign of hissing. These simple practices protect you from accidents and reward you with rich, intense coffee that rivals café quality.
In my experience, the Moka pot is one of the most satisfying brewing methods once you get comfortable with it. There’s something deeply rewarding about hearing that familiar gurgle and knowing a perfect cup is moments away. Give these techniques a try with your next brew, and I think you’ll taste the difference immediately. Your morning coffee ritual is about to get a serious upgrade.



Comments