Ever wondered if you could roast your own coffee at home without investing in expensive equipment? Here’s the thing: you absolutely can. The pan roasting method has been used for centuries, long before fancy drum roasters existed. All you need is a simple pan, some green coffee beans, and a bit of patience. I’ve roasted countless batches this way, and while it takes practice, the reward of brewing coffee you roasted yourself is unmatched.
In this guide, you’ll learn exactly how to roast coffee using nothing more than a stovetop and a pan. We’ll cover the gear you need, the step-by-step process, common mistakes to avoid, and how to tell when your beans are perfectly roasted. Whether you’re a curious beginner or a home barista looking to level up, this pan roasting method is your gateway to freshly roasted coffee without breaking the bank.
What You’ll Need to Roast Coffee in a Pan
Before you fire up the stove, let’s gather everything you need. The beauty of pan roasting is its simplicity, but having the right setup makes a huge difference in your results.
Ingredients
Green coffee beans – Start with about 100-150 grams for your first batch. Look for high-quality single-origin beans from reputable suppliers.
That’s it. Seriously. Coffee roasting only requires one ingredient.
Gear
Heavy-bottomed pan or cast iron skillet – The thicker the bottom, the more even the heat distribution. Avoid non-stick pans as they can release harmful fumes at high temperatures.
Wooden spoon or spatula – For constant stirring. Metal works too, but wood is gentler on your pan.
Metal colander – For cooling the beans quickly after roasting.
Kitchen timer – Essential for tracking your roast.
Good ventilation – Open windows, turn on the exhaust fan, or roast outside if possible. Coffee roasting produces a lot of smoke.
Oven mitts – Safety first. That pan gets extremely hot.
Airtight container – For storing your freshly roasted beans.
Barista Tip: I keep a dedicated “roasting pan” that I don’t use for cooking food. Coffee oils can leave residue, and you don’t want your scrambled eggs tasting like yesterday’s roast.
Understanding the Coffee Roasting Process
Before we dive into the steps, let’s quickly understand what happens when you roast coffee. This knowledge helps you recognize the signs of a good roast and troubleshoot problems.
The Stages of Roasting
Green coffee beans go through several transformations when heated. First, they lose moisture and turn from green to yellow. Then they start to brown as the Maillard reaction kicks in (the same chemical reaction that browns bread and sears steak). Eventually, you’ll hear a distinct cracking sound called “first crack,” which signals that the beans have reached a light roast level.
If you continue roasting, you’ll eventually reach “second crack,” a faster, more subtle crackling that indicates a medium-dark to dark roast. The entire process typically takes between 10-20 minutes depending on your heat level and desired roast.
What to Listen and Look For
First crack – Sounds like popcorn popping. Beans are now at a light roast.
Development phase – The 1-3 minutes after first crack where flavors develop.
Second crack – Quieter, more rapid crackling. You’re entering dark roast territory.
Color changes – From green to yellow to light brown to dark brown.
Chaff release – Papery skin that flakes off during roasting. It’s messy but normal.
In short: first crack means light roast, continued roasting gives you medium, and second crack means dark. Stop whenever you reach your preferred level.
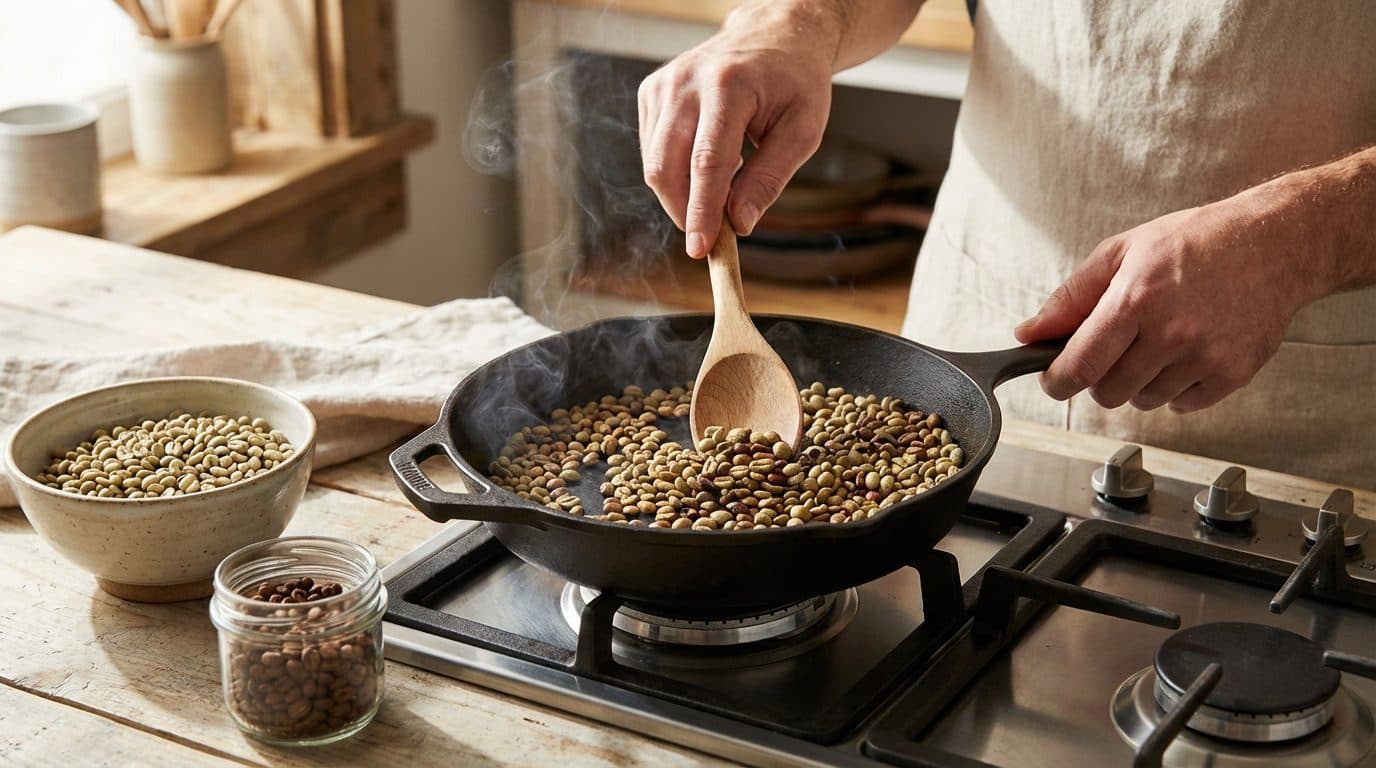
Step-by-Step: How to Roast Coffee in a Pan
Alright, let’s get roasting. Follow these steps carefully, and remember that your first batch might not be perfect. That’s completely normal. I burned my fair share of beans before getting the hang of it.
Preparation
1. Set up your workspace. Open windows, turn on exhaust fans, and make sure you have good ventilation. Have your colander ready nearby for cooling.
2. Preheat your pan. Place it over medium heat for about 2-3 minutes. You want it hot but not smoking. If you flick a drop of water on the surface, it should sizzle and evaporate quickly.
3. Measure your beans. Start with a single layer of beans in your pan. Overcrowding leads to uneven roasting. For most pans, 100-150 grams is ideal.
The Roasting Process
4. Add the green beans to the preheated pan. You should hear them start to crackle slightly almost immediately. Start your timer now.
5. Stir constantly. I cannot stress this enough. Keep those beans moving every few seconds. Pan roasting without a roaster means you are the roaster. Uneven stirring equals uneven roasting.
6. Watch the color change. Around the 4-6 minute mark, your beans should transition from green to yellow. You’ll also notice a grassy smell.
7. Listen for first crack. Usually happens between 7-10 minutes. The beans will start popping like popcorn. This is your light roast marker.
8. Decide your roast level. For a medium roast, continue for 1-2 minutes after first crack ends. For dark roast, wait for second crack (usually 2-4 minutes after first crack).
9. Stop the roast. When you’ve reached your desired color and the cracking sounds match your target, immediately remove the pan from heat.
Cooling Your Beans
10. Transfer immediately to your metal colander. Shake and toss the beans to cool them rapidly. This stops the roasting process. If you let them sit in the hot pan, they’ll continue cooking and potentially burn.
11. Continue cooling for 3-5 minutes. Toss them until they’re cool to the touch. You can also use a fan to speed up the process.
12. Let them rest. Freshly roasted coffee releases CO2 for the next 12-24 hours. Store in a loosely covered container initially, then seal tightly after degassing.
Barista Tip: I roast outside on a portable burner when the weather allows. The smoke and chaff are much more manageable outdoors, and my kitchen doesn’t smell like a coffee roastery for days.
Common Mistakes When Pan Roasting Coffee
In my experience, most beginners make the same handful of mistakes. Knowing these pitfalls ahead of time saves you from wasting good beans.
Heat Management Issues
Heat too high – Burns the outside while the inside stays underdeveloped. You’ll taste bitter, ashy notes.
Heat too low – Creates “baked” coffee that tastes flat and lacks complexity. If your roast takes longer than 20 minutes, the heat was too low.
Inconsistent heat – Constantly adjusting the flame leads to uneven roasts. Find a steady medium heat and stick with it.
Technique Problems
Not stirring enough – Even 10 seconds of neglect can scorch the beans touching the pan surface.
Overcrowding the pan – Too many beans means poor airflow and uneven heat distribution.
Slow cooling – Leaving beans in the hot pan or cooling them too slowly results in over-roasted coffee.
Here’s a real scenario I’ve seen many times: someone gets distracted answering a text message for 30 seconds and suddenly half their batch has dark spots while the other half is still light. When you roast coffee in a pan, your full attention is required.
Roast Levels and Flavor Profiles
One of the joys of roasting your own coffee without a roaster is complete control over the final flavor. Here’s a quick reference table:
Roast Level
Color
Timing
Flavor Profile
Light
Light brown
At first crack
Bright, acidic, fruity, tea-like
Medium
Medium brown
1-2 min after first crack
Balanced, sweet, chocolatey
Medium-Dark
Rich brown, slight oil
Just before second crack
Full-bodied, caramel, low acidity
Dark
Dark brown, oily
During/after second crack
Bold, smoky, bitter notes
For beginners, I recommend aiming for a medium roast. It’s forgiving, works well with most brewing methods, and showcases the bean’s natural characteristics without overpowering them with roast flavors.
Frequently Asked Questions
How long should I wait before brewing my pan-roasted coffee?
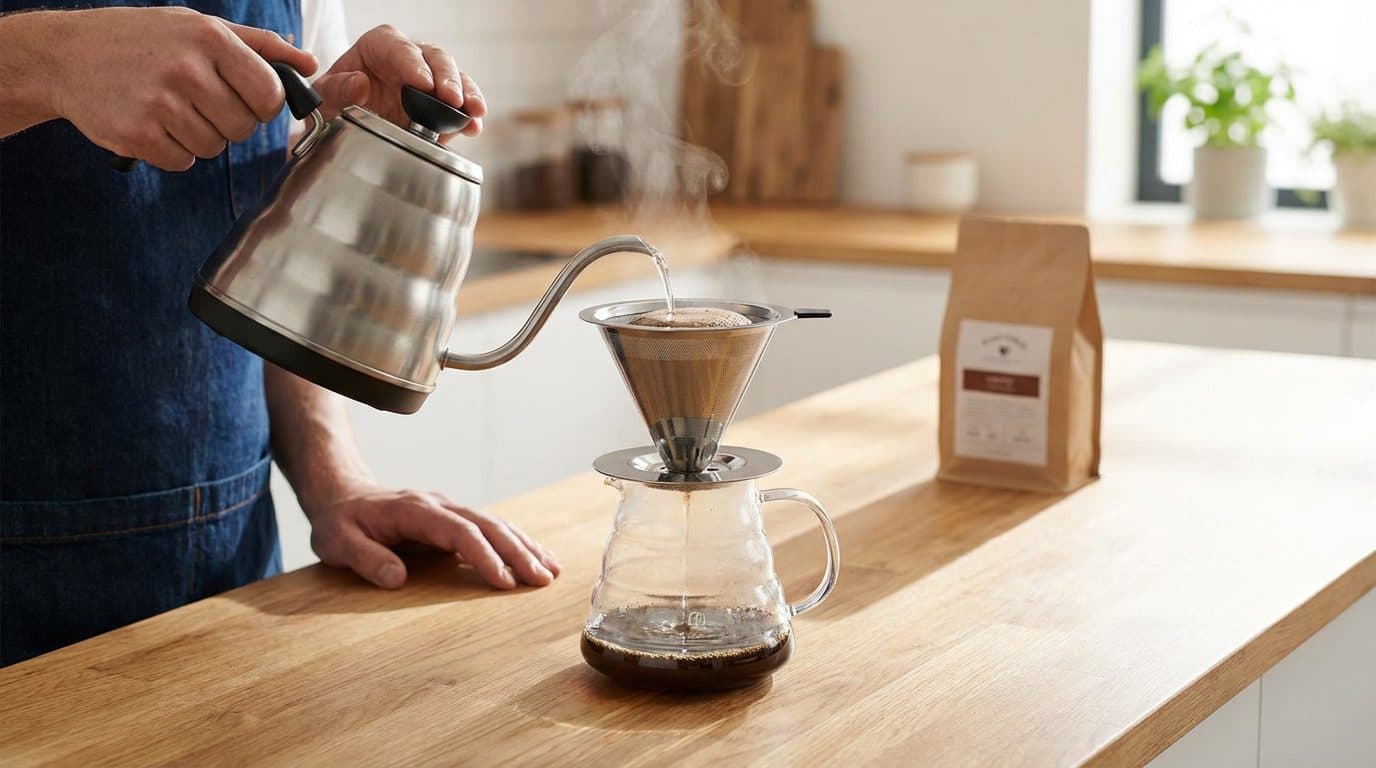
Fresh-roasted coffee needs time to degas. Wait at least 12-24 hours before brewing, though many roasters suggest 3-5 days for optimal flavor development. The sweet spot is usually between day 3 and day 14 after roasting.
Why does my pan-roasted coffee taste smoky or burnt?
This usually means your heat was too high or you didn’t stir consistently enough. Beans that contact the hot pan surface for too long develop burnt flavors. Try lowering your heat and stirring more frequently on your next batch.
Can I roast coffee in a non-stick pan?
I strongly advise against it. Non-stick coatings can release toxic fumes at the high temperatures required for coffee roasting. Stick with cast iron, stainless steel, or carbon steel pans.
How do I store my home-roasted coffee beans?
After the initial 12-24 hour degassing period, store beans in an airtight container away from light, heat, and moisture. A cool, dark cupboard works perfectly. Avoid refrigerating or freezing unless you’re storing for several weeks.
Is pan-roasted coffee as good as professionally roasted coffee?
Honestly? It’s different. Pan roasting creates slightly less consistent results than professional drum roasters, but many home baristas (myself included) love the unique character it produces. Plus, there’s something deeply satisfying about the hands-on process.
Summary and Your Next Steps
Roasting coffee in a pan without a roaster is entirely achievable, and it opens up a whole new dimension of the coffee hobby. You’ve learned that all you need is a heavy pan, green beans, constant stirring, and attention to the visual and auditory cues that signal your desired roast level. The key moments to remember are first crack for light roast, development time for medium, and second crack for dark.
Start with a small batch, expect imperfection, and take notes on each roast. Write down your heat level, timing, and results so you can refine your technique over time. Life is too short for bad coffee, and honestly, even a slightly imperfect home roast tastes better than stale store-bought beans sitting on a shelf for months.
Grab some green beans, fire up that pan, and discover what fresh-roasted coffee really tastes like. Your morning cup will never be the same.


Comments