


Table of Contents
- What You'll Need for Strong AeroPress Coffee
- Gear
- Ingredients
- Understanding Strong AeroPress Coffee vs. True Espresso
- Key Differences at a Glance
- The Inverted Method: Your Secret Weapon for Strength
- Step-by-Step Brewing Instructions
- Taste Profile
- Dialing In Your Perfect Ratio and Variables
- Coffee-to-Water Ratio
- Grind Size Adjustments
- Water Temperature
- Steep Time
- Using Your Strong AeroPress Coffee in Espresso-Style Drinks
- AeroPress "Latte"
- AeroPress "Cappuccino"
- Iced "Espresso" Drinks
- Affogato
- Frequently Asked Questions
- Can I really make espresso with an AeroPress?
- What's the best coffee roast for strong AeroPress brewing?
- Should I use paper or metal filters for stronger coffee?
- How do I avoid bitterness when brewing strong AeroPress coffee?
- Can I make multiple shots at once?
- Conclusion and Your Next Steps
Do you love the intensity of espresso but don’t want to invest in an expensive machine? You’re not alone. Many home coffee enthusiasts crave that bold, concentrated coffee punch but feel limited by their equipment. Here’s the good news: your humble AeroPress can deliver surprisingly espresso-like results with the right technique. In this guide, I’ll walk you through exactly how to make strong AeroPress coffee that rivals the intensity of true espresso, perfect for lattes, cappuccinos, or just a powerful shot to kickstart your morning.
We’ll cover everything from the ideal grind size and coffee-to-water ratio to the exact brewing steps that maximize extraction and body. Whether you’re a seasoned AeroPress user or just getting started, these techniques will help you unlock a whole new level of coffee strength from this versatile brewer.
What You’ll Need for Strong AeroPress Coffee
Gear
- AeroPress (original or AeroPress Go)
- Burr grinder (blade grinders work but produce less consistent results)
- Kettle (gooseneck preferred for control, but any kettle works)
- Scale (for precise measurements)
- Timer (your phone works perfectly)
- Stirring paddle or spoon
- Metal or fine paper filter (metal filters produce more body)
Ingredients
- 18-22 grams of freshly roasted coffee beans (medium-dark to dark roast recommended)
- 80-100ml of water (around 85-90°C / 185-195°F)
Barista Tip: Fresh beans make all the difference. Coffee starts losing its aromatic compounds within two weeks of roasting. For the strongest, most flavorful results, buy whole beans and grind them right before brewing.
Understanding Strong AeroPress Coffee vs. True Espresso
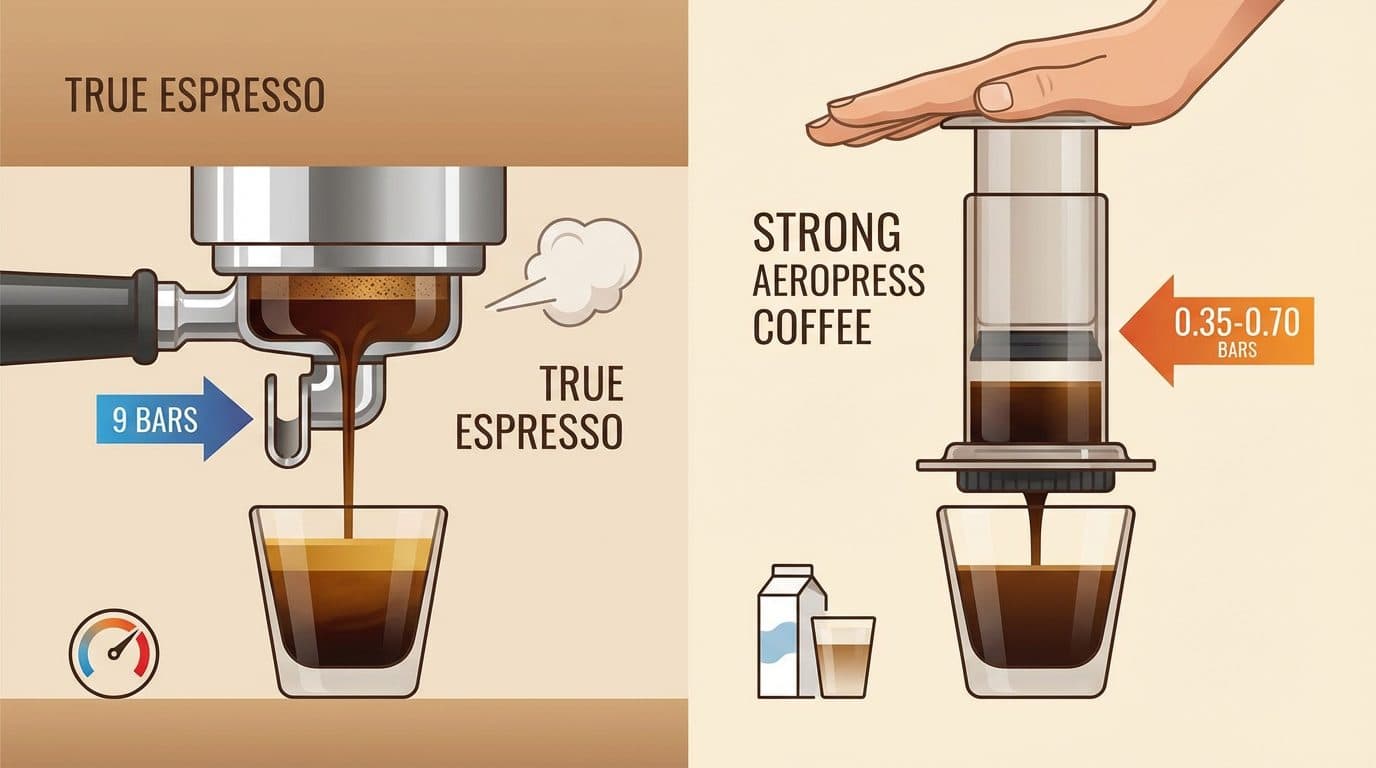
Before we dive into the method, let’s set some realistic expectations. True espresso requires 9 bars of pressure and produces a drink with crema, intense concentration, and a specific mouthfeel. The AeroPress generates about 0.35-0.70 bars of pressure when you press down. So technically, you’re not making espresso.
However, you can absolutely make concentrated coffee that mimics espresso’s strength and works beautifully in milk-based drinks. I’ve found that guests often can’t tell the difference when I serve them an AeroPress “latte.” The key is maximizing extraction and minimizing water volume.
Key Differences at a Glance
| Factor | True Espresso | Strong AeroPress |
|---|---|---|
| Pressure | 9 bars | 0.35-0.70 bars |
| Brew Time | 25-30 seconds | 1-2 minutes |
| Coffee-to-Water Ratio | 1:2 | 1:4 to 1:5 |
| Crema | Yes | Minimal to none |
| Body & Intensity | Very high | High |
In short, you’re trading some pressure-derived characteristics for convenience, affordability, and excellent results that work for most purposes.
The Inverted Method: Your Secret Weapon for Strength
For maximum strength and body, the inverted brewing method is essential. This technique prevents any coffee from dripping through before you’re ready, allowing for full immersion and better extraction.
Step-by-Step Brewing Instructions
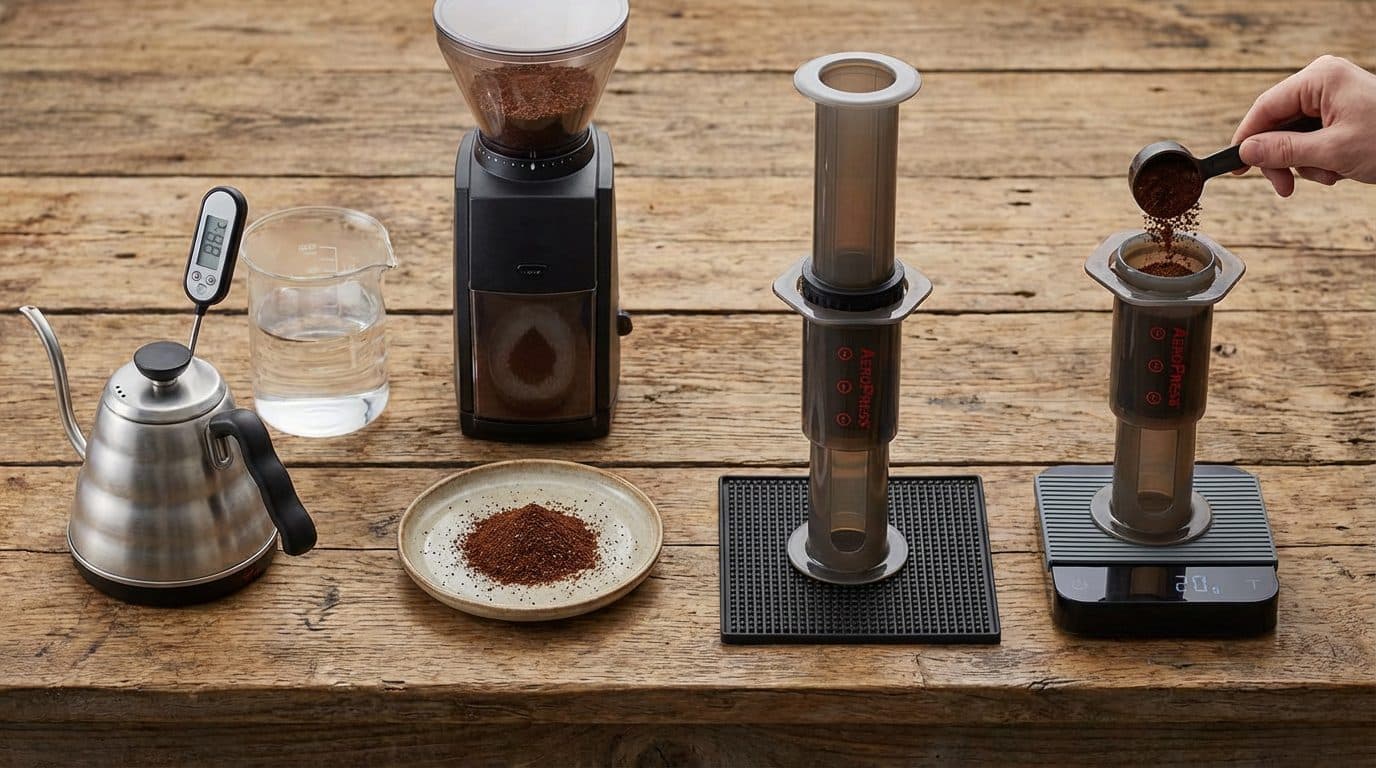
- Heat your water to 85-90°C (185-195°F). Boiling water can over-extract and create bitterness, while too-cool water under-extracts, leaving strength on the table.
- Grind your coffee fine – slightly coarser than espresso, similar to table salt. You want a grind size that allows for quick extraction without clogging the filter completely.
- Assemble the AeroPress inverted by placing the plunger into the chamber about 1 cm and flipping it upside down so the open end faces up.
- Add 18-22 grams of ground coffee to the chamber. More coffee equals stronger results, so don’t be shy.
- Start your timer and pour 80-100ml of hot water over the grounds. Use less water for a more concentrated shot.
- Stir vigorously for 10-15 seconds to ensure all grounds are saturated and extracting evenly.
- Steep for 1-2 minutes total (including stir time). Longer steep times increase strength but can introduce bitterness if overdone.
- Attach your filter cap (with a pre-wetted filter) and carefully flip the AeroPress onto your mug.
- Press down slowly and steadily for 20-30 seconds. Rushing creates channeling; patience creates smoothness.
Barista Tip: If pressing feels too easy, your grind is too coarse. If it feels impossible, your grind is too fine. Aim for firm but manageable resistance.
Taste Profile
When done correctly, this method produces a bold, full-bodied concentrate with chocolatey, slightly syrupy characteristics. Expect low acidity (especially with darker roasts) and enough intensity to stand up to milk without getting lost.
Dialing In Your Perfect Ratio and Variables
Coffee brewing is personal, and finding your ideal strong AeroPress recipe requires some experimentation. Here are the key variables to adjust:
Coffee-to-Water Ratio
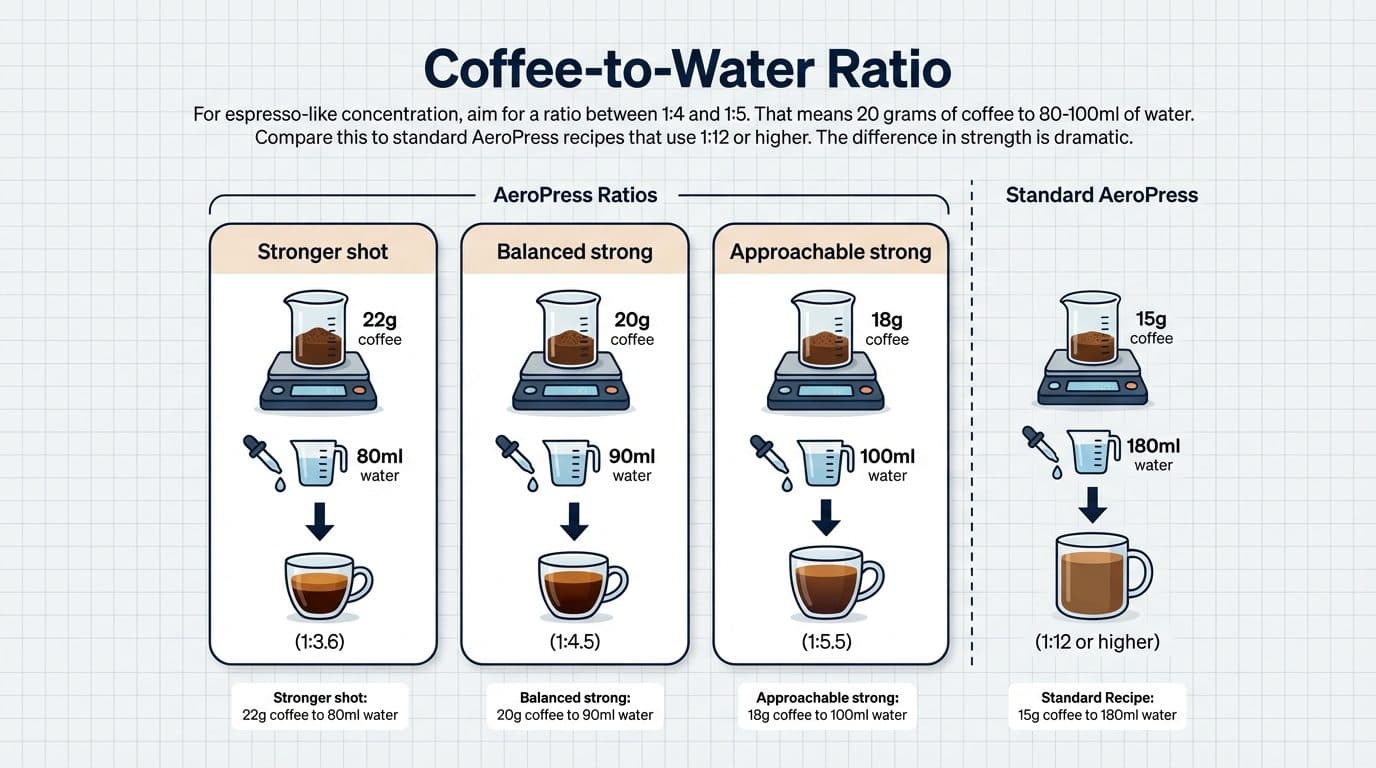
For espresso-like concentration, aim for a ratio between 1:4 and 1:5. That means 20 grams of coffee to 80-100ml of water. Compare this to standard AeroPress recipes that use 1:12 or higher. The difference in strength is dramatic.
- Stronger shot: 22g coffee to 80ml water (1:3.6)
- Balanced strong: 20g coffee to 90ml water (1:4.5)
- Approachable strong: 18g coffee to 100ml water (1:5.5)
Grind Size Adjustments
If your coffee tastes weak and watery, grind finer. If it tastes bitter and harsh, grind coarser. Small adjustments make significant differences at these concentrated ratios. In my experience, most people grind too coarse when attempting strong AeroPress coffee.
Water Temperature
Higher temperatures extract more quickly and intensely. For dark roasts, stay around 85°C to avoid burnt flavors. For medium roasts, you can push toward 90-92°C for fuller extraction.
Steep Time
The sweet spot for most strong brews is 60-90 seconds total. Going beyond 2 minutes often introduces unpleasant bitter compounds, especially with fine grinds and hot water.
Key Takeaway: Start with 20g coffee, 90ml water at 88°C, steeped for 75 seconds. Adjust one variable at a time until you find your personal perfect shot.
Using Your Strong AeroPress Coffee in Espresso-Style Drinks
Now for the fun part: turning your concentrated AeroPress coffee into café-quality drinks at home.
AeroPress “Latte”
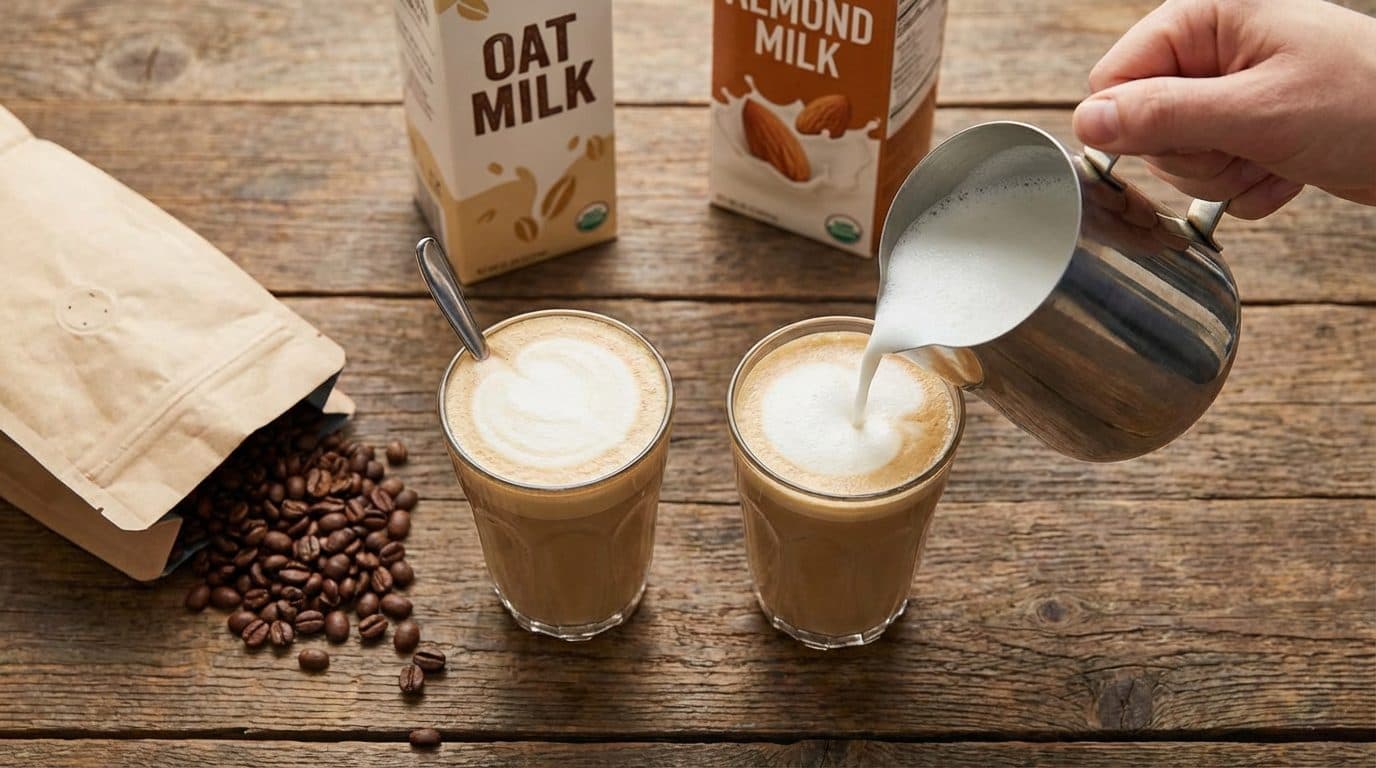
Brew a strong shot using the method above. Heat and froth 150-200ml of milk (dairy or plant-based). I’ve found that oat milk froths beautifully and complements the coffee’s body. Pour your coffee into a mug, add frothed milk, and enjoy. The coffee’s intensity cuts through the milk perfectly.
AeroPress “Cappuccino”
Use the same strong shot but with less milk and more foam. Aim for equal parts coffee, steamed milk, and milk foam. The concentrated brew provides enough backbone to balance the airy texture.
Iced “Espresso” Drinks
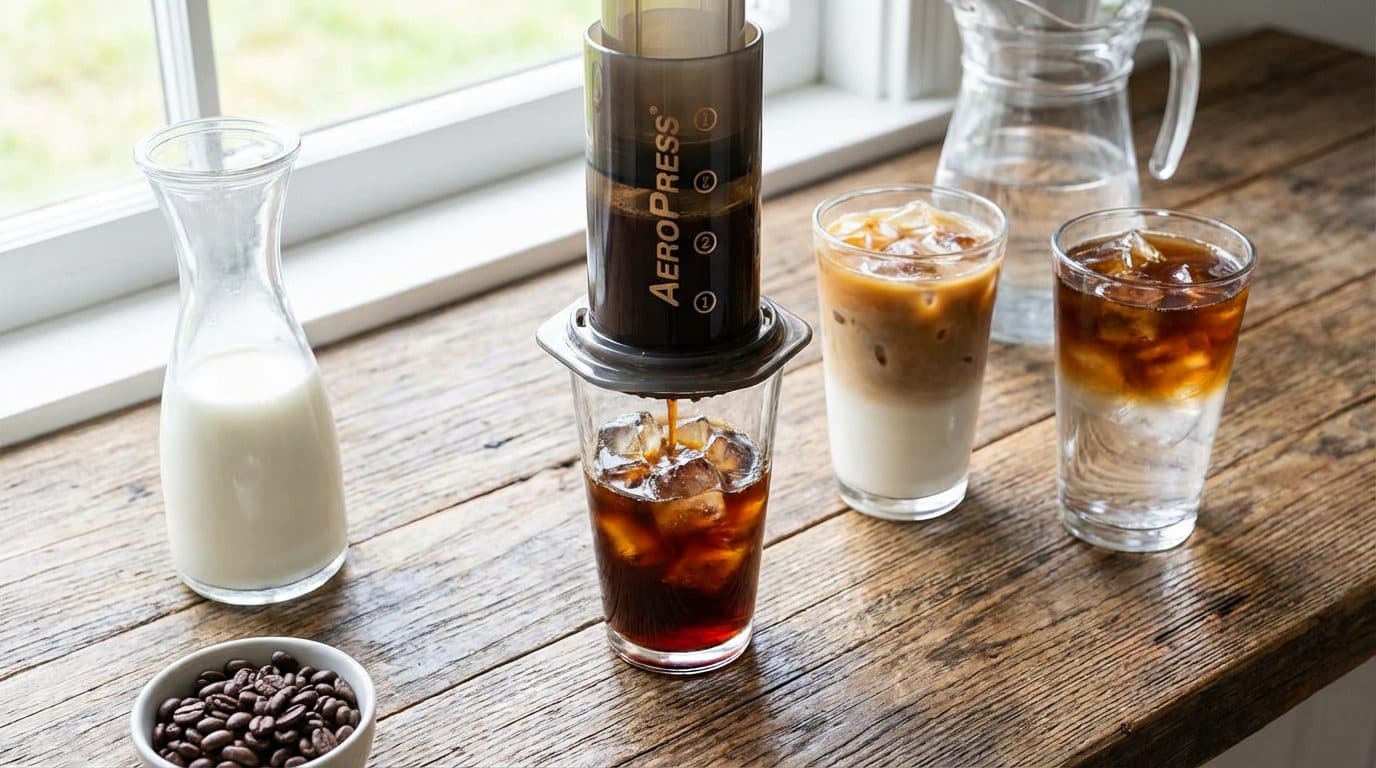
Brew your strong AeroPress coffee directly over ice. The immediate cooling locks in brightness and prevents oxidation. Add cold milk for an iced latte, or serve it straight as an iced Americano by adding cold water.
Affogato
Pour your hot, concentrated AeroPress shot directly over a scoop of vanilla ice cream. This is honestly one of my favorite ways to enjoy strong AeroPress coffee. The contrast between hot and cold, bitter and sweet, is perfect.
Barista Tip: When making milk drinks, brew your coffee slightly stronger than you think you need. Milk has a way of muting coffee flavors, so that extra intensity ensures your drink stays balanced.
Frequently Asked Questions
Can I really make espresso with an AeroPress?
Technically, no. True espresso requires high pressure that the AeroPress can’t generate. However, you can make a concentrated, strong coffee that functions similarly in drinks and tastes rich and intense. For most home purposes, the difference is negligible.
What’s the best coffee roast for strong AeroPress brewing?
Medium-dark to dark roasts typically work best. They extract efficiently, produce bold flavors, and have the lower acidity that pairs well with milk. That said, a quality medium roast can also deliver excellent results with slightly different flavor characteristics.
Should I use paper or metal filters for stronger coffee?
Metal filters allow more oils and fine particles through, creating a heavier body similar to espresso. Paper filters produce cleaner cups with less sediment. For espresso-like drinks, I prefer metal filters, but paper filters still work well.
How do I avoid bitterness when brewing strong AeroPress coffee?
Three main culprits cause bitterness: water too hot, grind too fine, or steep time too long. Start with water around 85-88°C, keep steep times under 90 seconds, and adjust your grind to find the balance between strength and smoothness.
Can I make multiple shots at once?
The AeroPress has limited capacity, so making more than one concentrated shot at a time is challenging. For multiple drinks, brew separate shots or invest in a larger brewing device. Life’s too short for weak, watered-down coffee.
Conclusion and Your Next Steps
Making strong AeroPress coffee for espresso-like drinks at home is absolutely achievable with the right approach. Focus on using more coffee (18-22g), less water (80-100ml), a fine grind, and the inverted method for maximum extraction. Don’t be afraid to experiment with ratios and variables until you find your ideal strength.
Start by following the recipe outlined above, then adjust based on your taste preferences. Once you’ve dialed in your technique, you’ll have a reliable method for creating café-quality lattes, cappuccinos, and concentrated shots without expensive equipment. Your morning coffee ritual is about to get a serious upgrade.

Comments