



Table of Contents
- What You'll Need for the Perfect Tulip Pour
- Understanding the Tulip Foundation
- The Anatomy of a Stacked Tulip
- Milk Texture: The Non-Negotiable Foundation
- Mastering the Stack: Step-by-Step Technique
- Advanced Stacking Variations
- The Five-Stack Tulip
- The Reverse Tulip
- The Tulip Rosetta Hybrid
- Common Mistakes and How to Fix Them
- Layers Blending Together
- Asymmetrical Stacks
- Weak or Broken Stem
- Frequently Asked Questions
- How many stacks should a beginner aim for?
- Does cup shape affect tulip stacking?
- Can I create tulip art with alternative milks?
- How long does it take to master advanced stacking?
- Why do my tulips look different from café tulips?
- Conclusion: Your Path to Tulip Mastery
You’ve nailed the basic heart and rosetta, and now you’re staring at your cup wondering how baristas create those mesmerizing layered tulips that look almost too beautiful to drink. The tulip pour is where latte art starts to feel like real artistry, and mastering the stacking technique is your gateway to creating multi-layered designs that will impress anyone who sees your morning brew. Life is too short for flat, boring latte art—let’s level up your pour game.
In this guide, I’ll walk you through the advanced stacking techniques that transform a simple tulip into a stunning, multi-petaled masterpiece. You’ll learn the precise wrist movements, timing, and milk texture secrets that separate amateur pours from café-quality art. Whether you’re aiming for a three-stack tulip or pushing toward five or more layers, these techniques will get you there.
What You’ll Need for the Perfect Tulip Pour
Before we dive into technique, let’s make sure your setup is dialed in. Advanced latte art demands precision, and having the right gear makes all the difference.
Equipment:
- Espresso machine with a quality steam wand
- Stainless steel milk pitcher (12-20 oz depending on cup size)
- Wide-brimmed cups or bowls (tulips show best in wider vessels)
- Fresh whole milk or your preferred alternative
- Freshly pulled espresso with good crema
Barista Tip: I’ve found that a pitcher with a sharp, pointed spout gives you far more control during the push-and-pull motion essential for stacking. Rounded spouts work for hearts, but tulips demand precision.
Understanding the Tulip Foundation

The tulip pour isn’t just a pattern—it’s a technique built on controlled interruptions. Unlike a rosetta where you maintain continuous flow, the tulip requires you to deliberately stop and restart your pour multiple times. Each “push” creates a new layer, and each layer pushes the previous one forward, creating that signature stacked appearance.
The Anatomy of a Stacked Tulip
A properly stacked tulip consists of three main elements:
- The base layers: These are your initial pushes that form the bottom petals
- The middle stacks: Each subsequent pour that creates the layered effect
- The finishing pull: The final stroke that ties everything together and creates the stem
Think of it like building a tower of pancakes, but in reverse. Each new layer slides underneath the previous one, pushing it forward in the cup. This is why timing and positioning are everything.
Milk Texture: The Non-Negotiable Foundation
Here’s where many home baristas struggle. For advanced tulip stacking, your microfoam needs to be absolutely silky—we’re talking wet paint consistency. Too thick, and your layers won’t flow properly. Too thin, and they’ll blend together into a muddy mess.
Aim for milk that’s around 140-150°F (60-65°C) with a glossy, mirror-like surface. When you swirl the pitcher, it should move like melted ice cream. In my experience, stretching the milk for just 1-2 seconds before submerging the wand produces the ideal texture for stacking.
Mastering the Stack: Step-by-Step Technique

Now for the actual pour. I’m going to break this down into numbered steps, but remember—latte art is fluid, and these movements should eventually blend into one smooth sequence.
Step 1: The Setup Pour
- Hold your cup at a 45-degree angle
- Begin pouring from about 3-4 inches above the surface
- Pour into the center of the crema, allowing the milk to sink beneath
- Fill the cup to about 1/3 full while maintaining this height
This initial pour creates your canvas. You’re not making art yet—you’re building the foundation that will support your design.
Step 2: The First Push
- Lower your pitcher until the spout nearly touches the surface
- Increase your flow rate slightly while staying in one spot
- Watch for a white dot to appear on the surface
- Once the dot reaches about the size of a quarter, stop pouring completely
This first push is your base layer. The key here is commitment—don’t be timid with your flow. A weak pour creates a weak foundation.
Step 3: The Stack Sequence
- Move your pitcher back slightly (about half an inch toward you)
- Resume pouring with the same flow rate
- Create another white dot that pushes into the first one
- Stop when this layer reaches similar size to the first
- Repeat this push-and-pull motion for each additional stack
Barista Tip: The secret to clean stacks is in the pause. Each time you stop pouring, lift your pitcher slightly before moving back. This prevents unwanted drips that can blur your layers.
Step 4: The Finishing Pull
- After your final push, raise your pitcher slightly
- Reduce your flow to a thin stream
- Pull straight through the center of all your stacks toward the far edge of the cup
- Lift away cleanly at the end
This pull creates the stem and ties all your layers together. A confident, steady pull makes the difference between a professional-looking tulip and a messy blob.
Advanced Stacking Variations
Once you’ve mastered the basic three-stack tulip, it’s time to push your skills further. Here are some variations that will challenge you and expand your repertoire.
The Five-Stack Tulip
More stacks require faster execution and smaller individual pushes. The technique remains the same, but you’ll need to:
- Use smaller push volumes for each layer
- Move more quickly between stacks
- Start your first push slightly lower in the cup
- Maintain extremely consistent flow throughout
I’ve found that practicing with larger cups (12 oz or more) gives you more room to work with when attempting higher stack counts.
The Reverse Tulip
Instead of pushing layers forward, you can create a reverse tulip by pulling each layer toward you. This creates a different visual effect where the layers appear to cascade backward. The technique involves:
- Starting your first push closer to the far edge of the cup
- Moving forward (toward you) with each subsequent push
- Finishing with a pull that goes away from you
The Tulip Rosetta Hybrid
This advanced design combines tulip stacking with rosetta wiggling. After creating two or three tulip stacks, you transition into a rosetta wiggle for the final layer before pulling through. The result is a design that showcases both techniques in one pour.
To execute this hybrid:
- Complete your tulip stacks as normal
- On your final push, begin a gentle side-to-side wiggle
- Continue wiggling while slowly pulling back
- Finish with a straight pull through the center
Common Mistakes and How to Fix Them
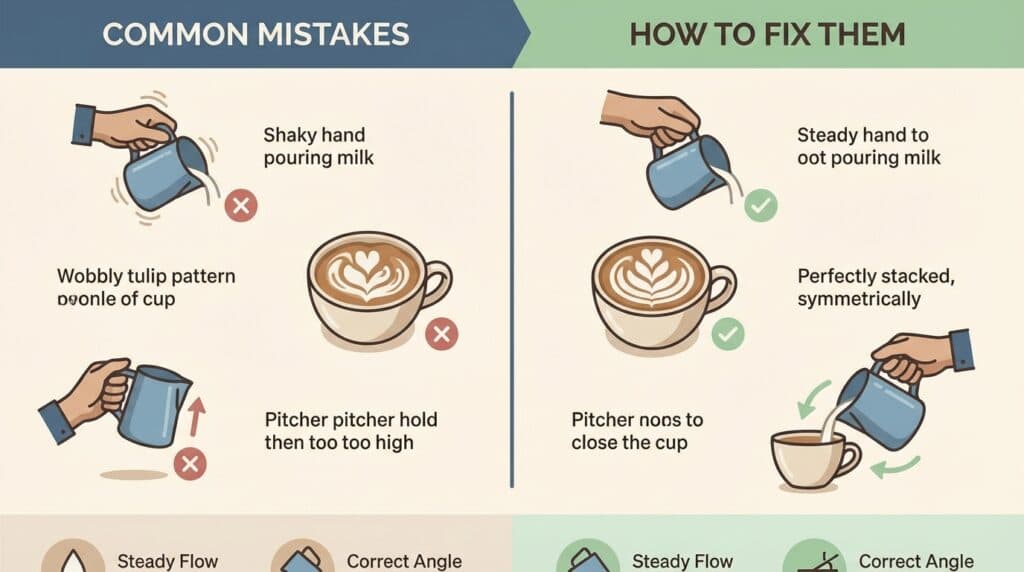
Even experienced baristas hit roadblocks with tulip stacking. Here are the issues I see most often and how to troubleshoot them.
Layers Blending Together
If your stacks are merging into one blob instead of staying distinct, the culprit is usually one of these:
- Milk too thin: You need more microfoam. Stretch your milk a bit longer
- Pouring too slowly: Increase your flow rate during pushes
- Not pausing between stacks: Make sure you fully stop before repositioning
Asymmetrical Stacks
Lopsided tulips usually come from inconsistent pitcher positioning. Practice keeping your spout centered in the cup throughout the entire pour. A helpful drill is to pour while watching your reflection in the milk surface—your spout should stay in the middle of the white area.
Weak or Broken Stem
If your finishing pull looks thin or disconnected, you’re likely lifting too high or reducing flow too much. The pull should be a confident, continuous motion with enough flow to create a visible line through all your layers.
Key Takeaway: Most tulip problems trace back to milk texture. Before blaming your technique, make sure your microfoam is genuinely silky and properly integrated. Spend a week focusing only on steaming before attempting advanced pours.
Frequently Asked Questions
How many stacks should a beginner aim for?
Start with three stacks. This gives you enough complexity to learn the push-and-pull rhythm without overwhelming yourself. Once you can consistently produce clean three-stack tulips, gradually add more layers. Most home baristas find their sweet spot between three and five stacks.
Does cup shape affect tulip stacking?

Absolutely. Wide, shallow cups give you more surface area to work with and make stacking easier. Tall, narrow cups compress your design and require more precise movements. I recommend practicing in 8-12 oz wide-brimmed cups before attempting tulips in smaller or unusually shaped vessels.
Can I create tulip art with alternative milks?
Yes, but it requires adjustment. Oat milk tends to work best for latte art among alternatives due to its fat content and protein structure. Almond and soy can work but often produce thinner foam that’s harder to stack. Look for barista-edition alternative milks specifically formulated for steaming and latte art.
How long does it take to master advanced stacking?
Expect to spend several weeks of daily practice before your stacks become consistent. In my experience, most dedicated home baristas achieve reliable three-stack tulips within a month of focused practice. Five-stack and hybrid designs typically take several more months to master.
Why do my tulips look different from café tulips?
Professional baristas pour hundreds of drinks daily, giving them muscle memory that’s hard to replicate at home. Additionally, commercial machines often produce more consistent steam pressure and temperature. Don’t compare your home pours to café standards—focus on your own progress and celebrate improvements.
Conclusion: Your Path to Tulip Mastery
The tulip pour with advanced stacking techniques represents a significant milestone in any home barista’s journey. It combines precise milk texturing, controlled pouring, and artistic timing into one beautiful result. Remember that consistency comes from repetition—every pour teaches you something, even the ones that don’t turn out perfectly.
Start with the fundamentals: nail your milk texture, practice the basic three-stack, and gradually push toward more complex variations. Keep your movements deliberate, your pauses clean, and your finishing pull confident. Before long, you’ll be creating café-worthy tulips that make every morning coffee feel like a special occasion. Now grab your pitcher and start practicing—your next perfect tulip is just a few pours away.



Comments