Table of Contents
- Quick Verdict: The 1:5 Ratio
- Understanding Cold Brew Concentrate Ratios
- The Most Common Ratios Explained
- How to Calculate Your Cold Brew Ratio
- Sample Batch Sizes
- A Real-World Example
- Factors That Affect Your Ideal Ratio
- Grind Size Matters More Than You Think
- Steep Time and Ratio Work Together
- Coffee Bean Origin and Roast Level
- How to Dilute Your Cold Brew Concentrate
- Dilution Ratios for Different Drinks
- Common Cold Brew Ratio Mistakes to Avoid
- Frequently Asked Questions
- Can I use the same ratio for ready-to-drink cold brew?
- What if my cold brew tastes too weak?
- Can I make cold brew concentrate with pre-ground coffee?
- Does the type of container matter?
- How long does cold brew concentrate last?
- Summary and Your Next Step
Quick Verdict: The 1:5 Ratio
After years of experimenting with cold brew concentrate in my own kitchen, I keep coming back to one golden ratio: 1:5 (coffee to water by weight). This means 1 gram of coarsely ground coffee for every 5 grams of water. It produces a rich, bold concentrate that you can dilute to your preferred strength without losing the complex flavors that make cold brew so special.
If you’re short on time, there’s your answer. But if you want to understand why this ratio works, how to adjust it for your taste, and what mistakes to avoid, stick around. Life is too short for weak cold brew.
Cold brew concentrate has become a kitchen staple for coffee lovers everywhere. It’s smooth, versatile, and keeps in the fridge for up to two weeks. But here’s the thing: get the coffee-to-water ratio wrong, and you’ll end up with either a bitter sludge or glorified brown water. Neither is acceptable. So let’s break down exactly how to nail your cold brew concentrate ratio every single time.
Understanding Cold Brew Concentrate Ratios
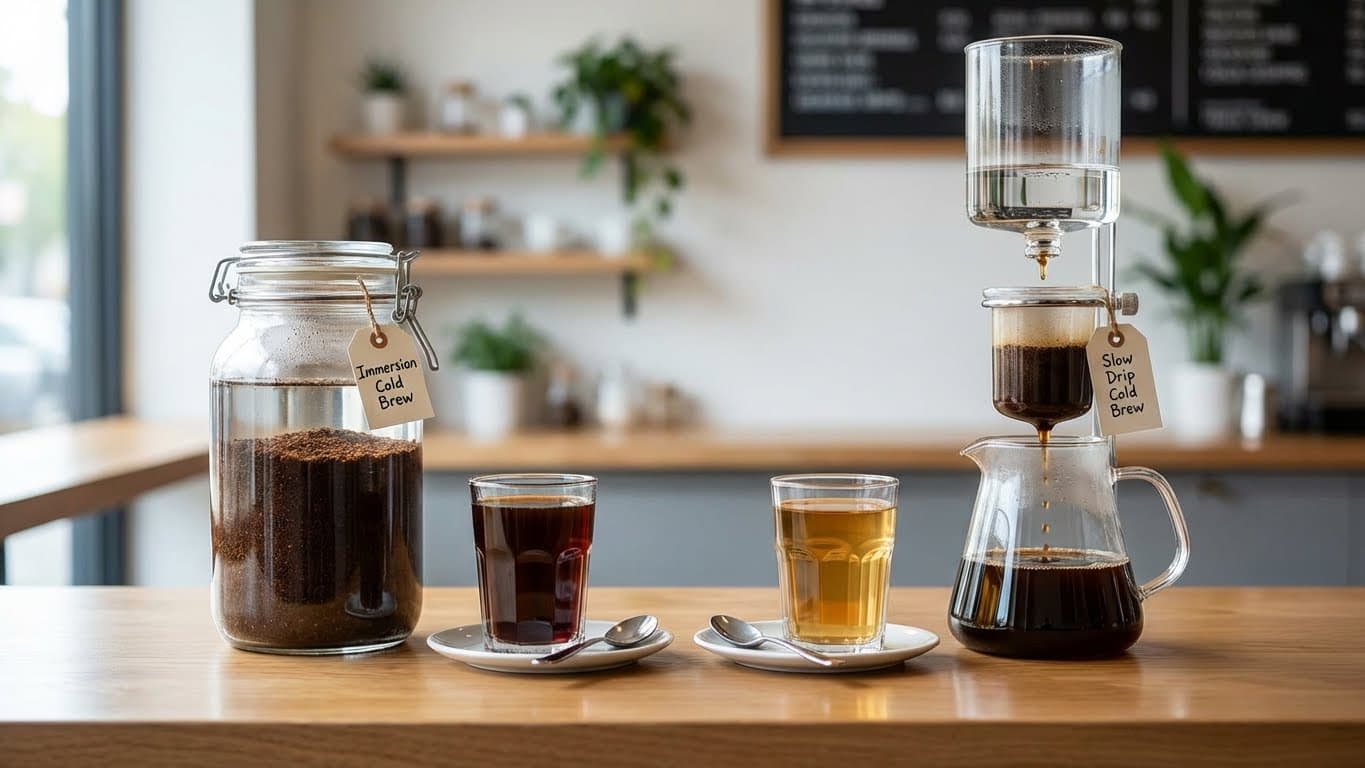
Before we dive into specific numbers, let’s clarify what we mean by “concentrate.” Cold brew concentrate is intentionally brewed strong so you can dilute it later with water, milk, or your favorite creamer. This is different from ready-to-drink cold brew, which is brewed at a weaker ratio and meant to be enjoyed straight.
The beauty of concentrate is flexibility. Brew it once, then customize each glass to your liking. Want it stronger today? Add less water. Feeling like an iced latte? Mix it with milk. The concentrate adapts to your mood.
The Most Common Ratios Explained

You’ll see various cold brew concentrate ratios floating around the internet. Here’s what each one actually delivers:
| Ratio (Coffee:Water) | Strength | Best For |
|---|---|---|
| 1:4 | Very Strong | Espresso-style drinks, heavy dilution |
| 1:5 | Strong (Recommended) | Versatile concentrate, balanced flavor |
| 1:6 | Medium-Strong | Light dilution, softer taste |
| 1:8 | Medium | Ready-to-drink or minimal dilution |
In my experience, the 1:5 ratio hits the sweet spot. It’s concentrated enough to stand up to ice and milk without tasting harsh or over-extracted. A 1:4 ratio can work, but you’ll need to be more careful with your grind size and steep time to avoid bitterness.
How to Calculate Your Cold Brew Ratio
Let’s get practical. Say you want to make a batch using 100 grams of coffee. With a 1:5 ratio, you’d use 500 grams of water. Simple math, but the results are anything but ordinary.
Sample Batch Sizes
- Small batch: 60g coffee + 300g water (yields about 250ml concentrate)
- Medium batch: 100g coffee + 500g water (yields about 400ml concentrate)
- Large batch: 200g coffee + 1000g water (yields about 800ml concentrate)
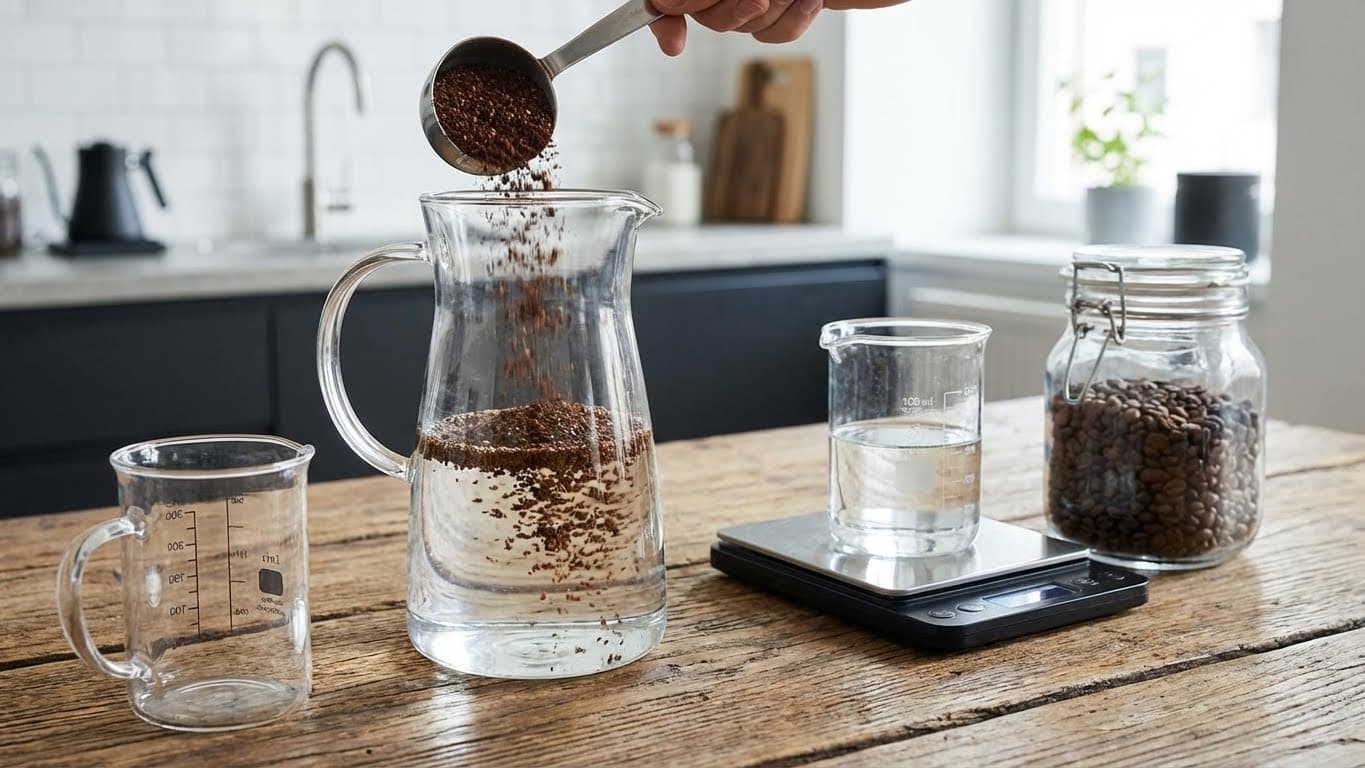
I always recommend weighing your ingredients rather than using volume measurements. Coffee beans vary in density, so “one cup of grounds” can mean wildly different amounts depending on the beans and grind size. A simple kitchen scale removes all the guesswork.
A Real-World Example

Let me walk you through my Sunday routine. I grab 150 grams of coarsely ground coffee and add it to my cold brew pitcher. Then I pour in 750 grams of filtered water at room temperature. A quick stir, and it goes into the fridge for 18 hours. The result? Approximately 600ml of smooth, chocolatey concentrate that lasts me the whole week.
Barista Tip: Always use filtered water. Tap water with heavy chlorine or mineral content can introduce off-flavors that become more noticeable in cold brew’s slow extraction process.
Factors That Affect Your Ideal Ratio
The 1:5 ratio is a fantastic starting point, but several variables can nudge you toward adjusting it. Understanding these factors helps you fine-tune your brew to perfection.
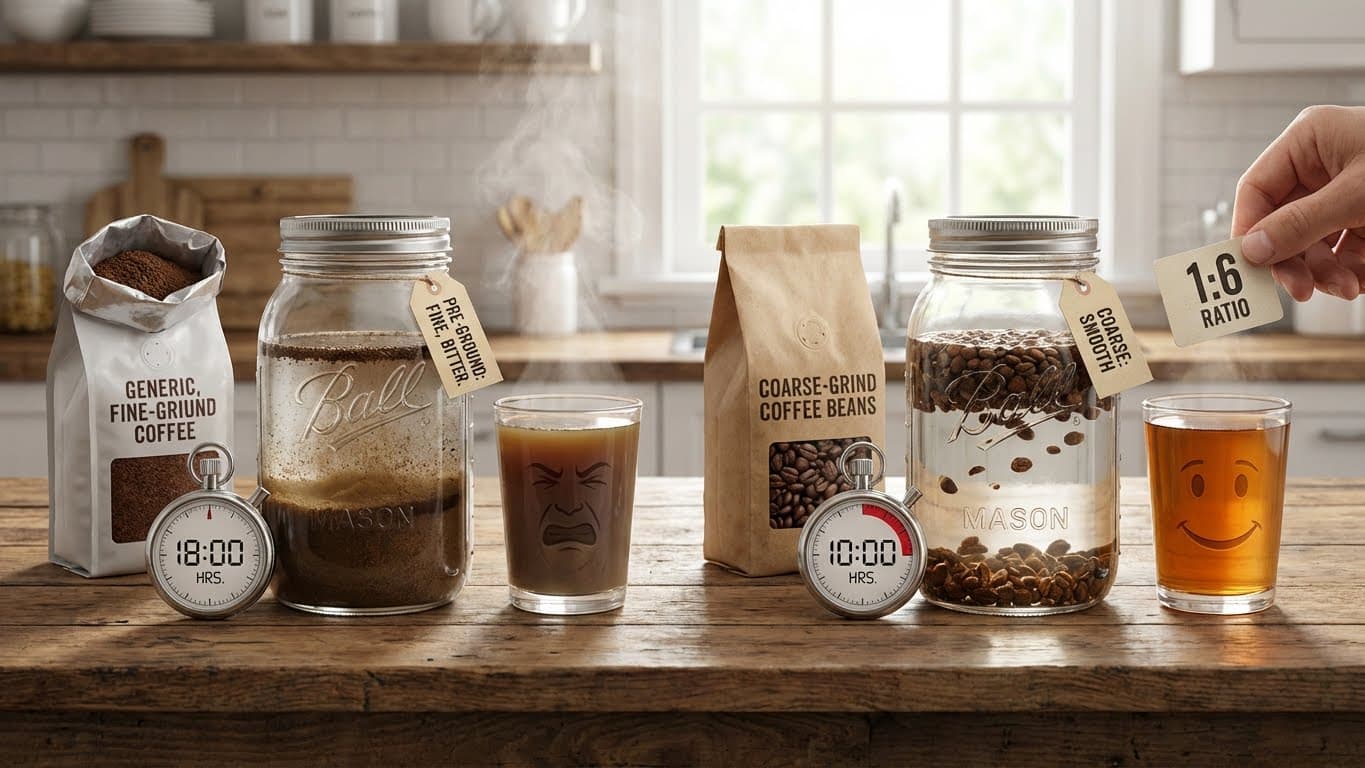
Grind Size Matters More Than You Think
Cold brew requires a coarse grind, roughly the texture of raw sugar or sea salt. Too fine, and you’ll over-extract, leading to bitterness even at lower ratios. Too coarse, and you’ll get a weak, underwhelming concentrate regardless of how much coffee you use.
If your grind is slightly finer than ideal, consider moving to a 1:6 ratio to compensate. Conversely, if your grinder only produces a very coarse grind, you might benefit from a 1:4.5 ratio.
Steep Time and Ratio Work Together
Most cold brew concentrate recipes call for 12 to 24 hours of steeping. I’ve found that 16 to 18 hours produces the best balance for a 1:5 ratio. Shorter steep times may require a stronger ratio, while longer steep times can turn even a moderate ratio into something overly intense.
- 12-14 hours: Consider a 1:4.5 ratio for fuller extraction
- 16-18 hours: The 1:5 ratio shines here
- 20-24 hours: A 1:6 ratio prevents over-extraction
Coffee Bean Origin and Roast Level

Different beans respond differently to cold brewing. In my experience, medium to dark roasts with chocolatey, nutty, or caramel notes produce the most crowd-pleasing cold brew. Light roasts can work, but their delicate fruity and floral notes don’t always translate well to cold extraction.
If you’re using a particularly bold, dark roast, you might find a 1:5.5 or 1:6 ratio prevents the concentrate from becoming overwhelmingly smoky. Lighter roasts, on the other hand, sometimes benefit from a 1:4.5 ratio to boost flavor intensity.
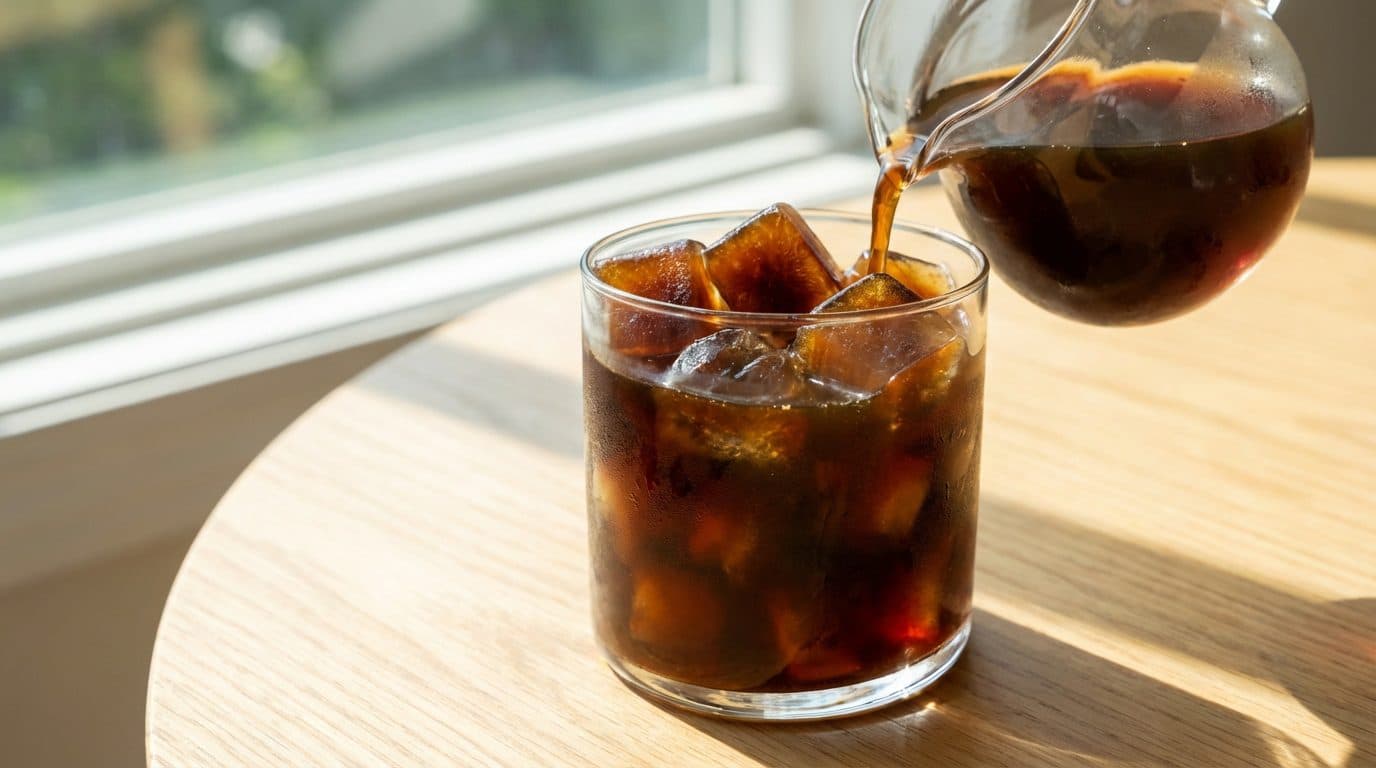
How to Dilute Your Cold Brew Concentrate
Making great concentrate is only half the journey. Dilution is where you craft the final drinking experience. The general guideline is to mix concentrate with water or milk at a 1:1 or 1:2 ratio, but personal preference rules here.
Dilution Ratios for Different Drinks
| Drink Style | Dilution Ratio | Result |
|---|---|---|
| Strong iced coffee | 1:1 (concentrate:water) | Bold, intense flavor |
| Standard iced coffee | 1:2 | Balanced, smooth |
| Mild iced coffee | 1:3 | Light, refreshing |
| Cold brew latte | 1:2 (concentrate:milk) | Creamy, coffee-forward |
Here’s a scenario I encounter often: you’ve made a batch, and it tastes a bit too strong even after dilution. Don’t panic. Simply add more water or milk until it hits your sweet spot. The concentrate is forgiving that way.
Key Takeaway: There’s no wrong way to dilute your concentrate. Start with a 1:1 ratio and adjust from there. Your perfect cup is whatever tastes best to you.
Common Cold Brew Ratio Mistakes to Avoid

Even experienced home baristas make these errors. Here’s how to sidestep the most frequent pitfalls:
- Using volume instead of weight: A tablespoon of finely ground coffee weighs more than a tablespoon of coarse grounds. Always weigh for consistency.
- Ignoring water quality: Hard water or heavily chlorinated tap water can ruin an otherwise perfect batch.
- Skipping the stir: After adding water to your grounds, give everything a good stir. Dry pockets of coffee lead to uneven extraction.
- Storing incorrectly: Concentrate should be refrigerated and kept in an airtight container. It stays fresh for about two weeks, though I’ve noticed flavor quality starts declining after day ten.
- Not filtering properly: A single pass through a paper filter or fine mesh strainer may leave sediment behind. I like to strain twice for a cleaner cup.
I once made the mistake of steeping a 1:4 ratio for a full 24 hours. The result was so bitter and astringent that even diluting it 1:4 with water couldn’t save it. That batch went down the drain, and I learned a valuable lesson about respecting the balance between ratio and time.
Frequently Asked Questions
Can I use the same ratio for ready-to-drink cold brew?
Not quite. Ready-to-drink cold brew is typically made at a 1:12 to 1:15 ratio, so it’s ready to enjoy straight without dilution. Concentrate ratios like 1:5 are meant to be mixed with water or milk before drinking.
What if my cold brew tastes too weak?
First, check your grind size. If it’s too coarse, try a slightly finer setting. You can also increase your ratio to 1:4.5 or extend your steep time by a few hours. Make one change at a time so you know what made the difference.
Can I make cold brew concentrate with pre-ground coffee?
You can, but pre-ground coffee is usually designed for drip machines and ground too fine for cold brew. This can lead to over-extraction and a bitter taste. If pre-ground is your only option, reduce your steep time to 10-12 hours and consider a slightly weaker ratio like 1:6.
Does the type of container matter?
Glass or food-grade plastic containers work best. Avoid reactive metals like aluminum, which can impart off-flavors. Mason jars, French presses, or dedicated cold brew pitchers all work beautifully.
How long does cold brew concentrate last?
Properly stored in the refrigerator, cold brew concentrate stays fresh for up to two weeks. However, I find the flavor is at its peak during the first week. After that, it can start tasting flat or stale.
Summary and Your Next Step
The best coffee-to-water ratio for cold brew concentrate is 1:5 by weight. This ratio produces a versatile, flavorful base that you can dilute to match your preferences. Pair it with a coarse grind, 16-18 hours of steeping, and quality filtered water, and you’ll have café-quality cold brew waiting in your fridge whenever you want it.
Start with this ratio for your next batch. Taste it, take notes, and adjust from there. Maybe you’ll discover you prefer a bolder 1:4.5 or a smoother 1:6. The beauty of making cold brew at home is the freedom to experiment until you find your personal perfect cup. Grab your scale, measure out your coffee, and get brewing. Your future self, reaching for that pitcher on a hot afternoon, will thank you.


Comments